HOW TO Setting function in Enscape
See more…
- Toolbar meaning and function in Enscape
- Detailed instructions for installing Enscape
- Download Enscape
- 6 Steps to learn interior design for beginners
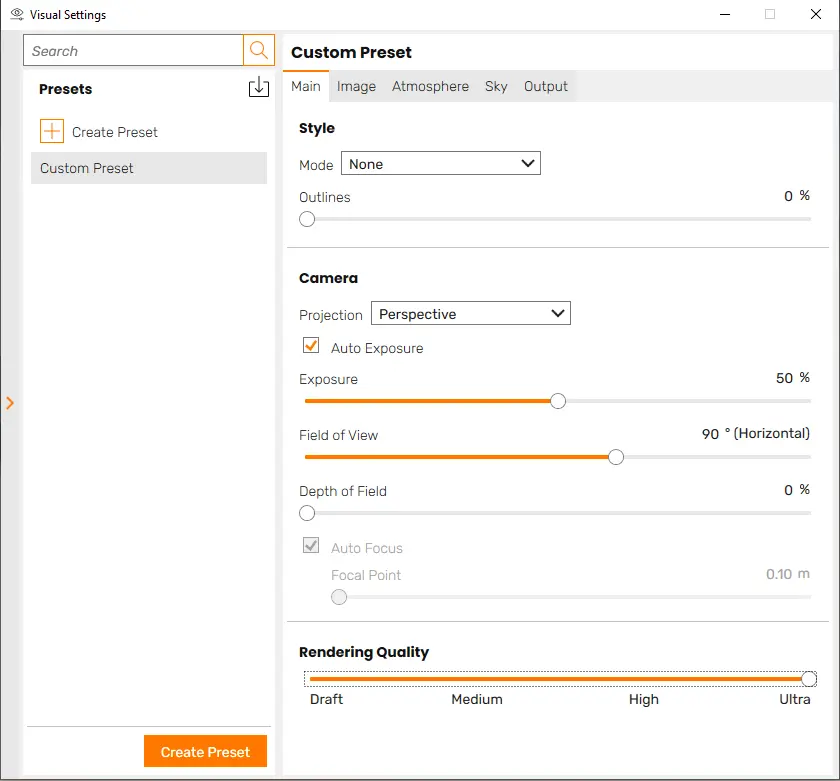
1. Main tab in Enscape settings
a. Style
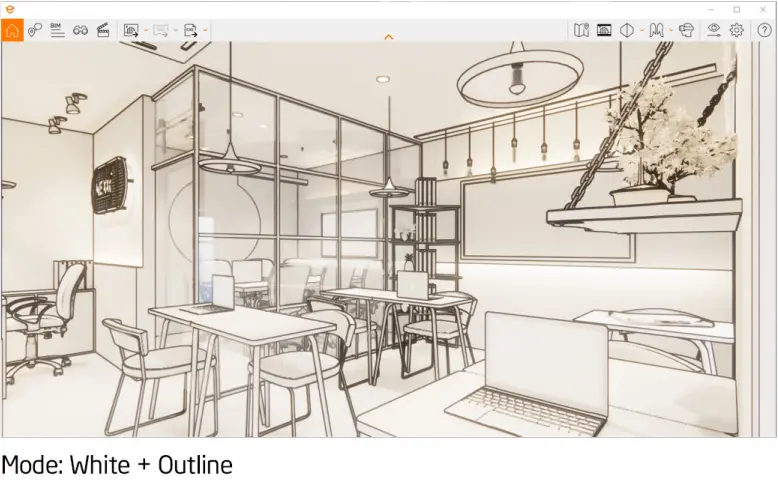
Mode: Object display style in Enscape
– White: All objects become white.
– Polystyrol: All objects are porous, light will pass through objects with a certain thinness.
– Light View: Shows temperature map, strong/weak light areas affecting location in space.
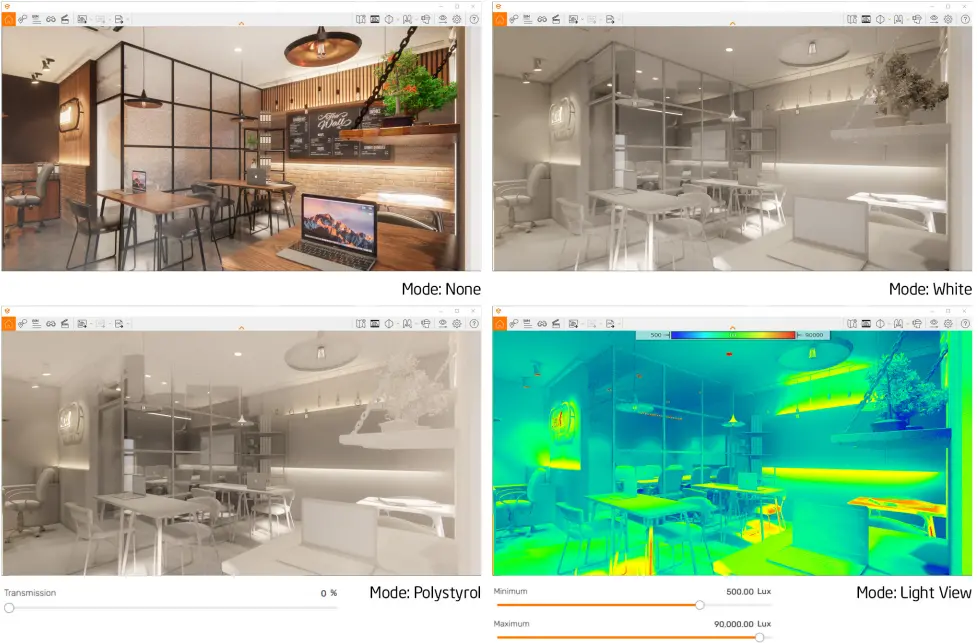
Outlines: Create a black border for all objects.
b. Camera
Projections: There are 3 options
+ Perspective: Perspective has only 1 focus point
+ Tow-point: Two-point perspective brings together the edges in the image parallel to the vertical axis
+ Orthographic: Sectional perspective
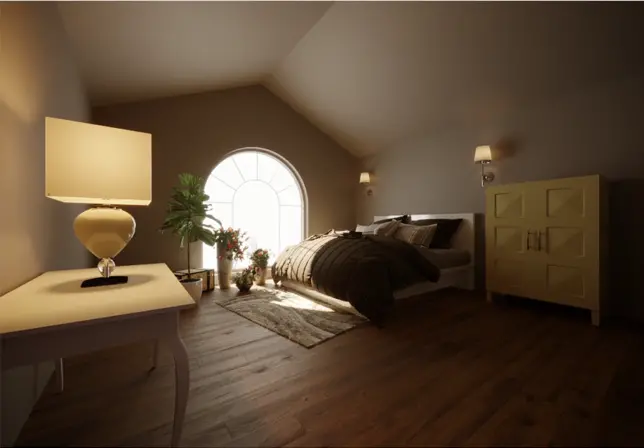
Auto Exposure: Automatically balance light and dark with bright viewing angles, Enscape automatically darkens and vice versa.
Exposure: When the Auto Exposure feature is enabled, this is the maximum brightness limit that Enscape is allowed to compensate for. When Auto Exposure is not turned on, you will manually adjust the space darker or brighter.
Note: You should turn off Auto Exposure to test the light intensity of artificial lights.
Field of view: Focal length, the smaller the number, the more details are magnified. The larger the number, the wider the viewing angle and creating a sense of scale. It's best to adjust it to the level of the human eye at 45-50 degrees, moving the camera further away if possible.
You should only change it in force majeure cases like you want to see the whole room but then the camera is pushed back from the wall (or you can use the Section feature).
Depth of Field: Depth-of-field effect, clarifying the objects you focus on, and blurring objects before and after them. The larger the value, the stronger the blurring.
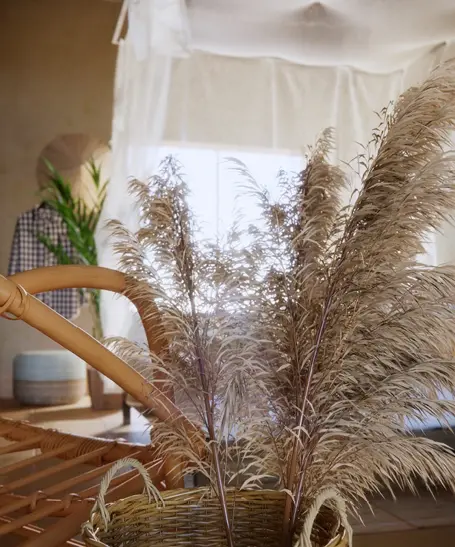
+ Auto Focus: Enscape automatically selects an object to highlight.
+ Focal Point: If Auto Focus is turned off, Enscape will let you select the subject by dragging the focus distance from the camera to the subject. When you move the Focal Point, you will see a streak of white light across objects from near to far. Objects located on the white light range will be clearly shown.
Rendering Quality: Image quality when exported. You should pull this position all the way to get the best quality.
To create options with preset settings, create your own Presets first. Later, you just need to click 1 click and you will immediately have the desired setting.
2. Image tab in Enscape settings
a. Corrections
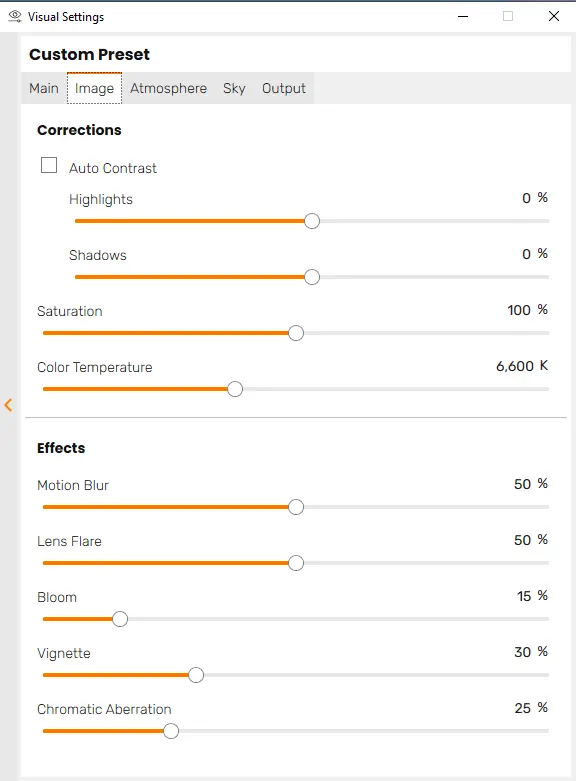
+ Auto Contrast: On one's own Dynamically adjust light and dark contrast.
+ Highlights: <0%: Reduces the intensity of strong light areas; >0%: Increases the intensity of bright areas.
+ Shadows: <0%: Enhance brightness for dark areas; >0%: Dark areas become darker.
+ Color Temperature: Color temperature.
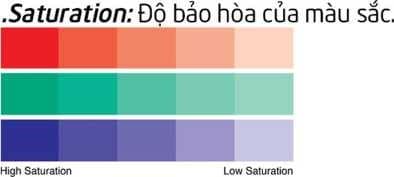
-Small parameters: hernh has a hot tone.
-Large parameters: photo has cool tones.
b. Effect
+ Motion Blur: Because the camera shutter speed is slow, the image is blurred when the camera moves.
+ Lens Flare: The effect of creating a flash point for the light source.
+ Bloom: Glowing effect of light.
+ Vignette: Darkening effect on 4 corners of the image.
+ Chromatic Aberration: Simulates color changes caused by guanometric dispersion. When used, image sharpness may be reduced.
3. Atmosphere tab in Enscape settings
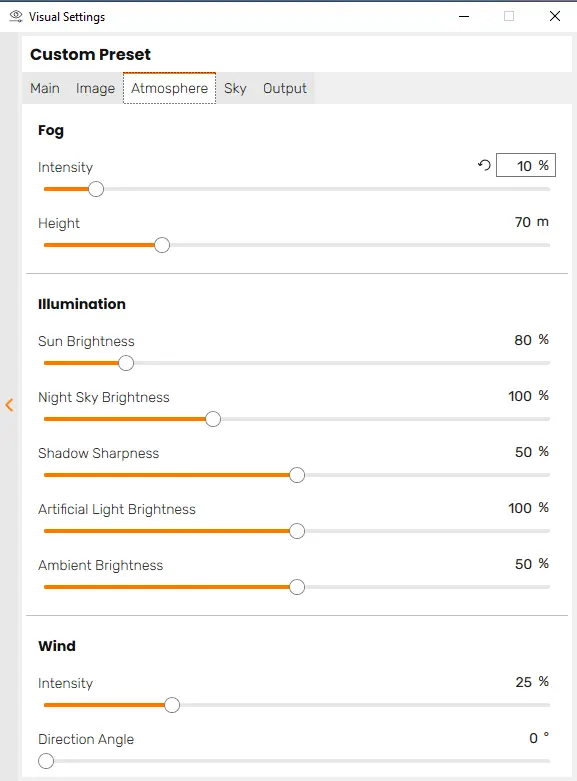
a. Fog fog effect
+ Intensity: Fog thickness.
+ Cao: Fog height from ground level.
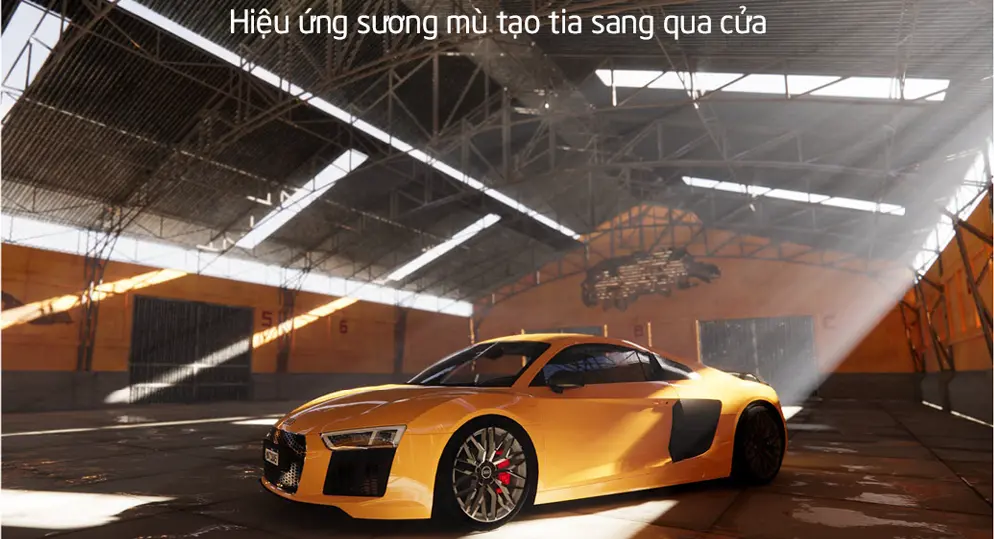
b. Illumination light
+ Sun Brightness: Strong/weak light intensity of sunlight, affecting the contrast between strong sunlight and shadow areas.
+ Night Sky Brightness: Change the brightness of the moon and stars in the sky, increasing the amount of light in the environment at night.
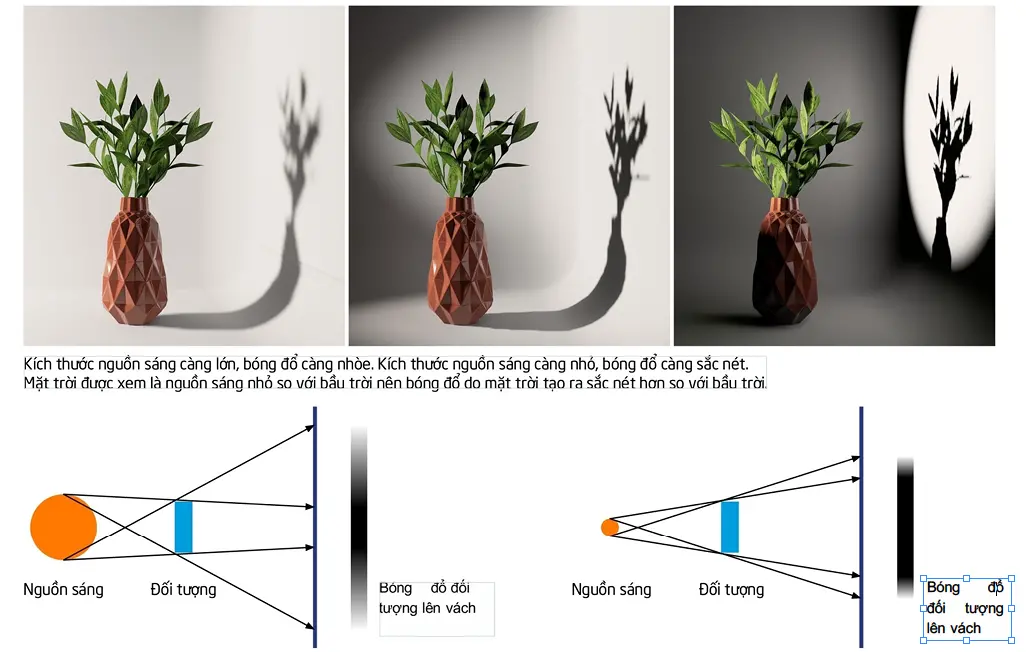
+ Shadow Sharpness: The sharpness/blurring of the object's shadow edges.
+ Artificial Light Brightness: Adjusts the brightness of all Enscape lights inside the environment, usually set to 100%. When setting the lights, if you want to turn off all the lights at once (to render during the day) you should lower the parameter to 0% without deleting all the Enscape lights.
+ Ambient Brightness: Useful in increasing the brightness of interior spaces during the day.
c. Wind affects trees and water surfaces.
+ Intensity: Wind intensity
+ Direction Angle: Wind direction.
4. Sky tab in Enscape settings
Light factors, reflections of the sky environment or HDRI still impact the object
White Background: White background
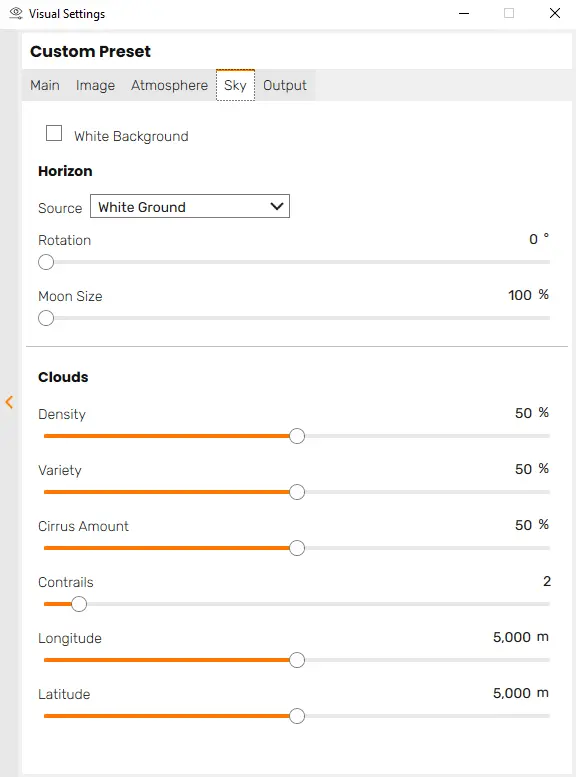
a. Horizon
+ Source: What is the source of sky light? There are many different options. Here you can load the HDR file to set up the environment for the drawing
+ Rotation: Rotate the environment.
+ Moon Size: Size of the moon at night.
b. Clouds: Clouds in the sky
+ Density: The larger the parameter, the more cloudy the sky, darkening the image and gradually reducing shadows (because the clouds block out the sunlight).
+ Variety: Cloud control and shape.
+ Cirrus Amount: High cloud layer.
+ Contrails: Smoke trail effect from an airplane.
+ Longitude: Longitude.
+ Latitude: Latitude
5. Output tab in Enscape settings
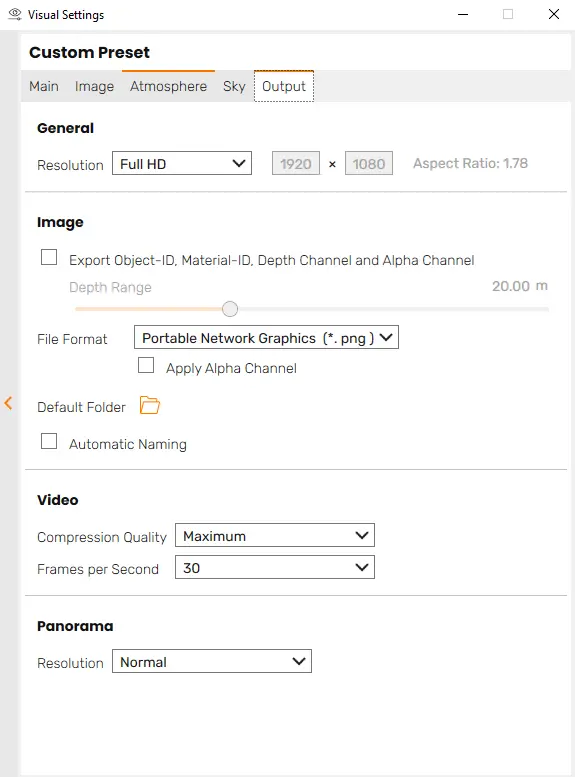
a. Genal
Resolution: Render image size. Use Viewport Aspect Ratio: Use viewport scaling.
b. image. image
+ Export Object-ID, Material-ID and D epth Channel: Export additional colorful images classified by object, material or DOF channel corresponding to the final image. Used for post-production editing in (Photoshop). .Depth Range: Maximum depth of DOF channel.
+ File Format: Select the render image file format (png, jpg, exr, .tga).
+ Default Folder: Select the default folder containing render files.
+ Automatic Naming: Automatically name files.
c. Video
Compression Quality: Video quality is arranged from low to high (Email, Web, BluRay, Maximum, Lossless - when selecting Lossess quality, the video will be rendered into each still image frame to achieve the highest quality.
You need to use specialized video editing software to connect image frames such as Adobe After Effects, Adobe Premiere...).
Frames per Second (fps): number of frames per second, the larger the number, the smoother the movement (according to the author's experience, you only need 60fps).
d. Panorama Overview
Resolution: Panorama image resolution (Low – Low, Normal – Normal, High – High).
Conclusion
So I just gave you detailed instructions on the functions in the table settings in Enscape Hope this article will be of great help to you. In the next article, we will continue to share with you the functions in the materials table.
Do not forget Follow us on Facebook to receive more knowledge about Enscape.

