Install windows for macbook This is a job no one wants. However, you are having to learn some 3D software or for some reason you still want to use windows software on your macbook computer. So what are the benefits of installing Windows on Mac? Whether it helps us or not, this article will guide and explain to you in detail how How to install windows for macbook. and its advantages and disadvantages.
How to install windows for macbook in detail
Before going into the installation, we need to briefly understand what a bootcam is and why we need to use a bootcam when installing windows. Which devices can use bootcam?
1. What is Bootcam?
BootCamp is an application on the Apple platform. Tool provided by the manufacturer to help users install Windows operating system on Mac. They work in parallel with the mac operating system. When you use bootcam, you can manually convert the two operating systems back and forth without any problems.
- Online macbook installation service
- Learn about the convenient and quick online Windows installation service
- What is 3D design service? 3D enhances brand image
- Learn about graphic design services
- Online Computer Software Installation Service
2. Which Mac can run Windows using bootcam?
Currently, Apple has released many models such as imac, Mac mini, these are popular models. All of these lines, if using Intel chips, can install the Windows operating system via bootcam. For the M1 series, it will not be possible to use because the manufacturer has not integrated the hardware to support it
3. Preparation steps when installing Windows for Mac
To install the Windows 7, 10, 11 operating system for Mac you need to prepare the following.
- Have a USB with a minimum capacity of 8Gb or more and formatted (FAT) or (FAT 32)
- The available hard drive space in the device is 64Gb or more. It's best if you have 100Gb free left. Because Windows' capacity already occupies 64Gb, the remaining capacity you use for storage.
4. How to install Windows for mac using BootCamp
- After preparing everything, proceed with the installation as follows.
Step 1: Start bootcam
Press Command + space then type Boot Camp Assitant and then boot up

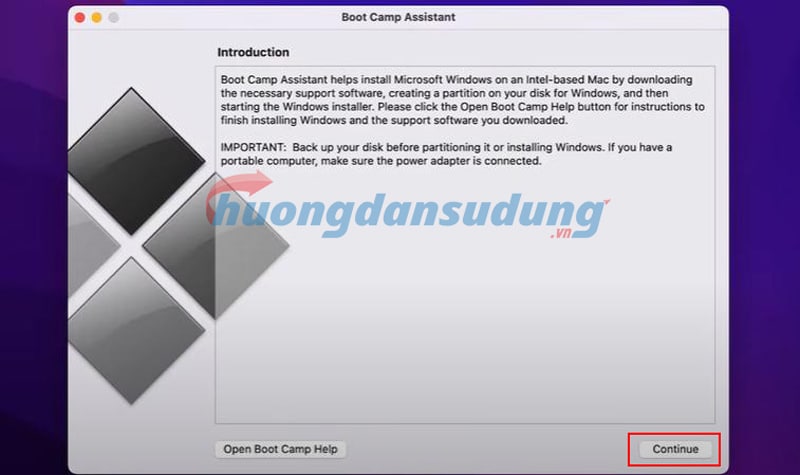
Step 2: Boot Camp Assist introduction table
In this table, click continue to continue. If the device says USB is plugged in, then plug in the USB and follow the instructions on it. Boot Camp Assistant can be used to create a drive used to create a Windows installation drive. This case is for older devices before 2015
Step 3: Set up boot camp for the system to install
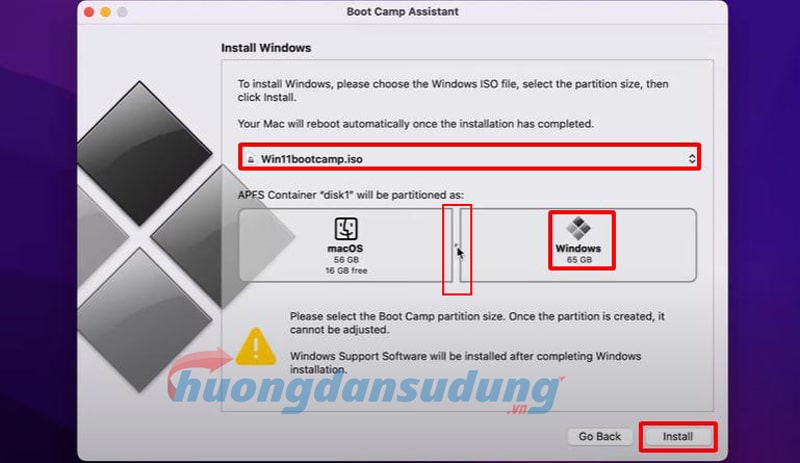
Here you choose in order from top to bottom from left to right.
In the first part, you choose the ISO file to install windows for macbook It could be win 7, win 10 or win 11... I will leave the installation version below. Below you drag the following dot to the appropriate size so you can install windows. Microsoft recommends a capacity of 64Gb which is reasonable. Then you press install.
https://www.fshare.vn/folder/M1ZO5CZPAYST?token=1672833258
Step 4: Notice of power connection
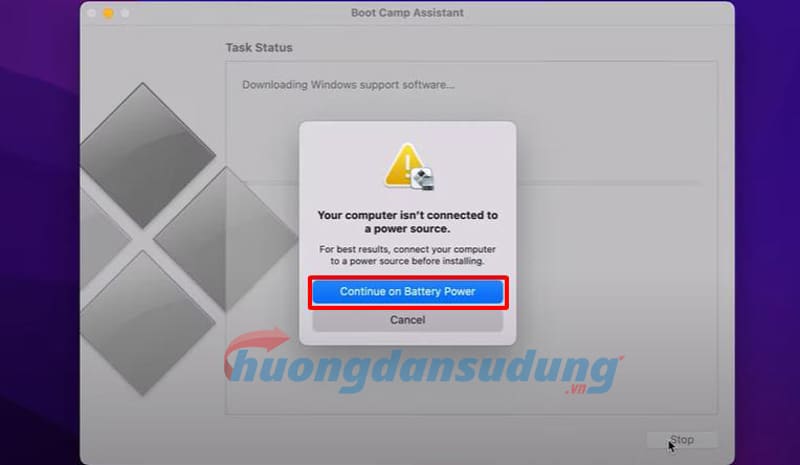
If while installing, your computer asks you to plug in the power source, remember to plug in the power source to avoid the possibility of it being interrupted midway through the installation. They will install for a while to partition the hard drive and install windows on macbook your.
Note that when installing, do not turn off the computer, do not turn off the boot camp, and do not start the computer until it is completed
Once the installation is complete, the computer will restart windows and install windows
Step 5: Proceed to install windows for macbook
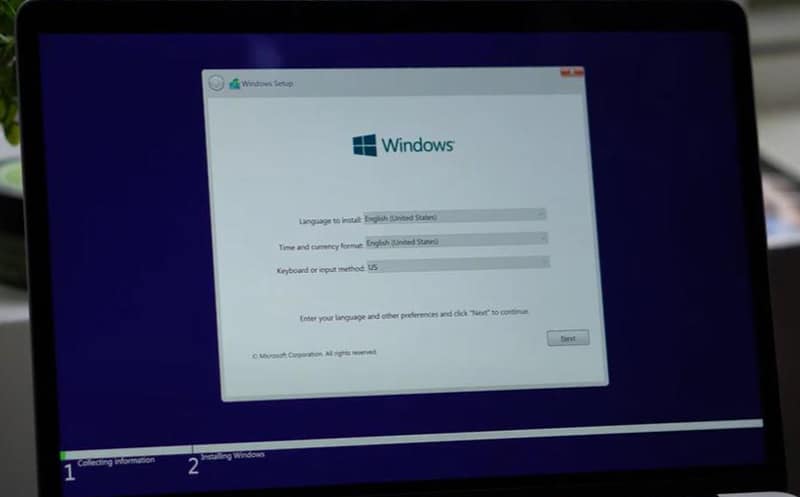
Installing Windows is exactly the same as regular Windows computers, so I won't give you many instructions on this part. At this window, you just need to follow the instructions and then click next
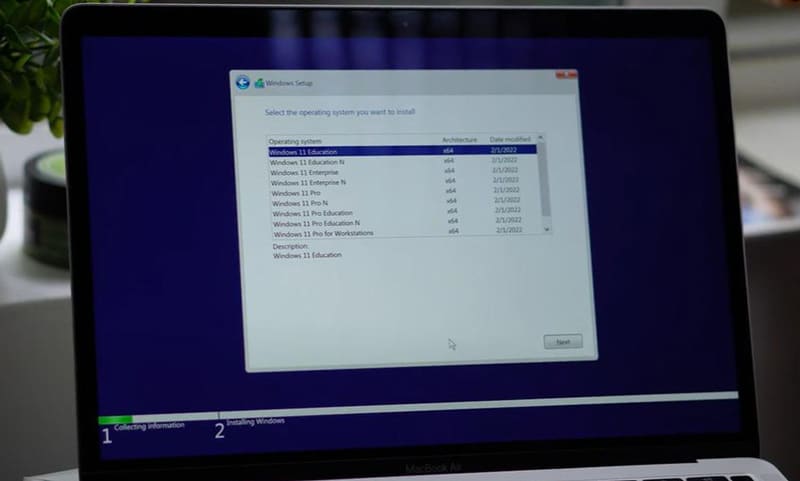
Step 6. Select the windows version to install
You choose the correct version of Windows so your computer can install the correct version for you. I usually use the Pro version and it's ok. Then click Next
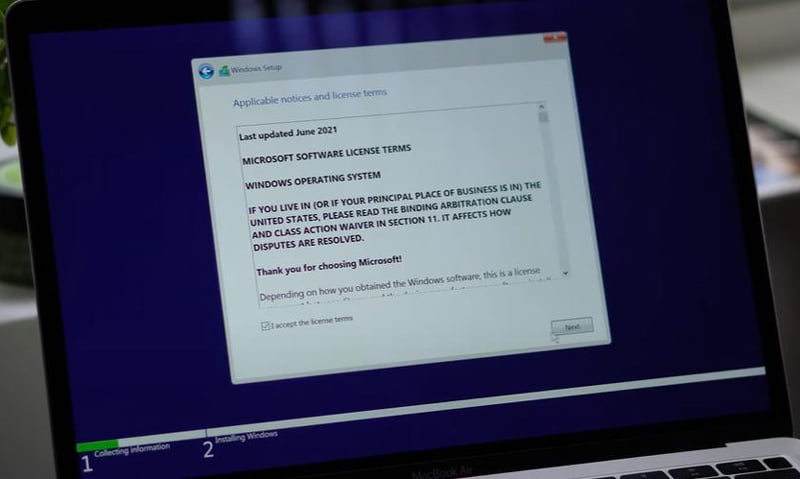
Step 7: Agree to terms and installation
At this point, you just need to select to agree to the terms and then proceed with the installation. Lovemaking lasts about 10-15 minutes. After the installation is complete, the computer will restart, so you can choose this part yourself
Step 8: Update boot camp
After the installation process is successful, go to Windows and update the boot camp. This process will help your computer fully update the drivers to help your computer operate smoother.
Some computer models will not automatically display boot camp when installing windows. At this time, you can access the C drive, then find the boot camp and select the Setup file to proceed with the installation. At this step, the installation is too easy
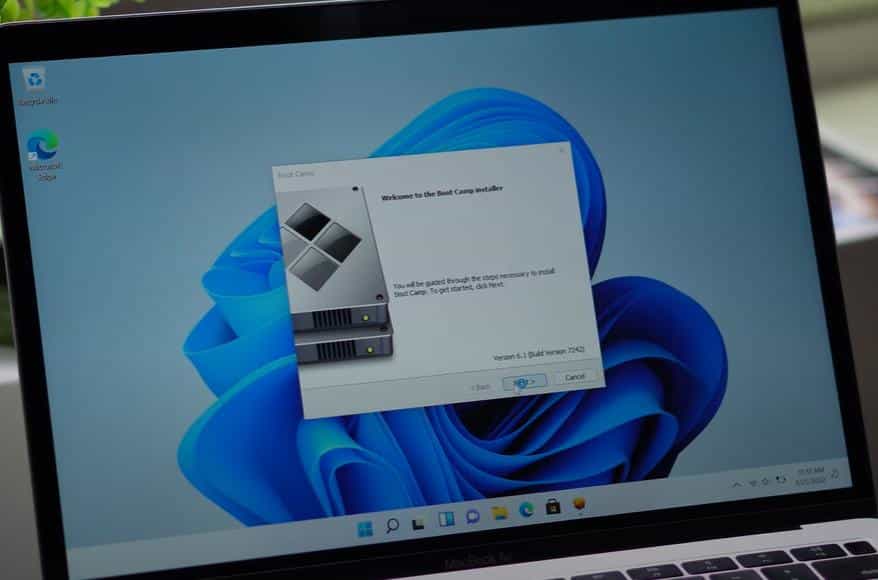
After installing boot camp, the system will notify you that you need to reset the device so that the system can update the hardware and software
Step 9: Update Apple software update.
You update the software system like any other software so that the software can fully receive the software.

Step 10: Update windows
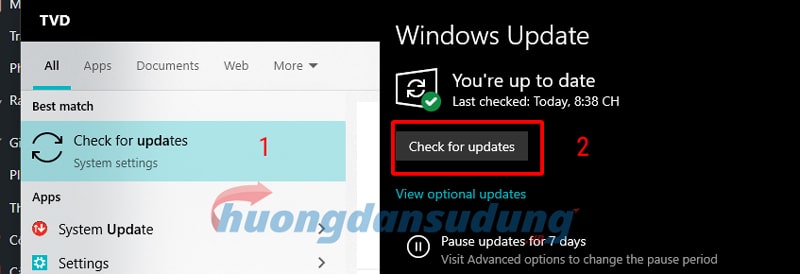
In order for your computer to have the latest and most fully updated version of Windows, you should update Windows so that the system can patch errors as well as update many features for you to use.
To update, just go to the Windows window and type the word update and Windows will immediately suggest it to you. After your computer has finished updating, you just need to restart your computer.
Step 11: Select the operating system when booting
To restart, just hold down the Office key to select the operating system when booting. Or you can also choose from the section Startup Disk Choose a default operating system when booting and you're done.
Conclude
Job install windows for macbook is extremely easy. You just need to pay a little attention and you can do it. However, to install all the software, you also need to know a little bit of technique. If you find this difficult, please contact us immediately and we will support you with a quote and installation right away.
Don't forget to follow the channel Facebook to update the latest software and tips.


