In the previous article, I gave you very detailed instructions How to smooth skin in photoshop Part 1 of this article I will continue to guide you How to remove acne and smooth skin in Photoshop part 2.
How to smooth skin in photoshop is something you will need to do when editing images. Adobe Photoshop is one of the leading image processing software in the world, widely used in many different fields such as graphic design, media, photography and digital art.
With Adobe Photoshop, users can edit and create high-quality images, from basic edits such as photo collage, color and contrast adjustment to more complex and special effects such as photo manipulation, create 3D images and restore damaged photos. With a user-friendly interface and diverse features, Photoshop is an indispensable tool for any professional designer or photographer.
How to smooth skin in photoshop
In Adobe Photoshop, you can use many different tools to remove acne and dark spots from your skin. One of the popular tools is the “Spot Healing Brush” (Skin repair scoring brush).
The Spot Healing Brush tool allows you to erase dark spots and blemishes on your skin by taking skin color from the surrounding area and applying it to the area to be removed. This makes the results look more natural and leaves no marks.
To use this tool, first select it from the toolbar, then choose a brush size that matches the size of the blemish. Then, just click on dark spots or pimples to remove them. If the blemish doesn't disappear completely, try adjusting the brush size or changing the color pick-up area using the options in the customization bar.
In addition to tools Spot Healing Brush, Photoshop also has other tools such as Clone Stamp Tool, Healing Brush Tool and Patch Tool to remove acne and dark spots on the skin. However, for best results, consider using these tools skillfully and retouching meticulously to avoid damaging the skin's structure.
- Instructions for smoothing skin in Photoshop part 1
- The best way to remove acne in photoshop in 2022
- Instructions for removing photoshop background very quickly

Steps to smooth skin in Photoshop
Step 1: Select the photo to edit
- You choose File > Open (Ctrl + O) > select the photo to edit
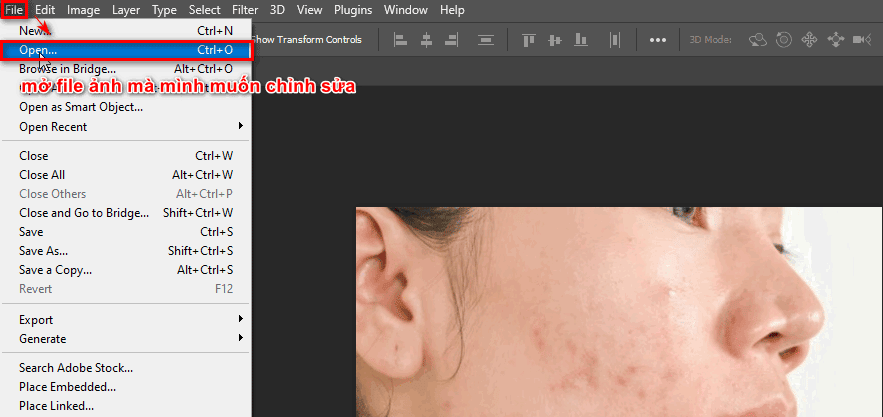
Step 2: Duplicate the image layer
- Now we click on the image layer we need to edit and then press the key Ctrl + J 2 times to get 2 more layers
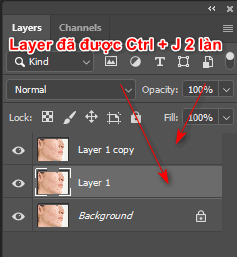
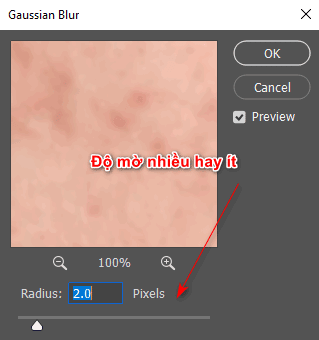
Step 3: Blur the photo with Blur
- I temporarily hide the top layer, then I use the middle layer
- Then I choose Filter > Blur > Gaussian Blur on the menu bar
- At this time, the parameter table appears, we give about 1.4 pixels (image opacity).
Adjust the wax parameters accordingly and your skin will look smooth and even
Step 4: Apply the effect on the middle layer that used Blur
- At this point, I turn back on the layer I hid
- Then I go to the section Image > Apply Image
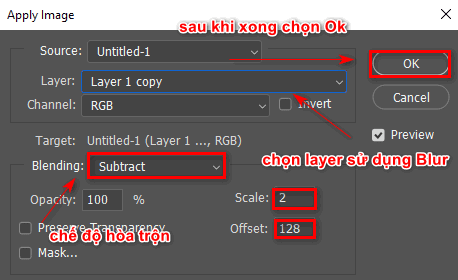
- When the parameter table appears Apply Image then adjust the part (Layer: Layer has Blur, Blending:Subtract, Scale: 2, Offset: 128)
- Then click Ok
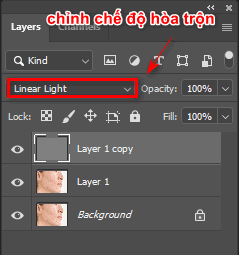
- Then we set the blending mode to Linear Light
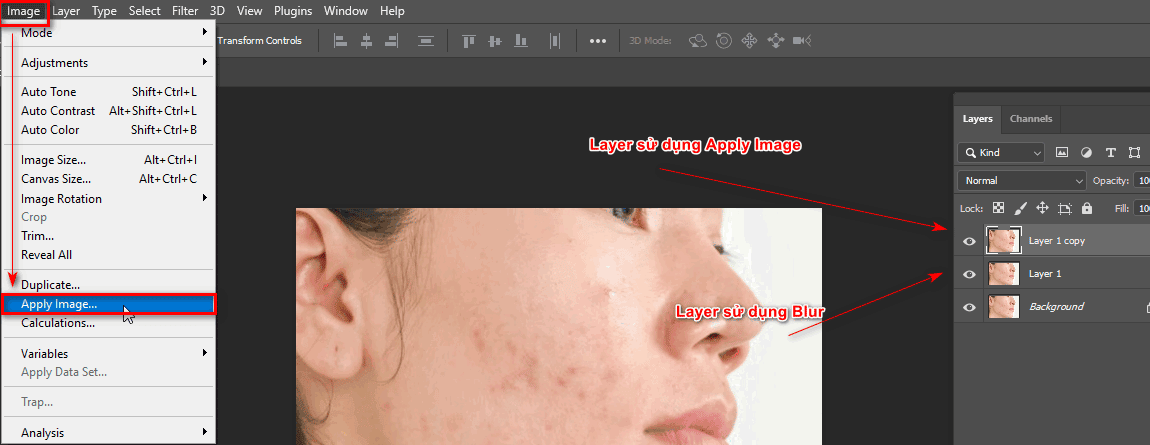
When choosing Apply image... the parameter table below appears. You set the parameters as shown in the image below
After setting the parameters, you need to choose the blending mode Lenear Light
Step 5: Erase acne on Layer
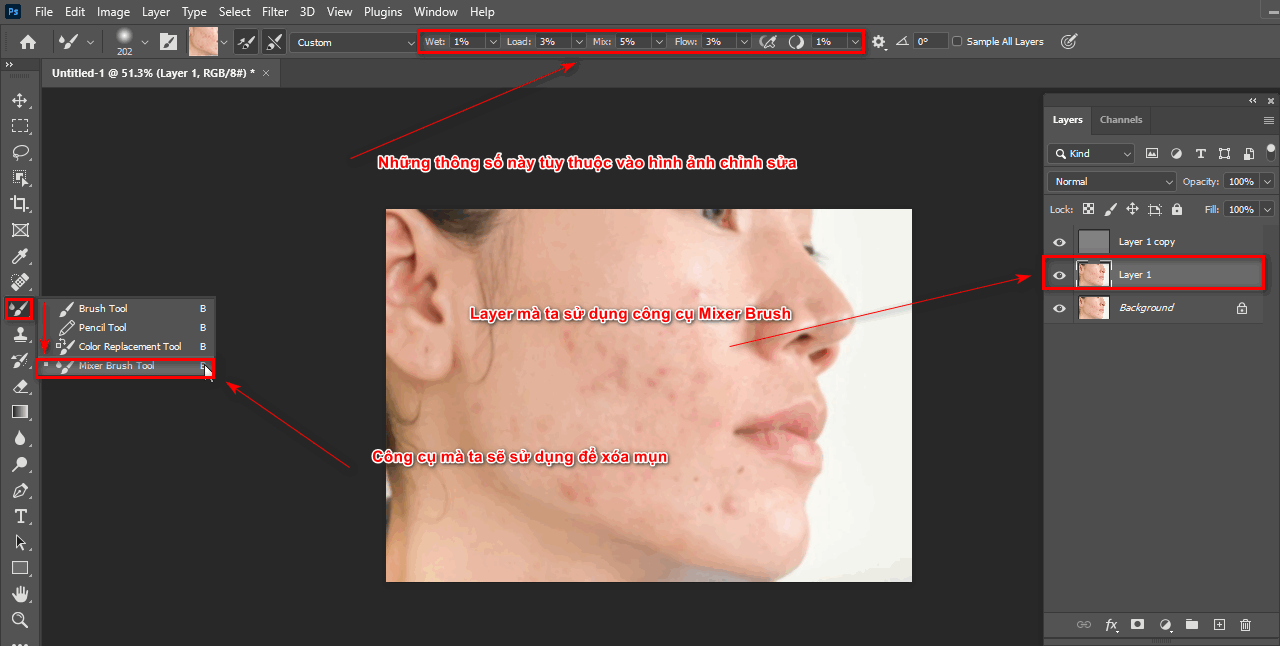
- I use it Mixer Brush Tool (B) used to smooth the skin
- When using this tool, you need to adjust some parameters accordingly
- The parameters you need to note are in the menu bar (Wel: 1, Load: 5, Mix: 90, Flow: 36 )
- Then use the tool on the previously Blur layer
- During the erasing process, for a more natural beauty and smoothness, you should also keep your brush soft (Hardness: short)
Step 6: Result of skin smoothing
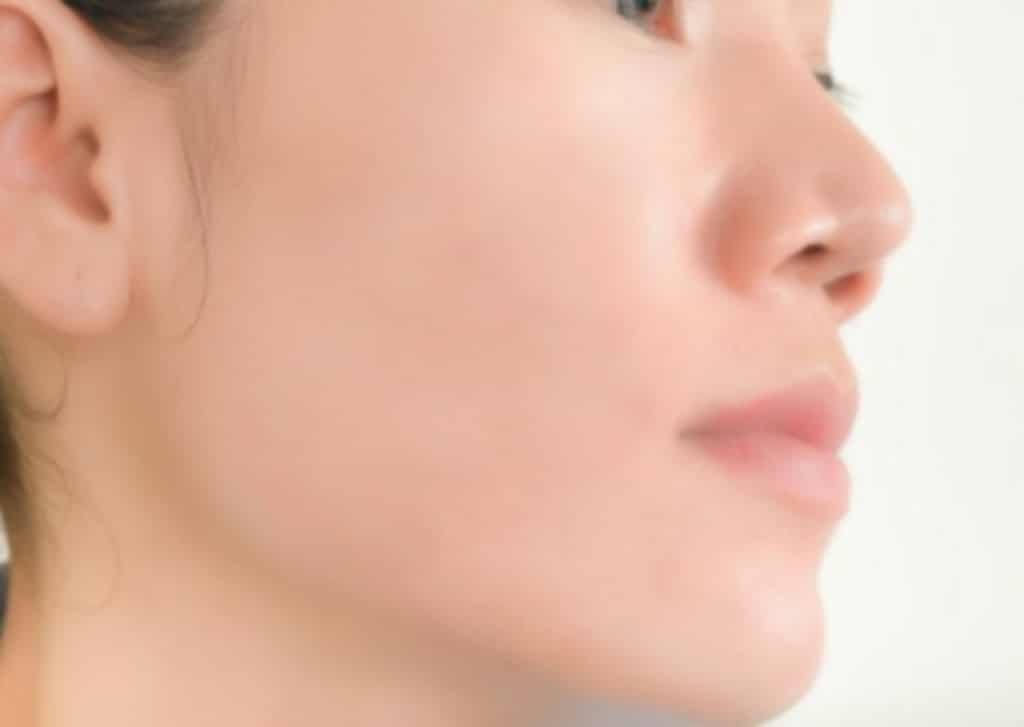
- At this point, we will have a smooth, beautiful face. Using this method, perhaps using this method, it will be simpler than the first part that I wrote in the previous article. In addition, when using this method, the number of steps will be fewer. Again, the parameters depend on the image we want to edit. Or if you feel your first part is better, you can refer to it and use it. If you are late and completely change it, I also have an article about that change.
Epilogue
- In short, features How to smooth skin in Photoshop is a useful tool for photo editing. With this feature, users can easily remove acne spots and other facial blemishes to create a more perfect photo. However, it should be noted that too much editing can lose the naturalness and natural beauty of the photo. Therefore, to get the best results, users need to take advantage of this feature carefully and skillfully to create the perfect photo while still maintaining the model's naturalness.
- If you are not confident about Photoshop, you can refer to it Photoshop course belong to Graphic Express. When you register to study, you will receive 1:1 tutoring and ensure that when you finish studying, you will be able to apply it at work. Study time is also flexible, suitable for office workers and students studying, and we will also provide support. Install valuable copyrighted software and libraries to best support the learning process. Wishing you success with this article.


