Natural facial retouching in adobe photoshop is a photo editing process that aims to improve the appearance of skin in an image.
Using sophisticated tools and techniques, you can blur imperfections such as blemishes, acne, melasma and freckles, while enhancing brightness and evenness of skin tone. The end result is a photo with more natural and flawless skin, creating a strong and professional impression.
With Photoshop, natural facial retouching becomes easy and effective, helping you create high-quality and sexy photos. More specifically, this skin retouching is used for cosmetic purposes suitable for all ages.
Natural Facial Retouching Tutorial in Photoshop
Here are some details on how to retouch natural facial skin in Photoshop:
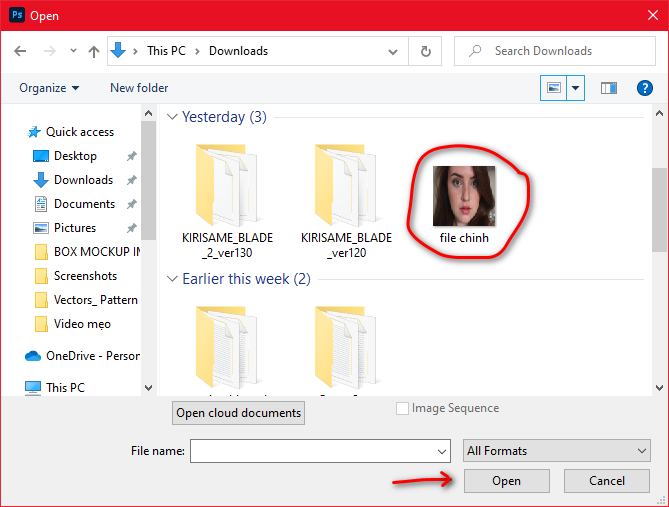
Step 1: Open the photo file that needs to be retouched Natural Facial Retouch in Photoshop.
If you want to edit your skin, the first step is to have a file to edit. This step is to prepare and open the file.
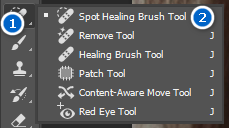
Step 2: Using the tool Spot Healing Brush to remove stains
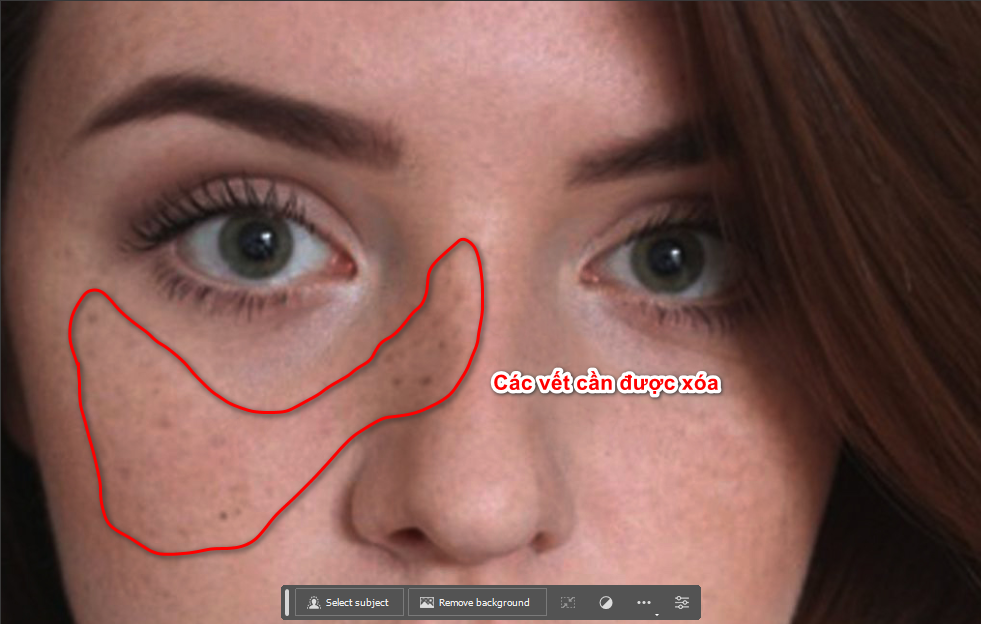
In Photoshop, you use the tool Spot Healing Brush to clear small pimples
Step 3: Make 2 copies
Duplicate the original Layer twice and we will get Layer 1 and Layer 1 copy. Then double click and rename Layer 1 copy to High Pass and Layer 1 to Gaussian Blur.
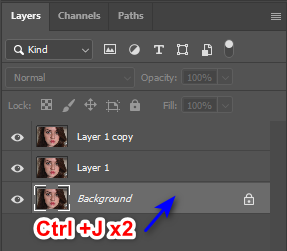
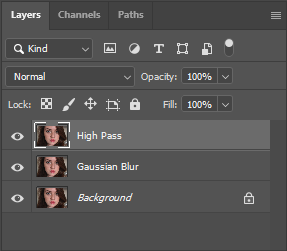
Make 2 copies of 1 edited object and then give the 2nd object Filter > Blur > Gaussian Blur to create the blur.
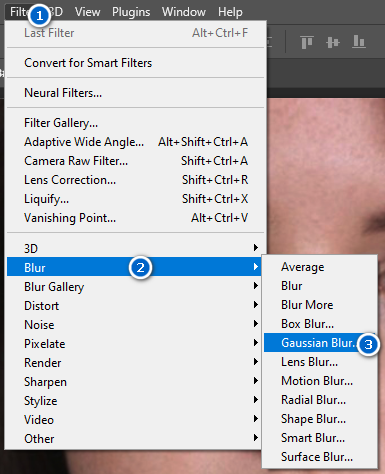
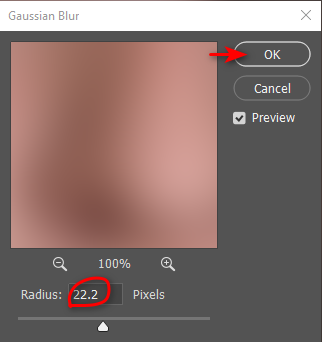

Step 4: Create High Pass to create detail for the object
For the third object, go to Filter > Other > High Pass to create a grayscale effect, then select the Linear light render type.
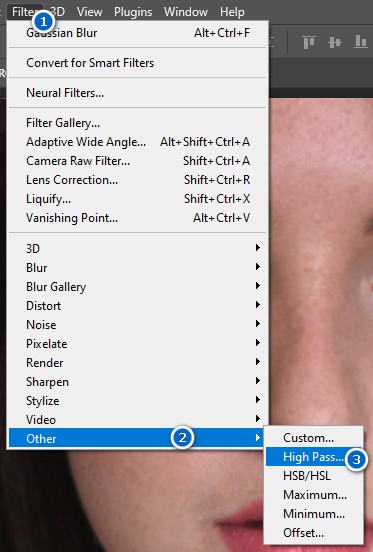
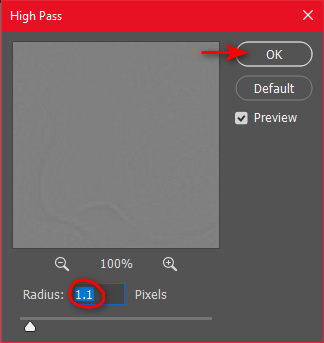

Step 5: Group objects to create a Filter set
Create a group of 2 layers with Filter and then create a Mask Layer. Note: The color of the Mask Layer in the Group is black.
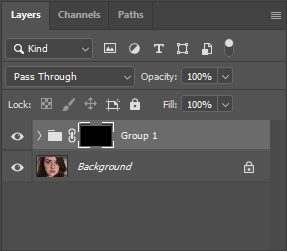
Step 6: Use a mask to naturally smooth your skin
Select Mask Layer and use Brush to remove dark spots and blemishes on the face to make the face brighter. But first, you have to reduce Opacity and Flow!


Note
- First, make sure you have a large, uncompressed copy of the original image to work with. This will help you maintain high quality during editing.
- Use the Healing Brush or Spot Healing Brush tool to remove minor blemishes on your face, such as pimples, blemishes, or freckles.
- Adjust the contrast and brightness of the photo to highlight facial details without losing naturalness.
- Avoid using the Blur tool to blur out facial skin, instead use the Clone Stamp tool or Healing Brush to edit areas with blemishes, freckles, or moles.
- Create natural whites for teeth and eyes using the Dodge and Burn tools.
- Use the Color Balance or Curves tool to adjust the overall color of your skin, creating a natural and balanced skin tone.
- Finally, check and re-adjust the entire photo to make sure the final result still looks natural and not overly made-up.
Conclude
Natural facial retouching in Photoshop is a powerful tool to help improve our appearance. This tool will help you look better than ever. It is considered a commonly used tool in photoshop that anyone who uses photoshop must use.
By using tools like blurring, color adjustment, and contrast enhancement, we can make our facial skin smoother and more natural. Natural facial retouching in Photoshop not only helps to hide skin imperfections, but also enhances our natural beauty.
However, it is important to remember that over-retouching can create an unnatural effect and take away from our natural beauty. Therefore, using this tool should be done with care and sensitivity.
To learn more, please Contact us!


