How to create see through screen in photoshop. Adobe Photoshop is a popular photo and graphics editing software developed by Adobe Systems. It allows users to edit and create images, graphic design, photo decoration, color and light correction, crop and process professional photos.
Photoshop is one of the most popular photo editing software in the world and is widely used in the fields of graphic design, communication and photography. It provides users with a variety of tools and features to create creative and professional works.
So you don't have to wait long, let's find out. How to create a see-through screen in photoshop right now
See more >> Photoshop course from basic to advanced 1 on 1 training
[note]
- How to create natural light in Photoshop
- How to create classic portraits in Photoshop simply
- How to change background color in Photoshop
- The ultimate way to smooth skin in Photoshop, part 2
- Instructions for smoothing skin in Photoshop
- The best way to remove acne in photoshop in 2022
[/note]
How to create a see-through screen in photoshop
Before doing this article, you need to prepare an image for yourself. You can choose any girl background image and a phone to practice.
Step 1: Open the background image file you want to make
- I go to File > Open to open a background that I need to make.
Step 2: Open the phone photo file that you want to put in the background
- I come in File > Open to open the phone photo file and the girl wallpaper file (note that I should use PNG file or your file has had the background removed)
- Then copy the voice image file to the girl background image file.
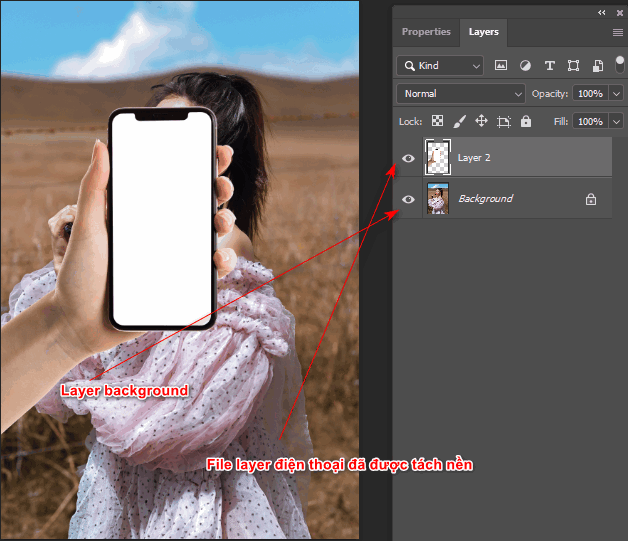
Step 3: Use the selection tool for the phone layer
- We use tools Magic Wand Tool (W) Select the area you want to erase the background to erase the blank area on the phone layer by doing the following:
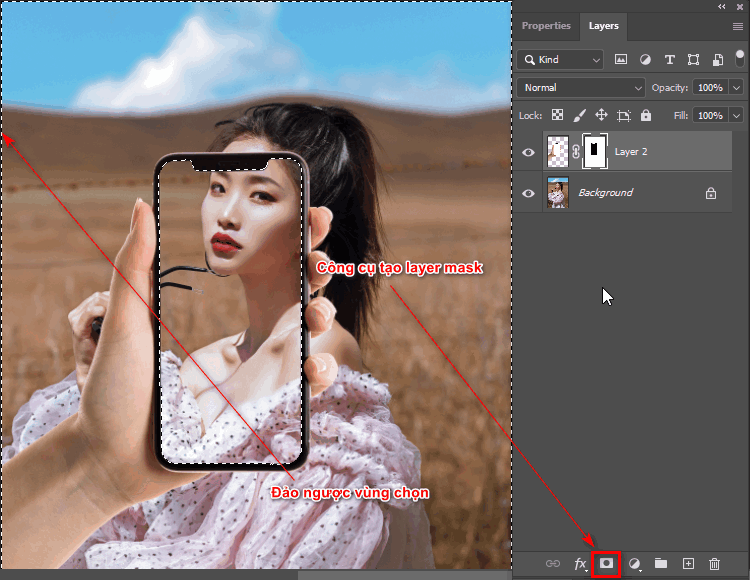
- Then we invert the selection by Ctrl + Shift + I, then click on the generator tool Layer Mask (The tool is located below the Layer panel and next to the fx)
See more >> :How to use the tool Quick Selection Tool Photoshop
- Between keys Ctrl + click on layer mask I just created to show the selection area
- Then we turn it over again. Ctrl + Shift + I, I choose Create new fill or adjustment layer > Solis Color then I choose black. We will get as shown below
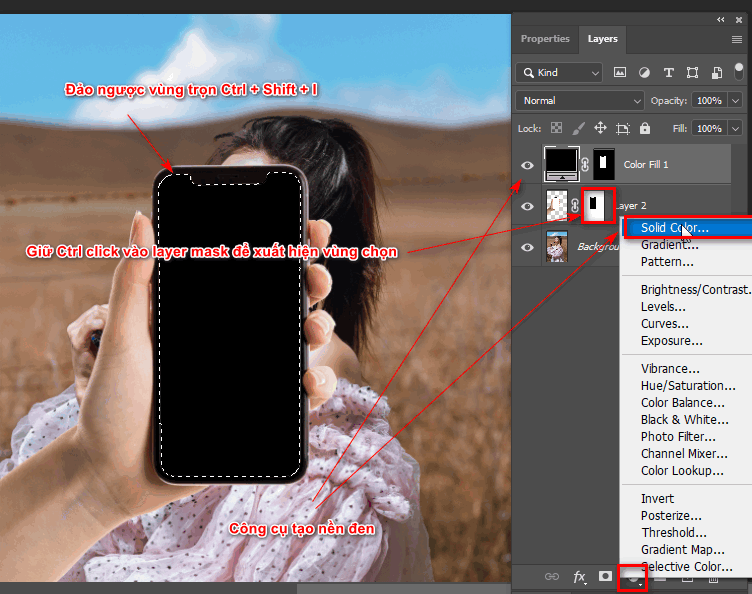
Step 4: Link 2 Layers and duplicate the background layer and blur
- Select the 2 phone photo layers and the color layer I just created, then I link back using the tool below the layer panel so we can move those 2 layers at the same time
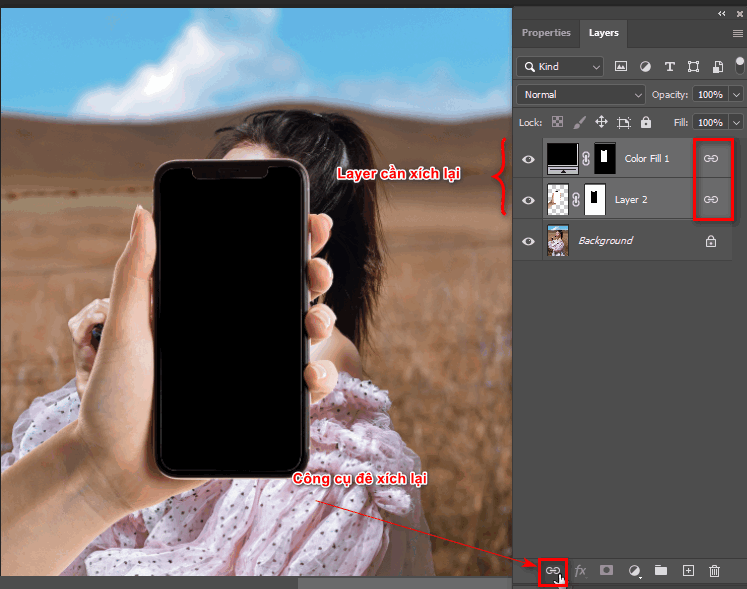
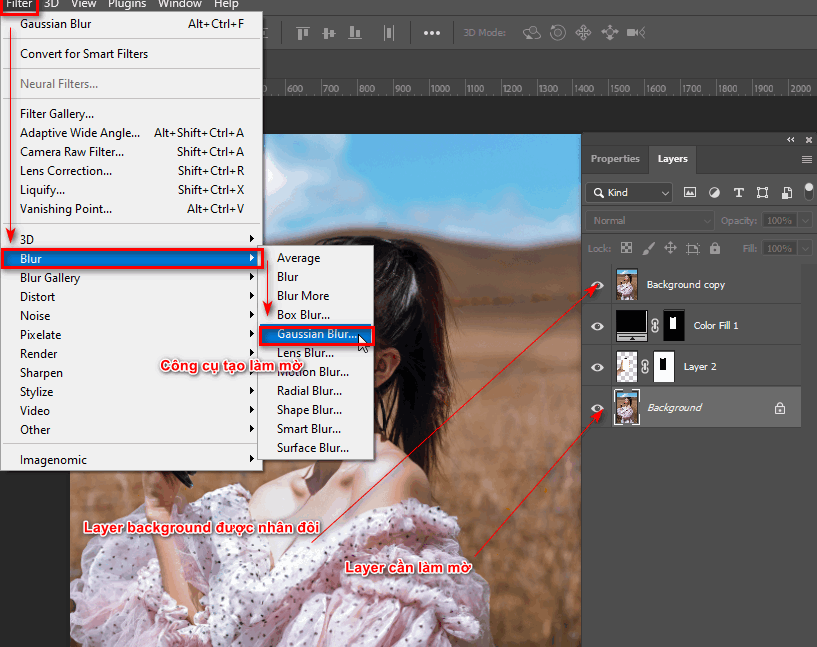
- Then select the background layer and duplicate it using the shortcut key Ctrl + J then move that layer to the top
- We select the background layer then go to the menu bar and select Filter > Blur > Gaussian Blur to blur
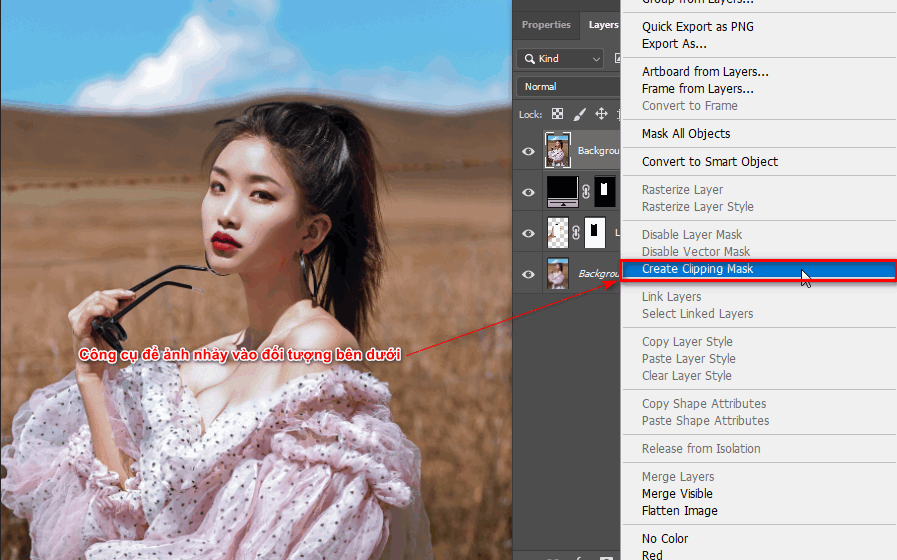
Step 5: Use the background layer to enter the phone layer frame
- We select the top Background Layer then right click and select the command Create Clipping Mask to let the photo jump into the frame below
- Now I just need to move the phone layer to see the difference.
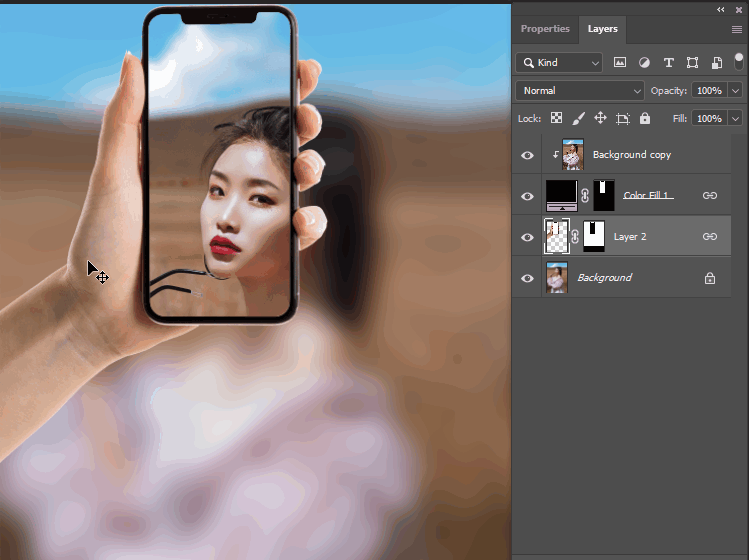
Step 6: Finished product after creating a see-through phone screen in photoshop

Epilogue
Through the article how to create see through screen in photoshop help you create a cool and unique background. In addition, help us learn more tools to understand and support in the design process to increase work efficiency.
If you are looking to learn about photoshop course then you can refer to photoshop course belong to Graphic Express. The course is guided by 1:1 tutoring. Improve your ability to absorb, especially this photoshop course is very suitable for students and working people.
Thank you for reading this article of mine and I wish you success.


