How to create photo frames in photoshop. Adobe Photoshop is the most popular and professional photo editing software in the world. With many powerful features and tools, Photoshop allows users to create beautiful and unique photos as desired.
From editing, creating effects, compositing photos to graphic design, Photoshop is always the top choice for photographers, designers, or anyone who is passionate about creativity and wants to express their ideas through images. Let's explore the power of Photoshop and create top-notch works of art.
To avoid being long-winded, let's learn together. how to create photo frame in photoshop below
See more >> Photoshop course from basic to advanced 1 on 1 training
- How to change background color in Photoshop
- Instructions for smoothing skin in Photoshop
- The ultimate way to smooth skin in Photoshop, part 2
- The best way to remove acne in photoshop in 2022
- Instructions for removing photoshop background very quickly
- How to create snow in Photoshop is extremely simple
- How to create rain in Photoshop is extremely simple
How to create photo frames in photoshop
To create a photo frame like in the picture. You need to prepare a picture of yourself or someone. A background so we can cover the excess parts.
How to proceed as follows
Step 1: Open the image file and frame you want to design
- Go to File > Open to open the image you want to design in the folder.
Step 2: Copy the image to the wallpaper you want to design
- I select the photo then press the key Ctrl + A to select all frames
- Then I click Ctrl + C copy that image and then go back to the page with the wallpaper you want to make later Ctrl + V to paste the image that I just copied

Step 3: Swap image into background
For photo frames, you need to change the display size to fit first. press Ctrl + T and drag the corner of the image to

- Then we click on the image layer then go to the menu bar Layer > New > Background form Layer. Now the image layer will become Background and will automatically move to the bottom.
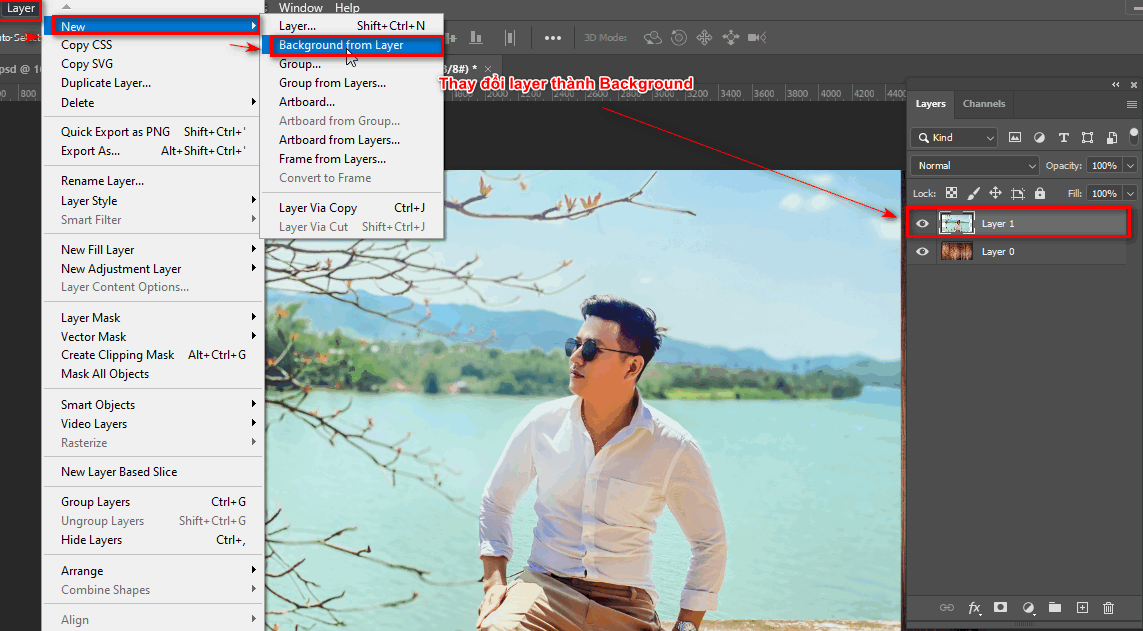
Step 4: Create the photo frames you want
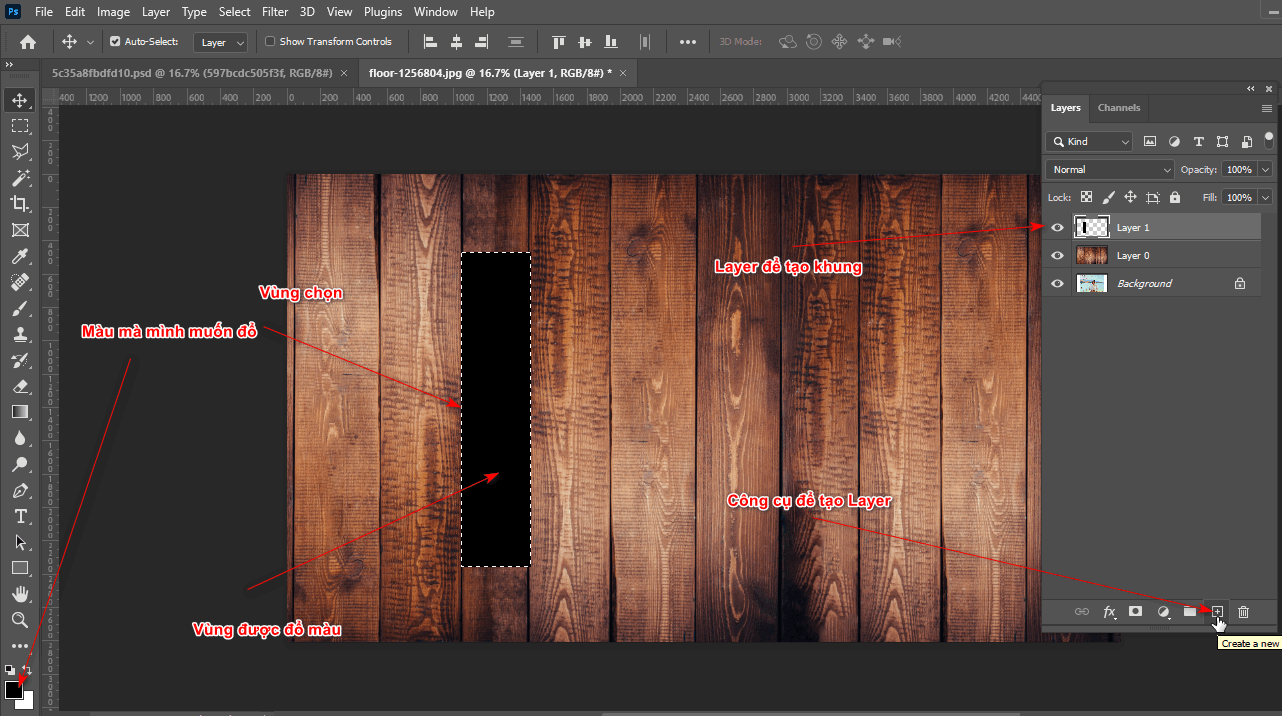
- I create an empty Layer using the + icon next to the trash can on the Layer panel. (Atl + Ctrl + Shift + N)
- After creating, we can now choose the tools that have a selection area.
- Then we pour black color on it. Alt + Delete on that selection area after you finish you press Ctrl + D to turn off the selection
- Now I go to the fx section right below the Layer panel. Fx > Blending Option > silencer Fill Opacity: 0 > Knockout: Shallow > OK
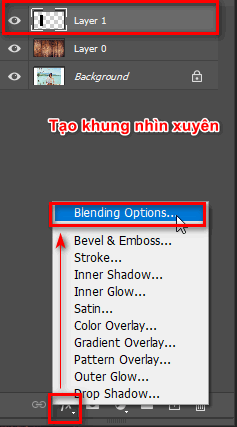
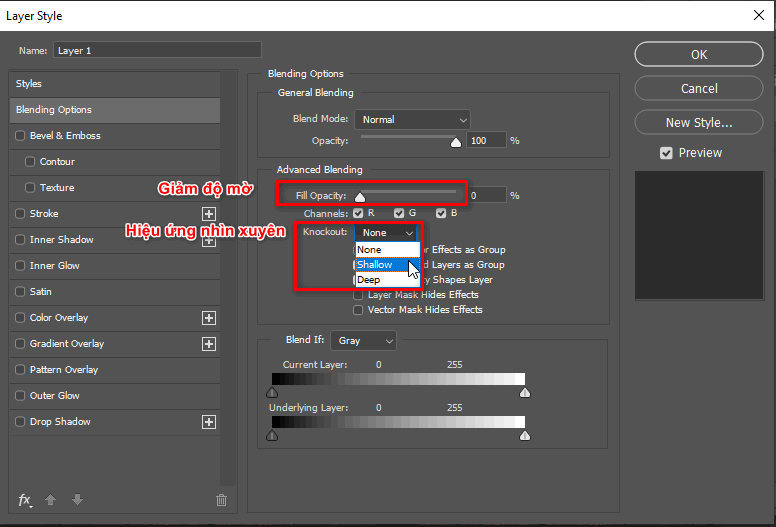
Make the border white by selecting
- Fx > Stroke > give white border > OK
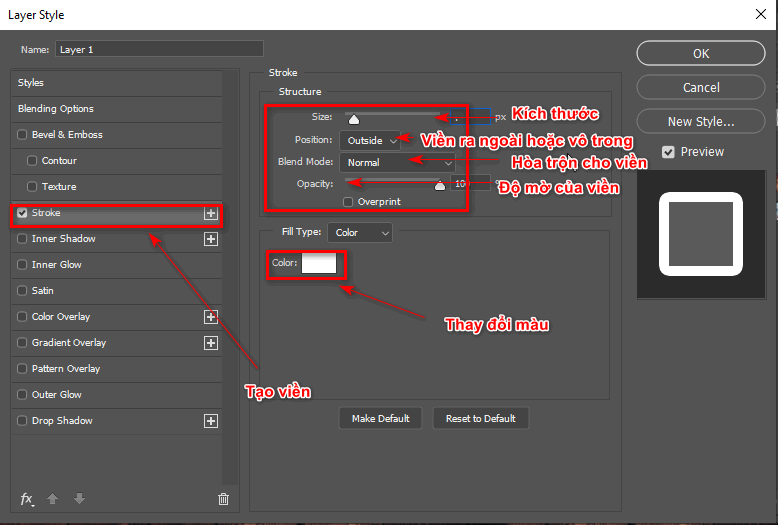
- Now the frame you choose will be visible through to see the background.
- Now select the Layer you just created the frame for and hold down the key. Alt + move mouse to copy drag or can use Ctrl + J then move that layer
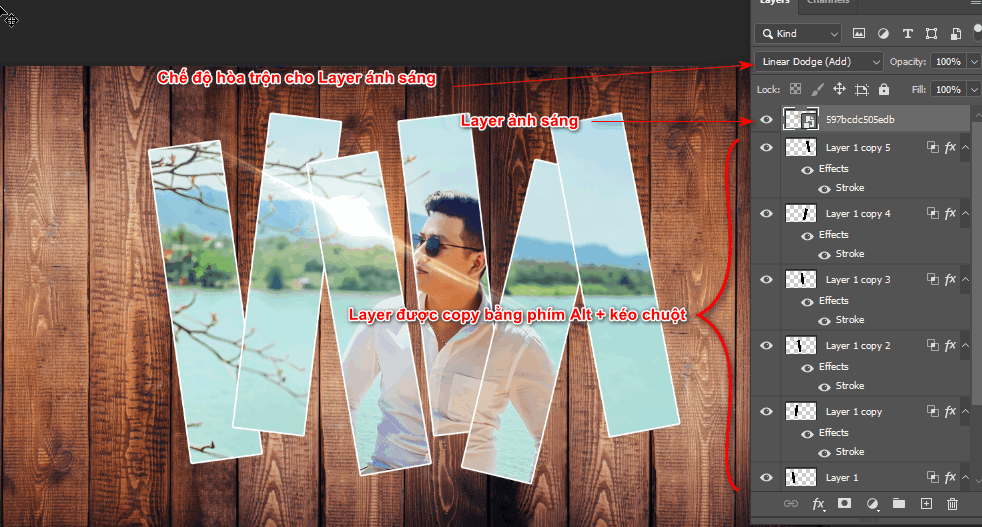
- Then I download the PSD light files and then add them to the image and remember to use blending to match the image.
Step 5: Product after using how to create beautiful photo frames in photoshop

Conclude
Posts how to create photo frame in photoshop also a tip to help us create a beautiful and virtual portrait photo. At the same time, it helps us know how to convert Layer to Background as well as fx effects, helping us know how to use Blending Option better.
If you are looking for a course on photo editing or want to make banners or posters for websites or printing, you can refer to Photoshop course belong to Graphic Express When you register, you will be able to install free software and at the same time have valuable library documents to help the learning and working process become faster and more convenient.
Thank you for reading this article. If you find it useful, don't forget to share it and read more good articles I've written. And if you don't understand the tools clearly, there are also articles for each Photoshop tool.


