How to create natural light in Photoshop. Adobe Photoshop is a widely used software application for image editing and manipulation. It is a powerful tool that allows users to create and enhance digital images, illustrations and works of art.
With its intuitive user interface and extensive features, Adobe Photoshop is loved by photographers, designers, and digital artists. From simple edits to complex design projects, Photoshop has become the go-to software for many creative professionals. Learn about it with the User Guide How to create natural light in Photoshop How to be effective?
- How to change background color in Photoshop
- The ultimate way to smooth skin in Photoshop, part 2
- Instructions for smoothing skin in Photoshop
- The best way to remove acne in photoshop
How to effectively create natural light in Photoshop
Step 1: Open the file where you want to create light
Go to the menu bar and select File > Open to open the image we want
Step 2: Create a new file to create a light frame for the photo
- Go to the menu bar and select File > New to create a new page
- Now we use the tool Rectangular Marquee Tool (M) Draw rectangular frames to create window frames
- When using the tool (M) We remember to create one for it Empty layer (Alt + Ctrl + Shifl + N) Let me pour black directly on it Alt + Delete frames that we have created
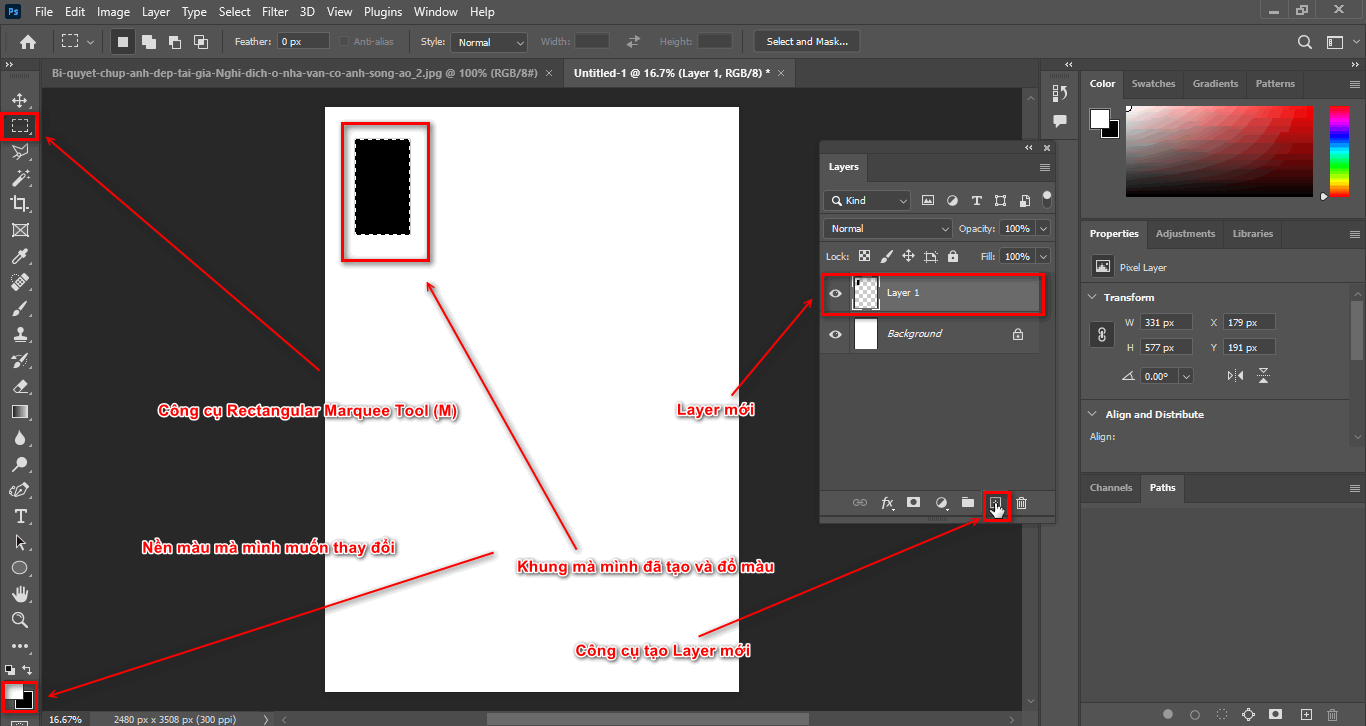
- At this point, I will create 6 rectangular frame layers, then I will combine all those frame layers using the keyboard shortcut: Ctrl + E
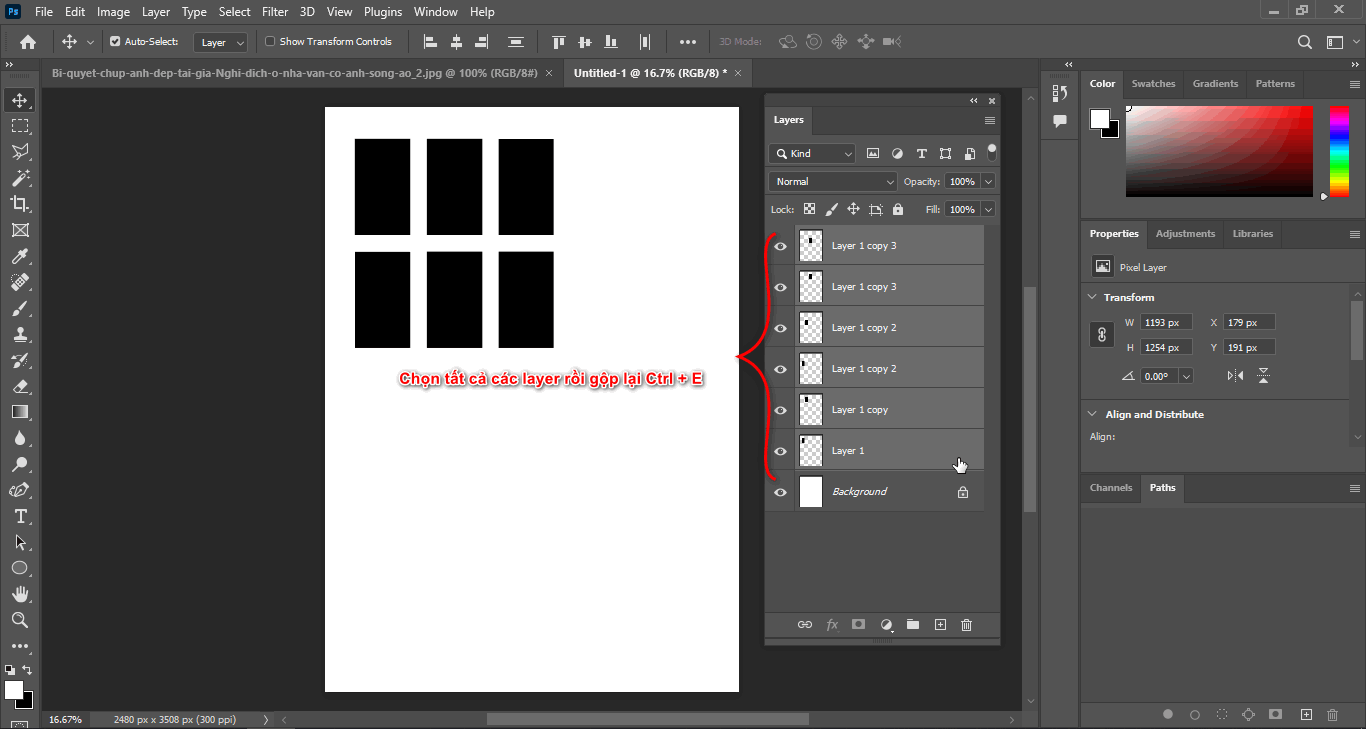
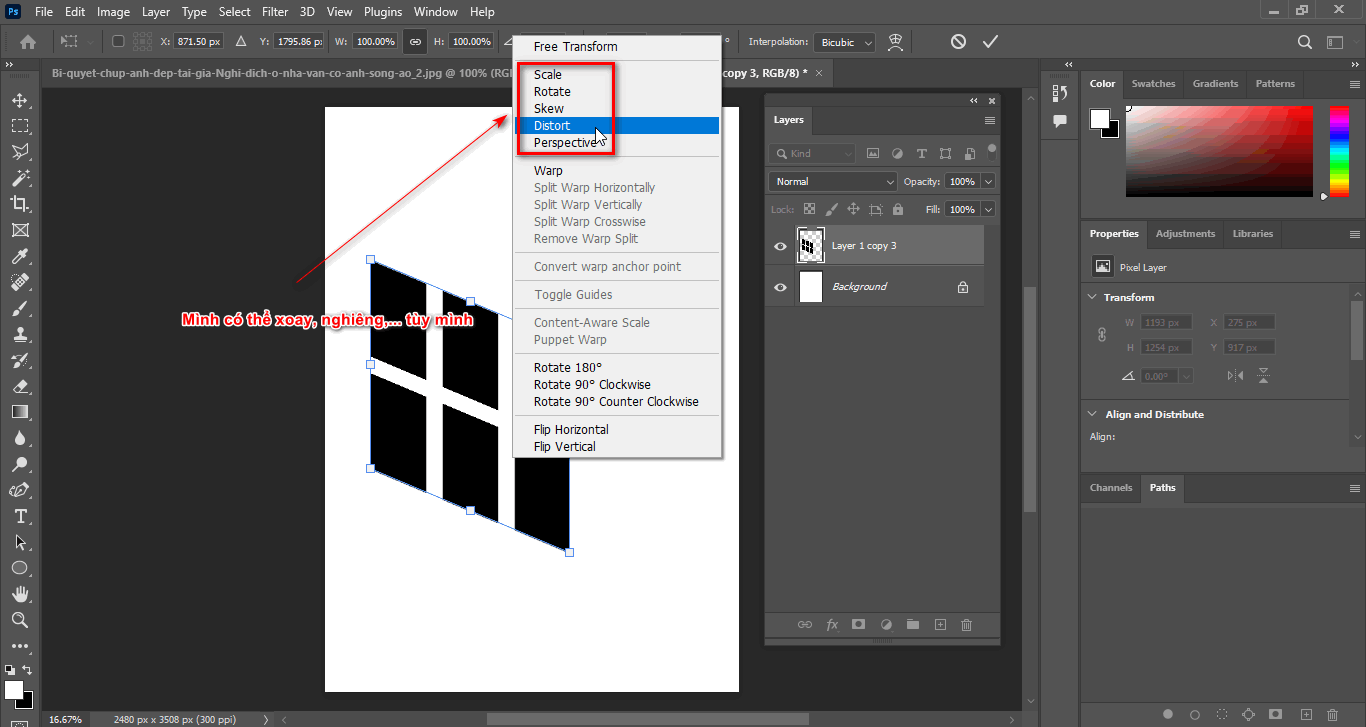
- After merging, I will adjust the direction and tilt of the frame to best suit by clicking Ctrl + T
- Then right click to select Skew to change the tilt of the door frame
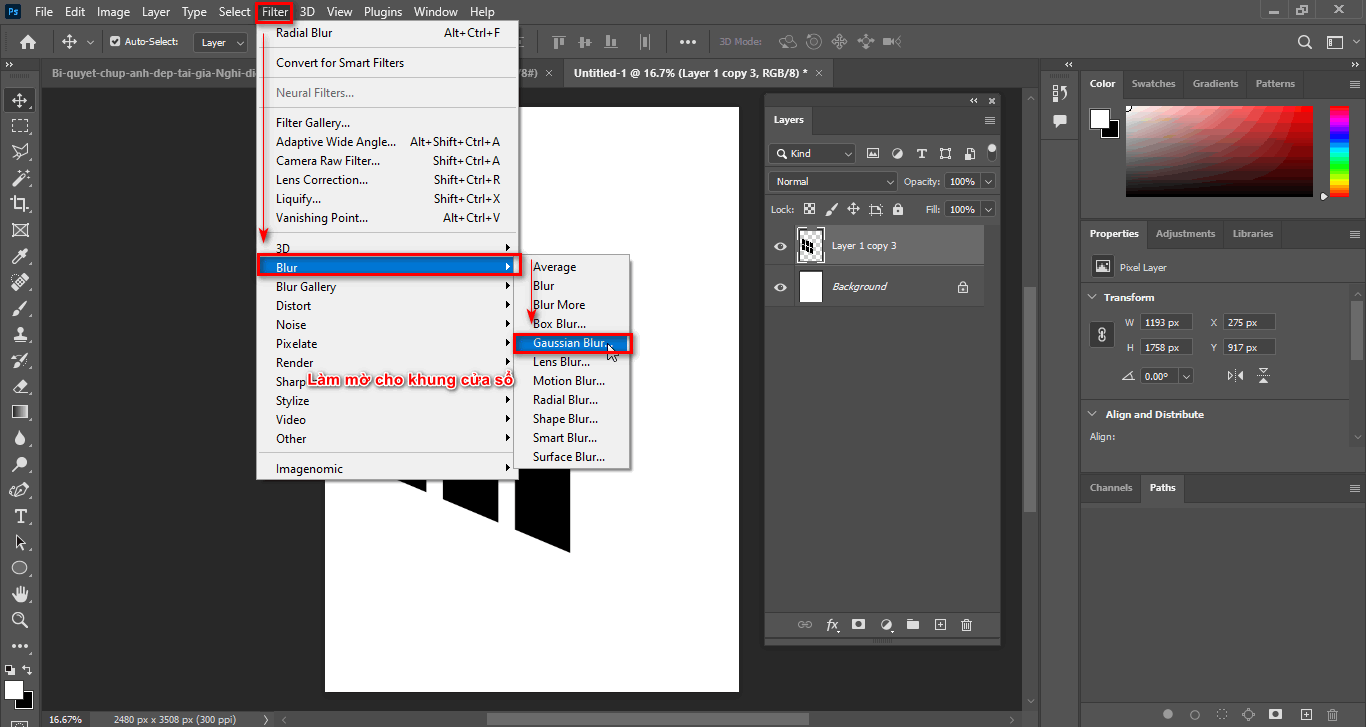
- Then go to the menu bar and select Filter > Blur > Gaussian Blur Create the most realistic opacity for the door frame (the parameters depend on the situation you use)
Step 3: Save the window frame
- First of all, turn off the Background Layer
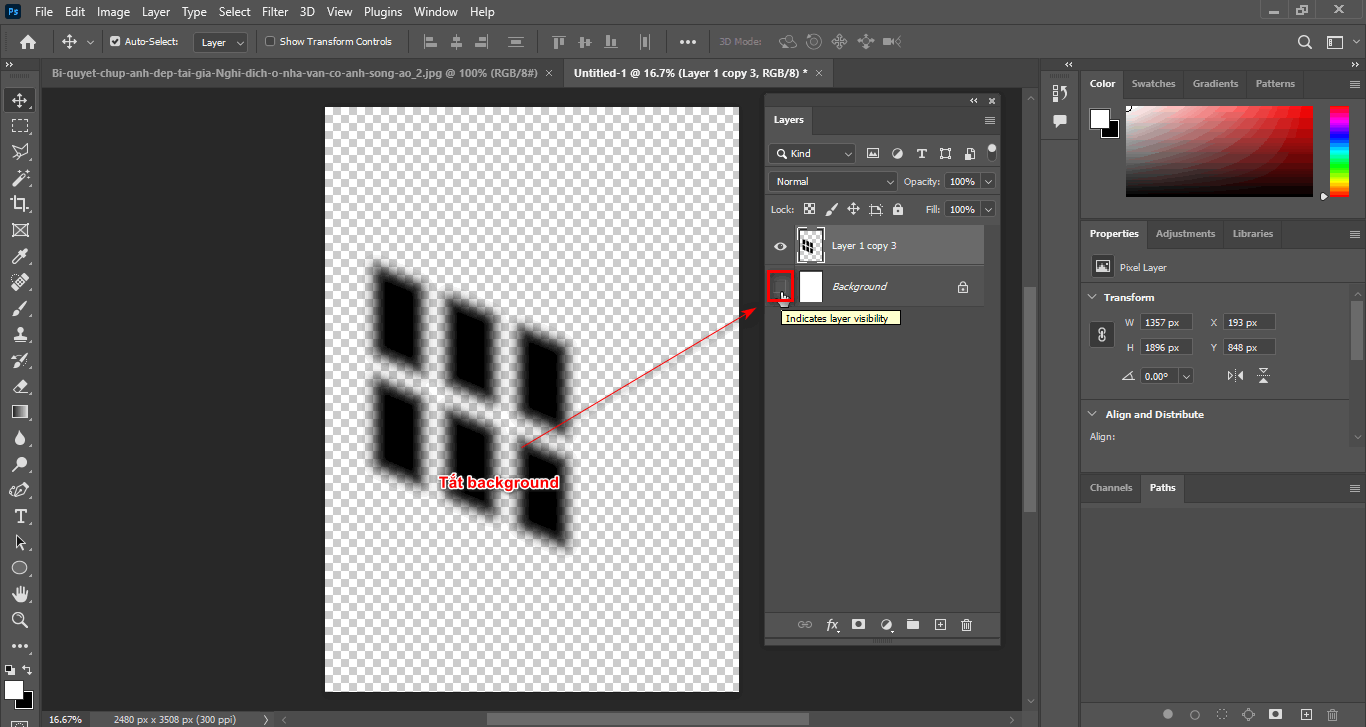
- Then use the tool Rectangular Marquee Tool (M) Create a selection surrounding the window layer you just created
- Then select the menu bar Edit > Define Brush Preset > OK
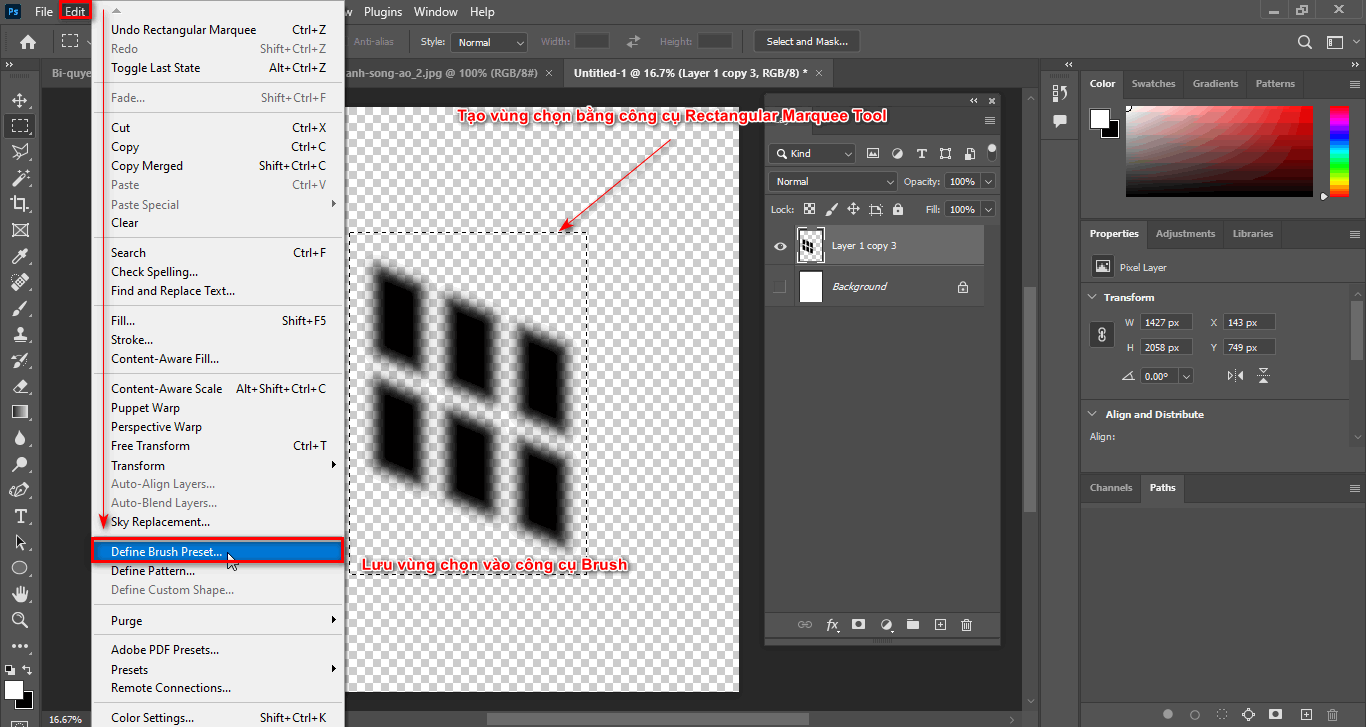
- After saving the object to the tool Brush
- Just now we were Create natural light in Photoshop Now we will include it in the image
Step 4: Go back to the image layer to add the light window to the image
- Looking at the Layer panel below, we select the tool Create New Fill or Adjustment Layer > Color Lookup
- At this point, a color palette will appear to suit the scene
- The 3DLUT File section will have many formats such as: color at night, during the day, film color,...
- I will choose 3DLUT File as the format Moonlight.3DL create a colorful night scene
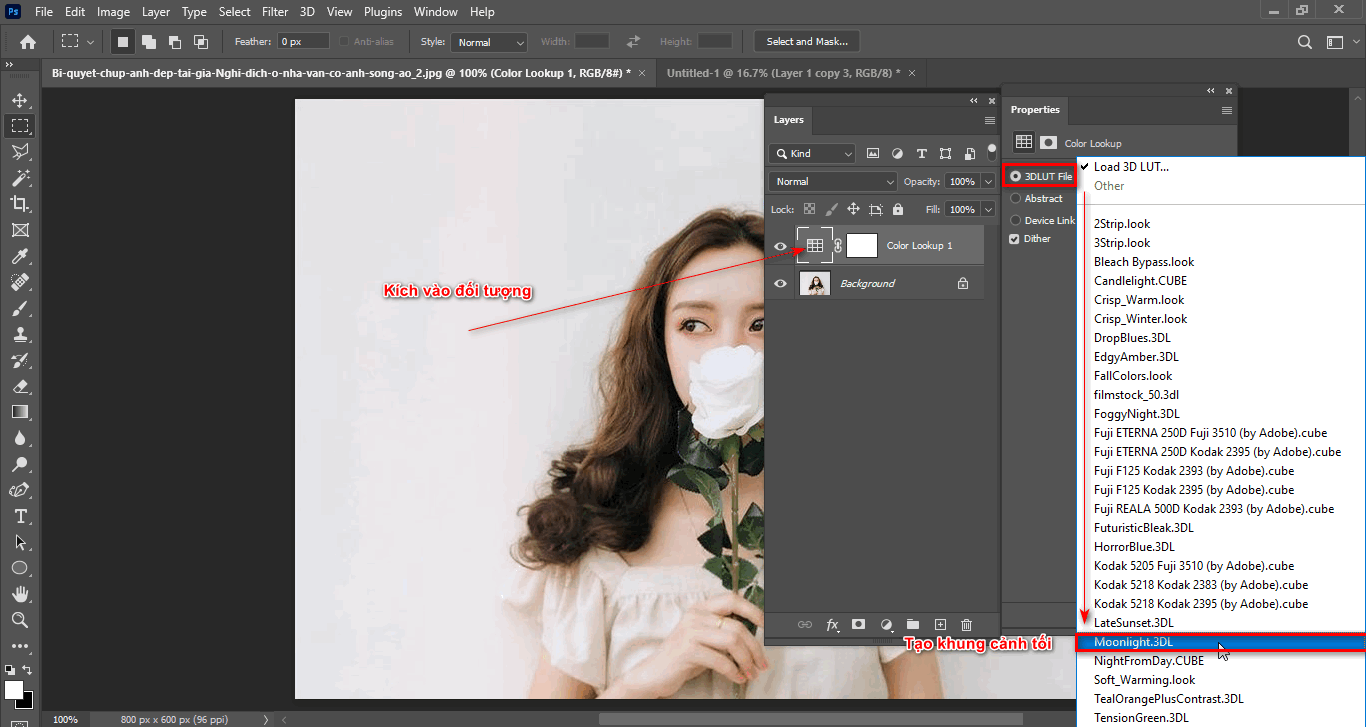
- Now I will create an empty layer to contain the window frame
- I use tools Brush window image that I just saved
- At this time, I set the color to white, then click on the image and a white window frame will appear
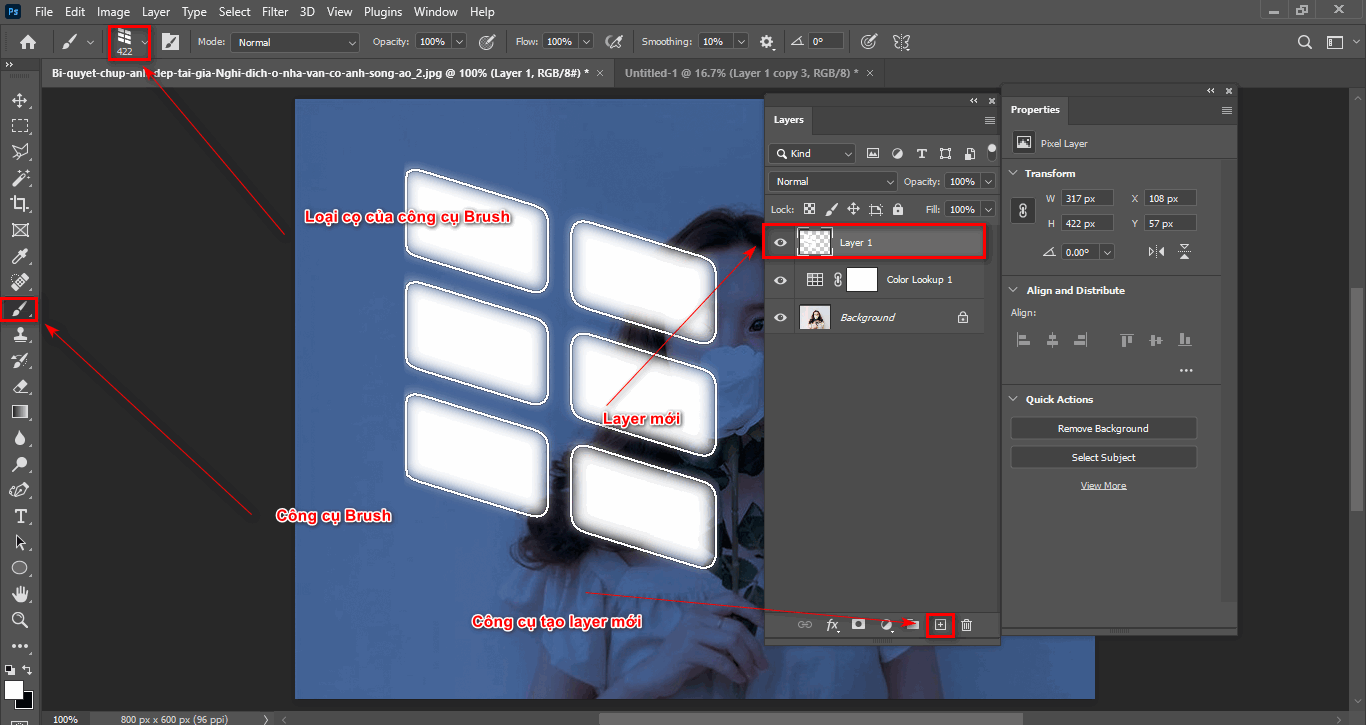
- Now, to make the window frame more realistic, I use the blending mode Softlight
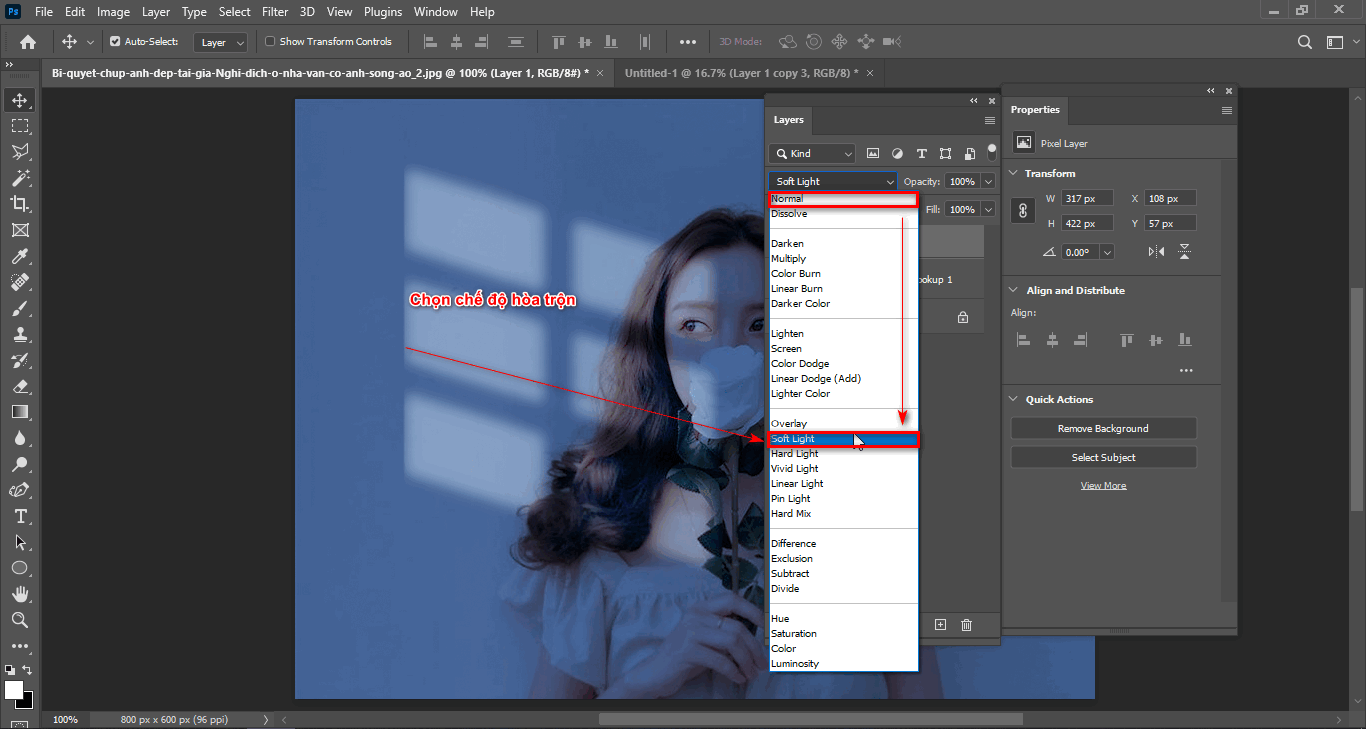
- In case if the window frame I think is not bright enough, I can double it Layer that goes up and down Opacity accordingly
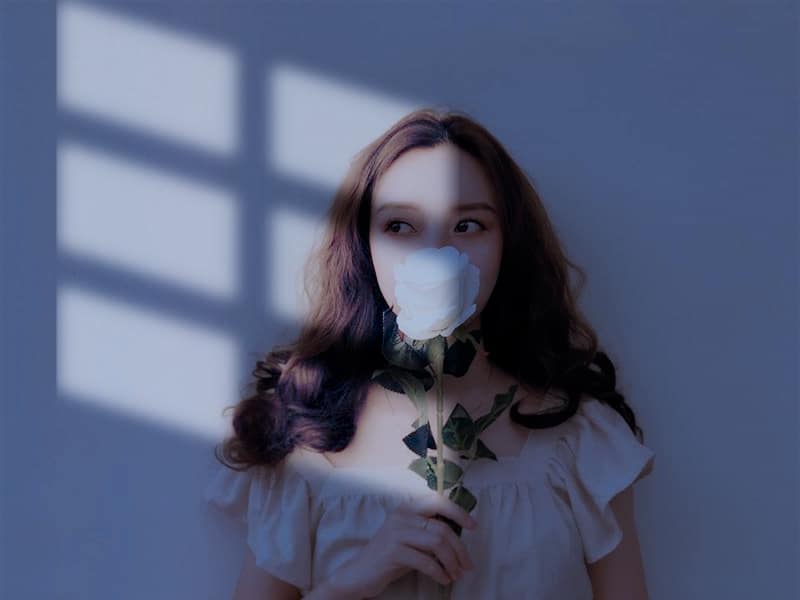
Step 5: Finished product after performing the above steps
Epilogue
Through this article you already know How to create natural light in Photoshop Extremely simple, isn't it? If you find Photoshop interesting and want to learn, come here Graphic Express. We train Photoshop from basic to advanced. Even people who don't know anything can learn photoshop course ours. Instructions until you are proficient before passing the lesson.
Thank you for following and I wish you success


