How to create a 3D movie table in illustrator 3D creation is now popular and many people use illustrator software, which is a 2D graphics software that specializes in redrawing images in vector form. The following versions have been upgraded and help those who Learning 2D can also learn a part of 3D, next I will guide you how to create a mini 3D keyboard on illustrator software, please follow and follow me.
 See more: Illustrator course from basic to advanced with 1:1
 Top 1 most detailed instructions on how to create Patterns in Illustrator
- Instructions for removing photoshop background very quickly
- Instructions for smoothing skin in Photoshop
- How to create snow in Photoshop is extremely simple
- How to create rain in Photoshop is extremely simple
- The best way to remove acne in photoshop in 2022
How to create a 3D movie table in illustrator
Step 1: You create a page of any size on the software
- Select File > New then enter the parameters and size you want
Step 2: Then you use the tool to draw a square
- You choose the tool Ractangle (M) To draw out a square you remember to hold Shift to draw a square
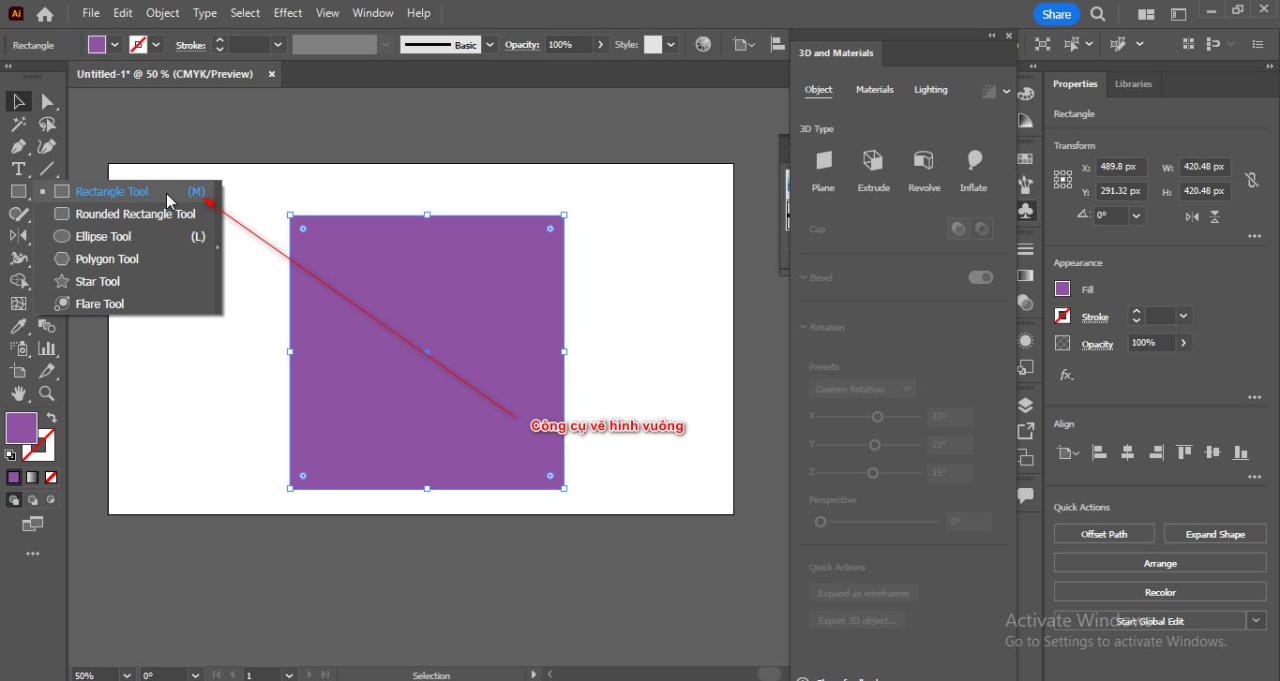
Step 3: Then you use the command to narrow it evenly into the square
- You select the newly created square object
- Then you press Ctrl + C (copy object), Ctrl + F (paste over previous object)
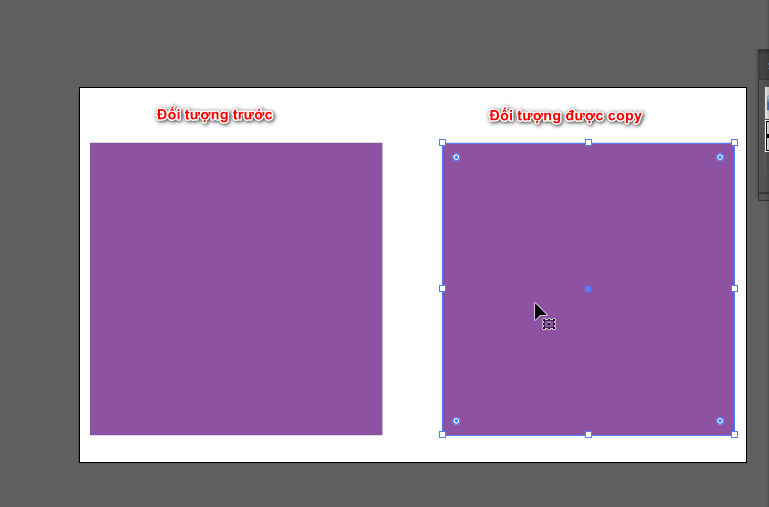
- Now you hold an origin of the object you just copied and then press Alt + Shift and drag the mouse in to evenly shrink the copied square
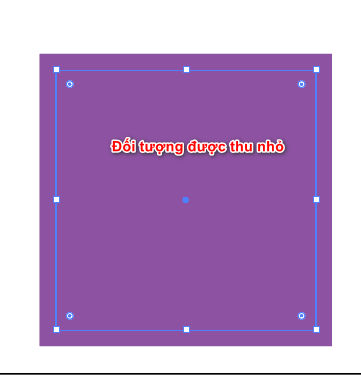
Step 4: Change the color of the above two objects and separate the inner object into small objects
- You select those 2 objects then you change the color
- After you're done, select the small object inside and use the command Object > Path > Split into Grid
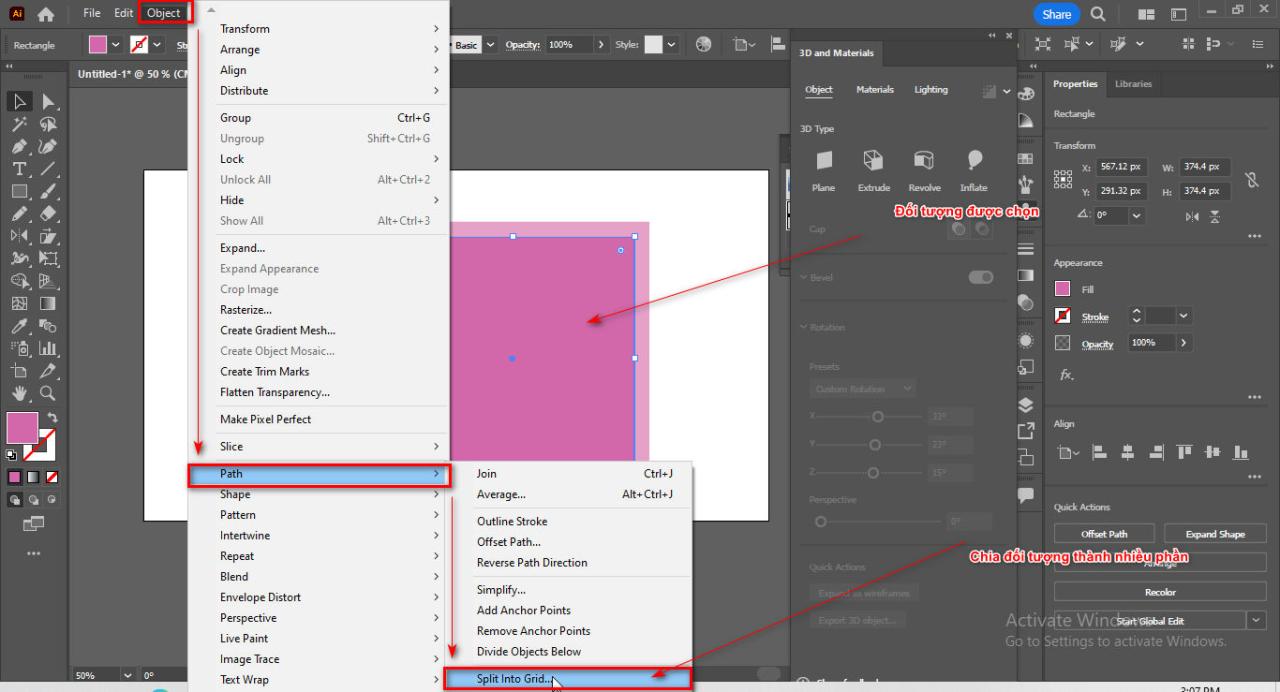
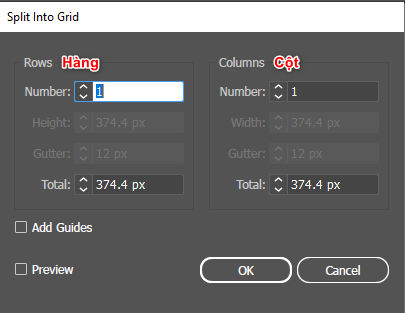
- When the parameters table appears, divide the object into 3 horizontal rows and 3 vertical columns
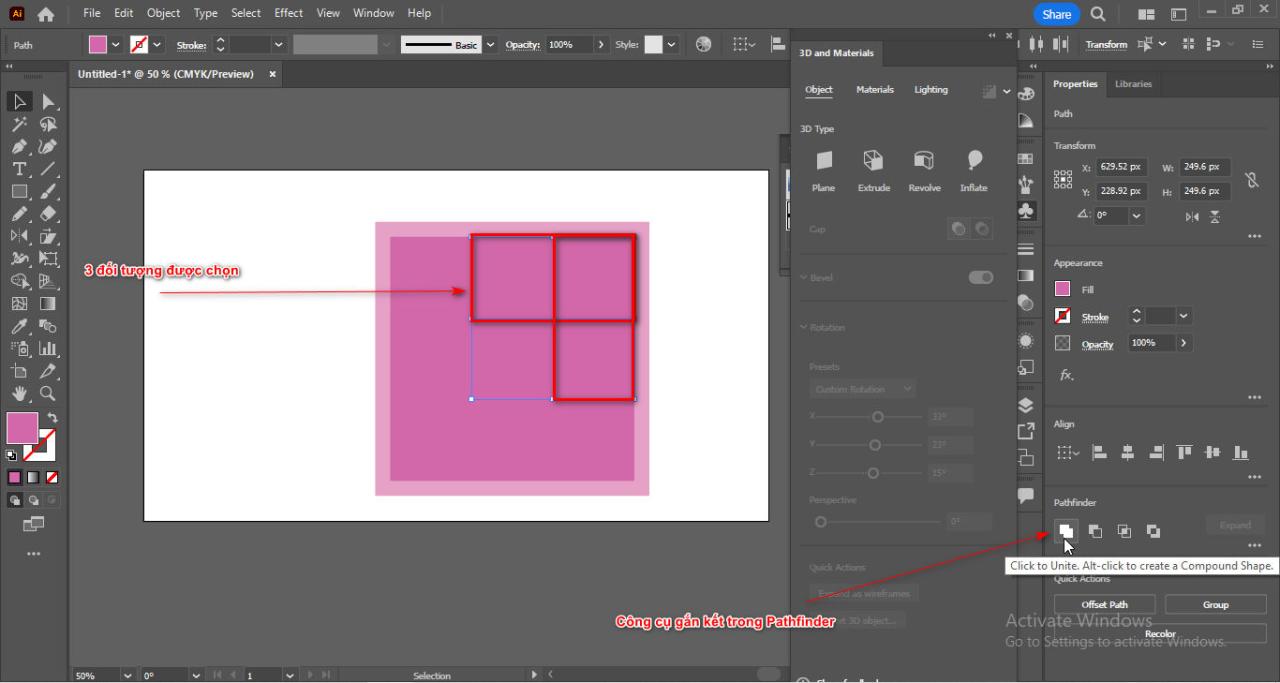
- You choose 3 squares then combine them with the command Pathfinder
- Now you enter an order Object > Path > Offset Path Complete all selected objects according to parameters (-) sink in > OK
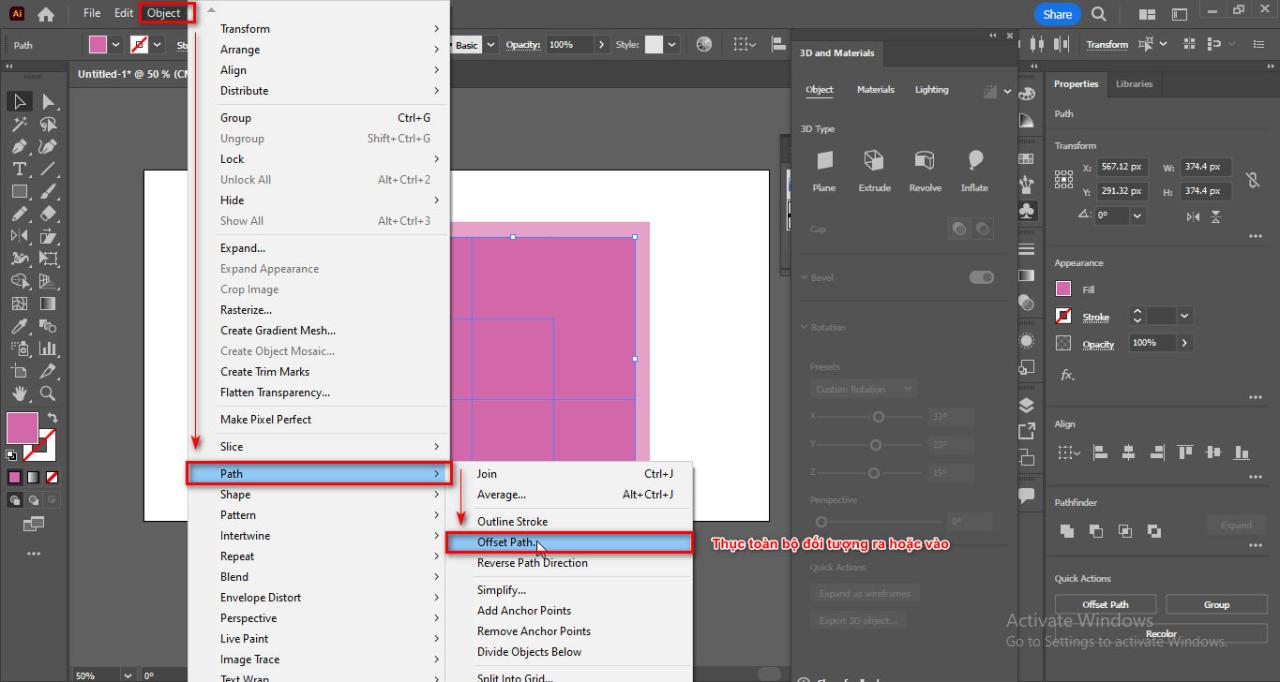
- You group the entire object by Ctrl + G and delete the previous squares you created
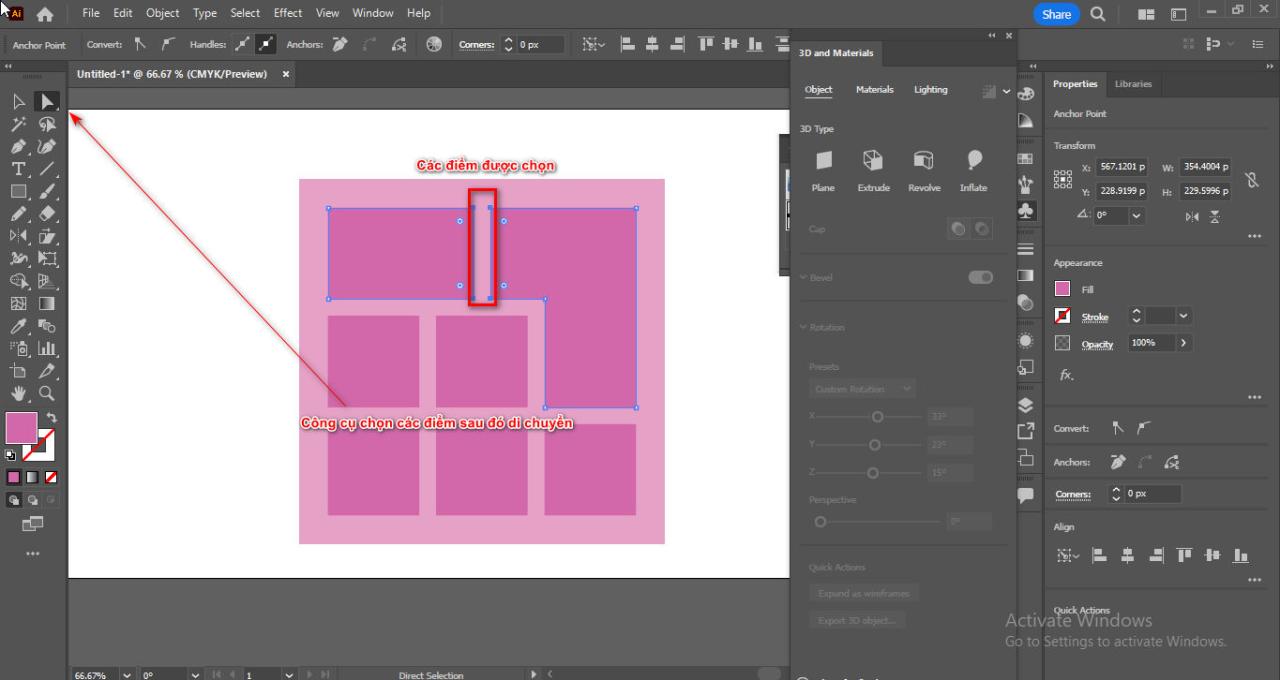
- If you want to have a different length, stretch it accordingly using the tool (A) Select points then move
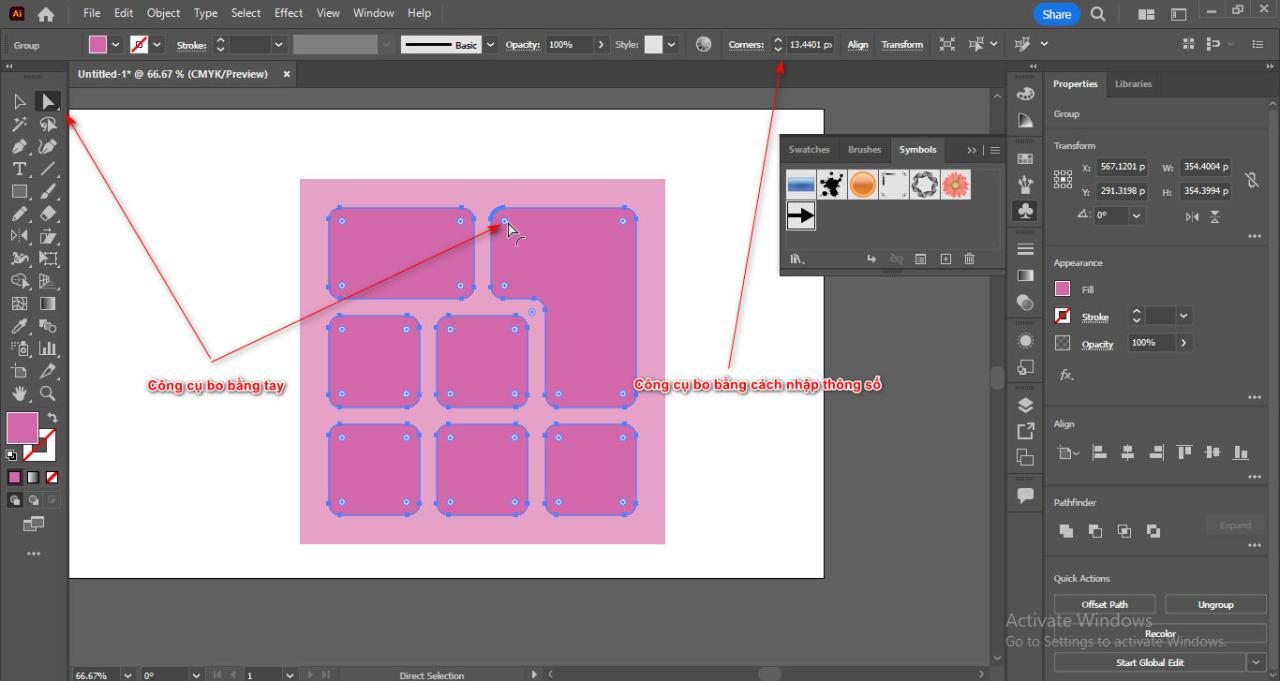
- Once you're done, select all the small squares and then use the tool (A) to round corners for those objects
Step 5: Type names and symbols for the cell keys you created
- You name the keys and you can draw symbols with other tools
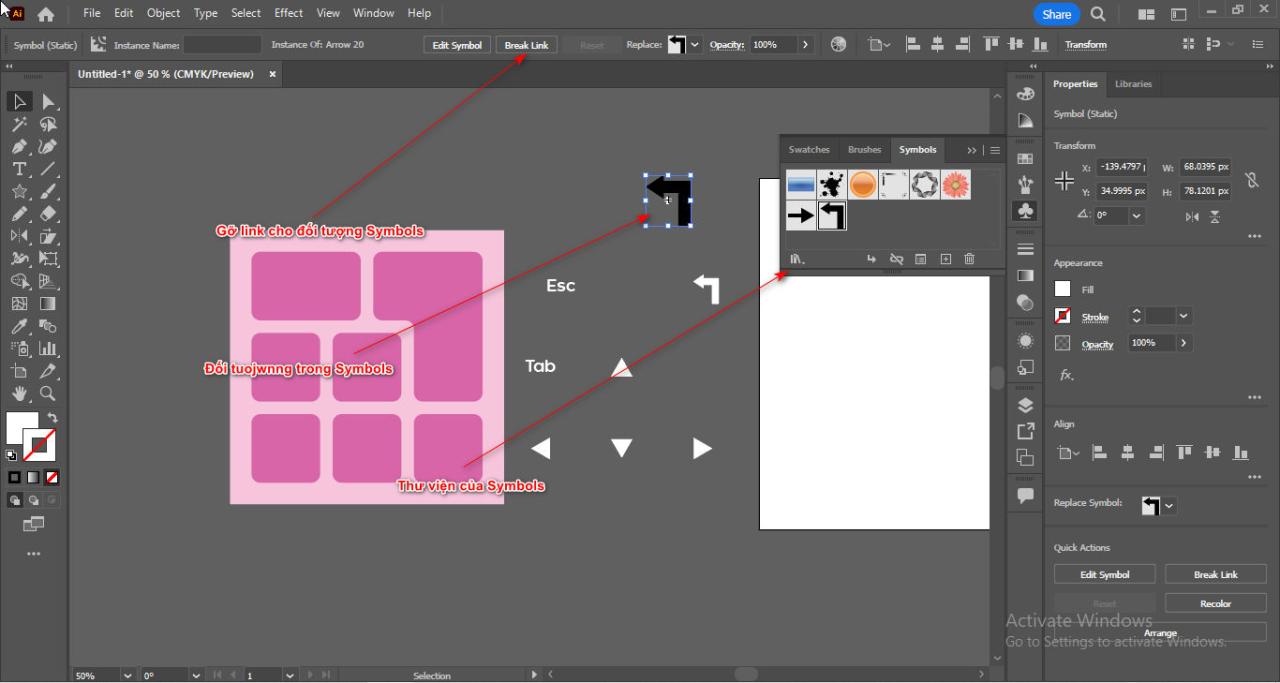
- For keys with other symbols you can find them in the section Window > Symbols
- Then you bring the object out and select it Break Link Turn object into image to change color
Step 6: Put all cell objects into 1 groud and use 3D
- You select all square objects then click Ctrl + G to join the group
- Then you enter an order Window > 3D and Materials
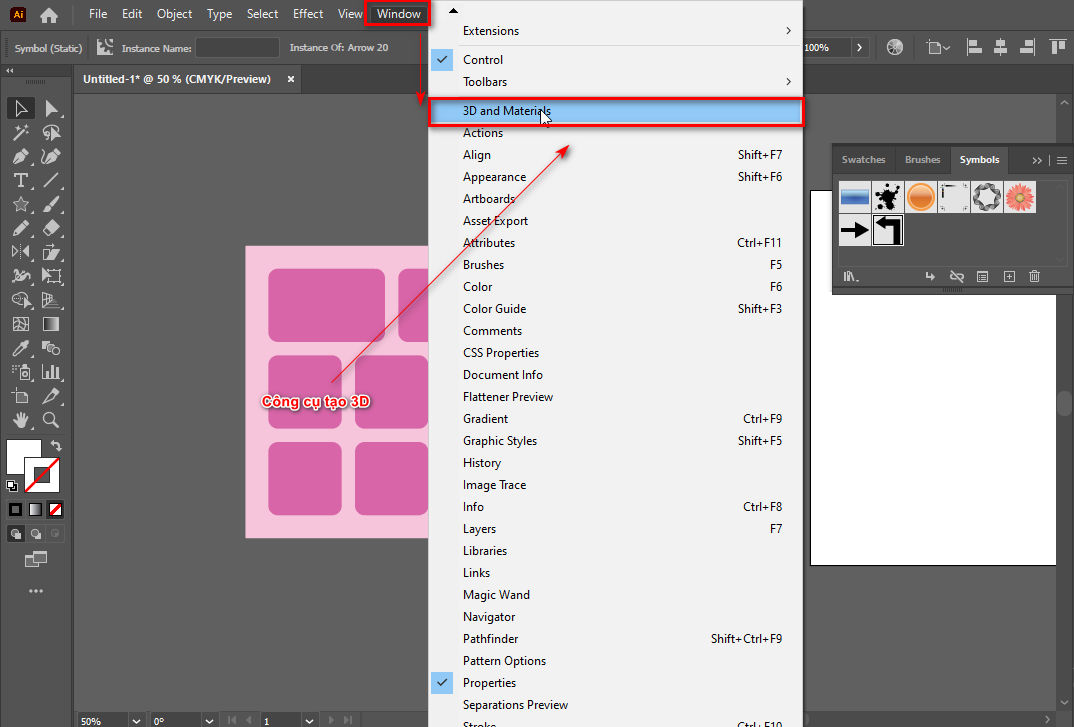
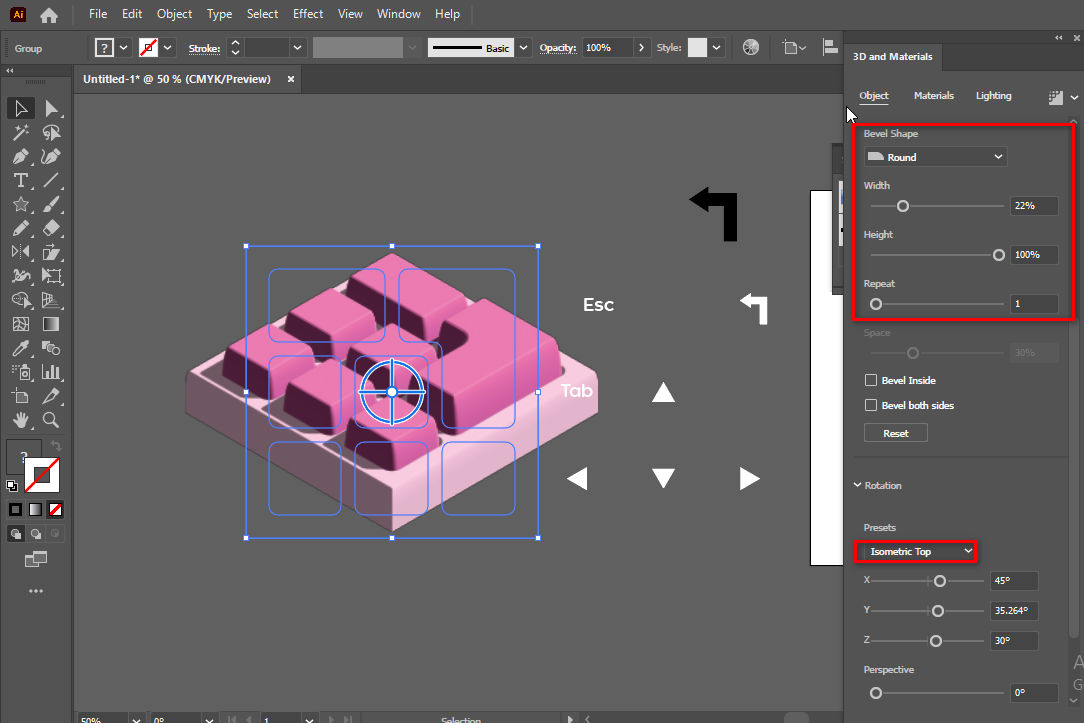
- At this time, the parameter table appears
- Then you follow the parameters you set
(Extrucle, Presets: Isometric Top, Bevel Shape: Round, Width: 22%, Height:100%)
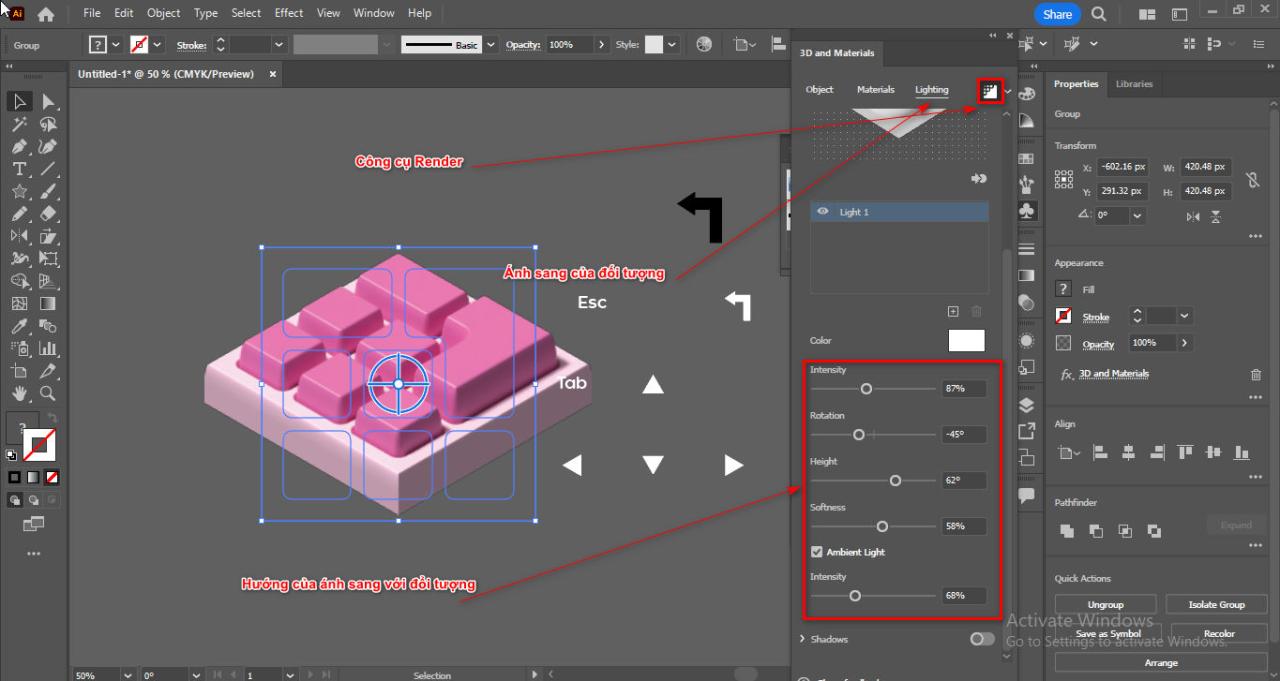
- Then click the Render icon and select the item to adjust the lighting for the object
- Similarly, the names and symbols for the keys follow the above steps but only use the rotation direction
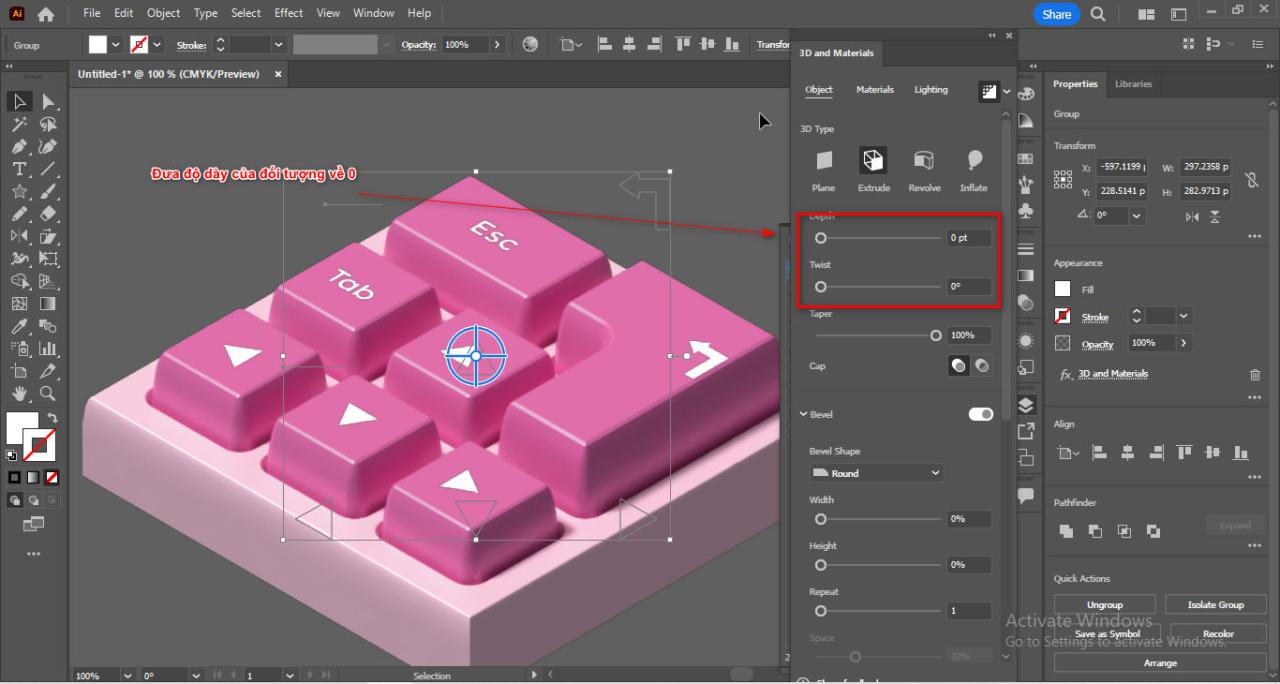
In addition, the light direction and some parameters can be changed depending on you.
Results after using how to create a 3D movie table in illustrator
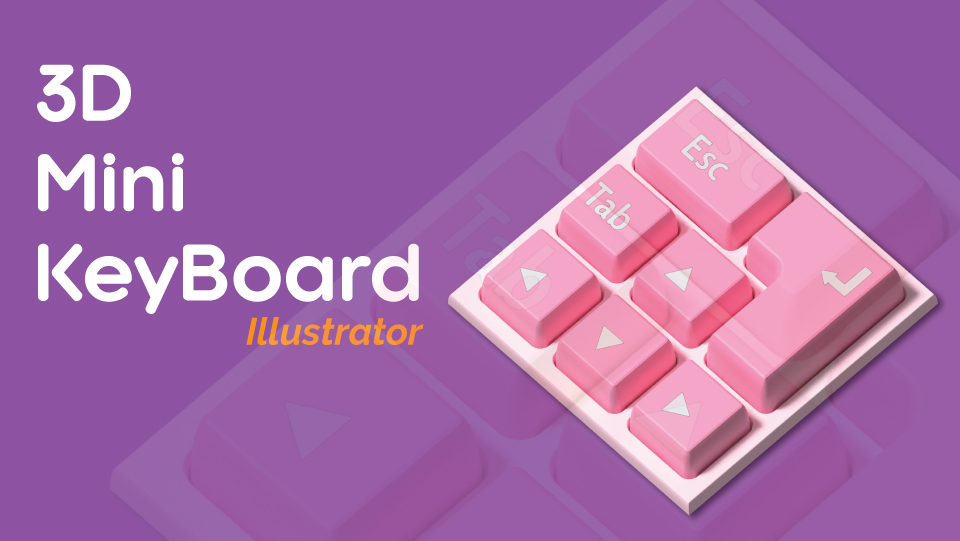
In short
This article also tells you a part of how to create 3D products using 2D illustrator software. It helps beginners get acquainted with 3D while still using 2D in just one software. How to create a 3D keyboard in illustrator Helps you create other things in 3D and also helps you know more about the tools as well as their properties and how they work.
If you are in need of design, don't forget us. Illustrator course belong to Graphic Express are being trained 1 on 1 to teach and learn real combat which is being studied by many people. Hope you will also be one of those people.
Good luck.


