How to create 3D background in Photoshop 3D images are a type of image created to display objects in three-dimensional space (length, width, and height). Typically, 3D images are created using graphics software or specialized tools to create 3D objects and place them in a 3D space.
3D images can be used in a variety of purposes, including animation production, video games, product design, advertising, architecture, and many other fields. 3D images can be created using different technologies such as ray tracing, style shading, texture mapping, and many other algorithms to create images with the best quality and effects.
Now we don't have to wait too long, let's find out How to create 3D background in Adobe Photoshop Please.
- Instructions for removing photoshop background very quickly
- Instructions for smoothing skin in Photoshop
- How to create snow in Photoshop is extremely simple
- How to create rain in Photoshop is extremely simple
- The best way to remove acne in photoshop in 2022
The following is How to create 3D background in Photoshop Please follow me:
How to create 3D background in Photoshop
Step 1: Open the image file you want to make a 3D image
- I go to File > Open to open 3 image files including: 1 photo file, 1 TV file, 1 background file.
Step 2: Change the color and direction of the background
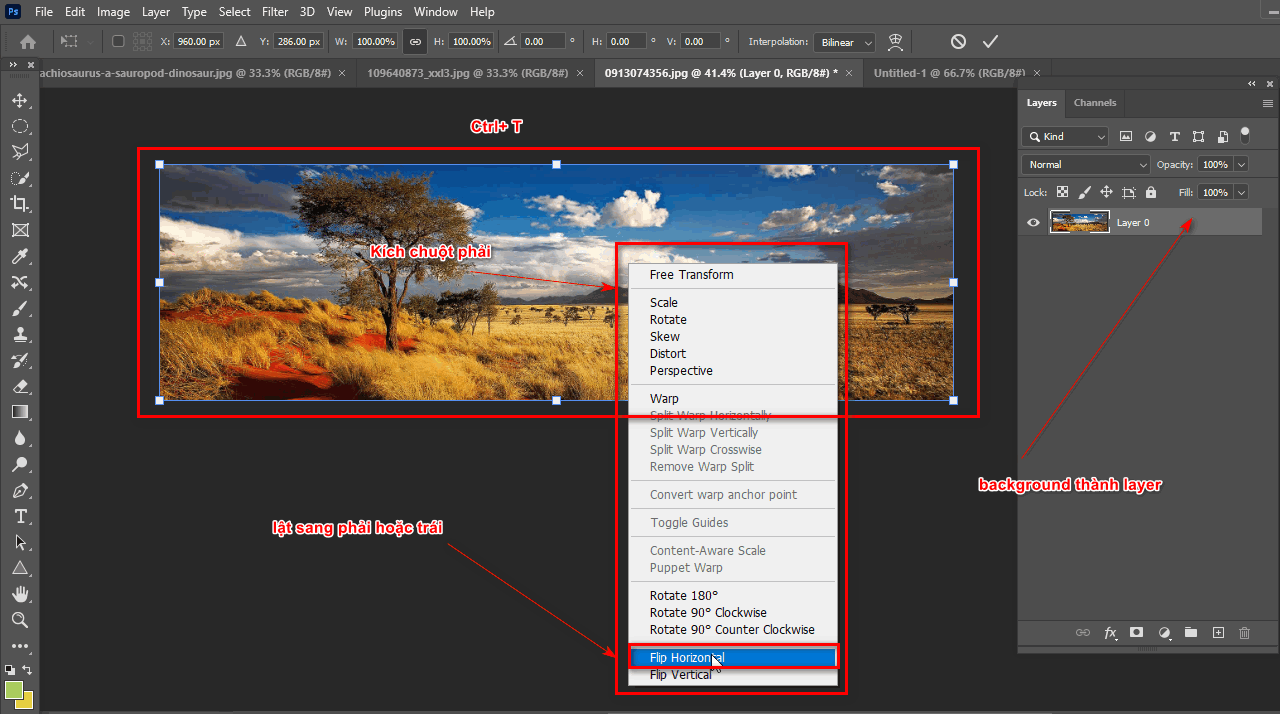
- We convert the background layer into a layer
- Then we use the command Ctrl + T Right click to select command Flip Horizontai to turn around >Enter
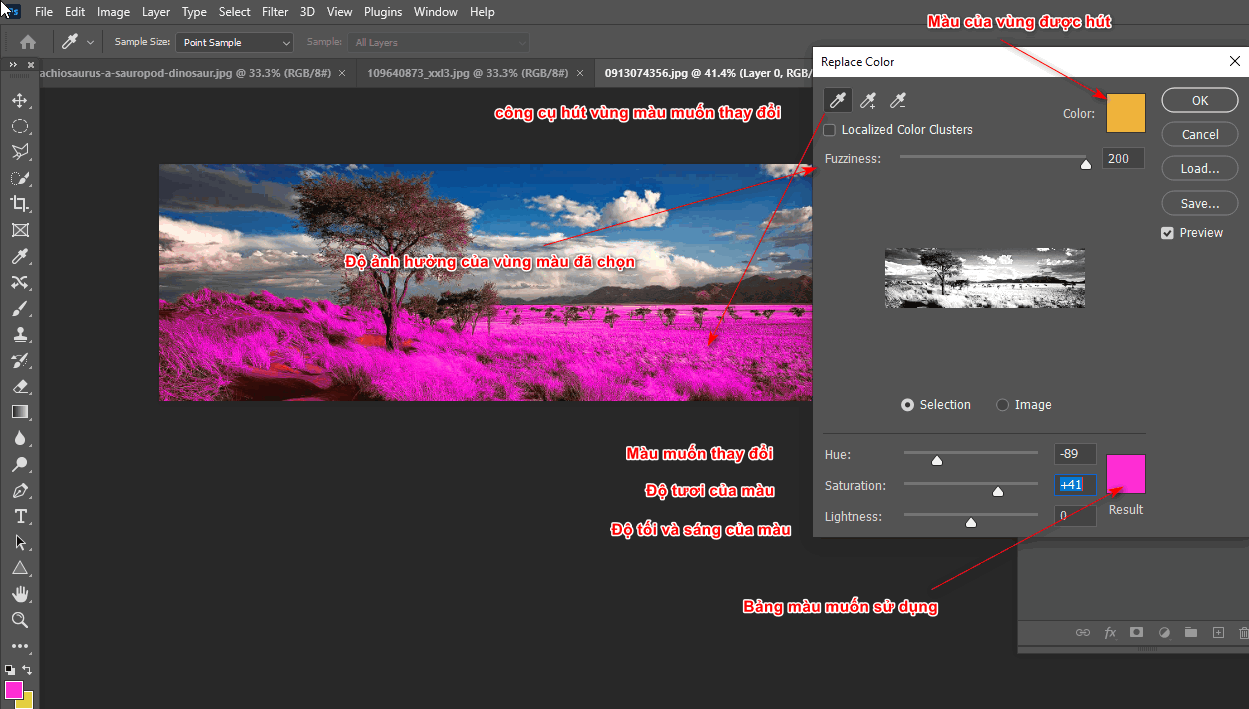
- I choose Image > Adjustment > Replace Color Change the color of the selected area
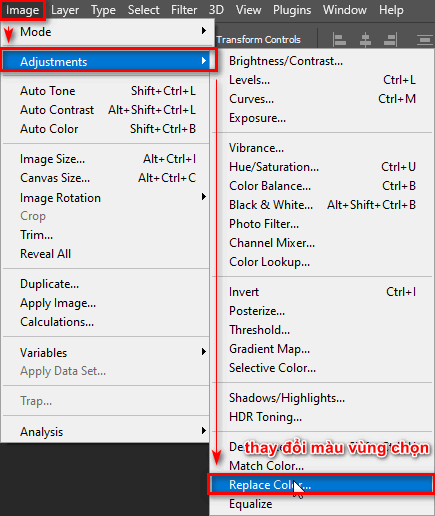
- After selecting the command Replace... will appear a parameter table about the color of the area you selected and the color you want to change > OK
Step 3: Cut the TV image object to the background
- Separate objects from the background with tools such as pen tool, lasso tool, magic want tool, object selection tool,...
- After separating the TV object from the background, we move that object to the background image that we already have
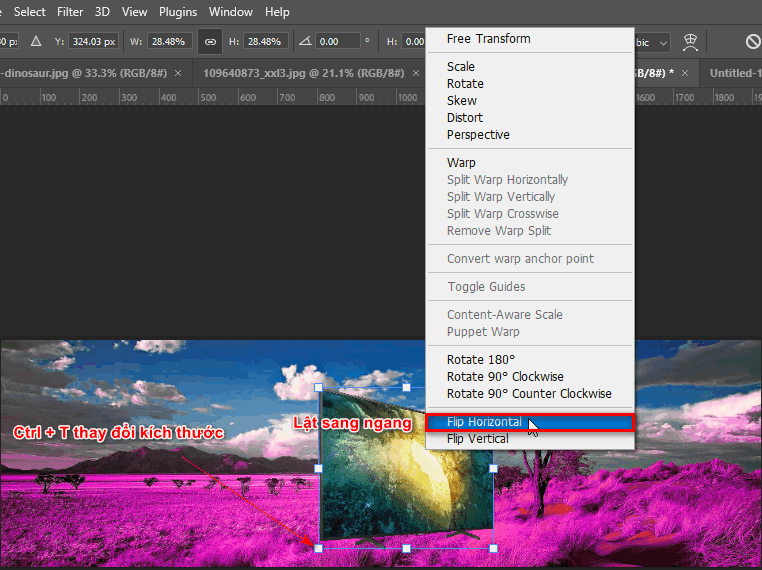
- Then use the command Ctrl + T with the TV object to resize it to match the background
- Now that the size is appropriate, right-click and select the flip command Flip Horizontai for television audiences
Step 4: Change the brightness and move the object to the background image
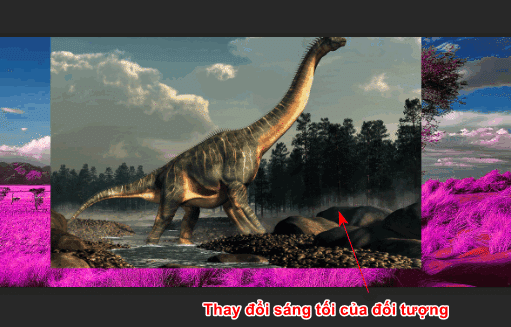
- Convert the dinosaur image file using the command Ctrl + L and Ctrl + M Change the brightness and darkness of the object to make it most realistic
- Use command Ctrl + A select all then Ctrl + C Copy the object within the selection on the layer you are selecting
- Go to the background image object then click Ctrl + V Paste the object you copied
- Use command Ctrl + T to adjust the size so that the image size is larger than the TV image size
Step 5: Cut and combine objects to create a 3D image for the background
- Place the dinosaur object on top of the TV object so that the dinosaur's head and tail come out of the TV
- Now reduce the opacity of the dinosaur Opacity down to 50% in layer version
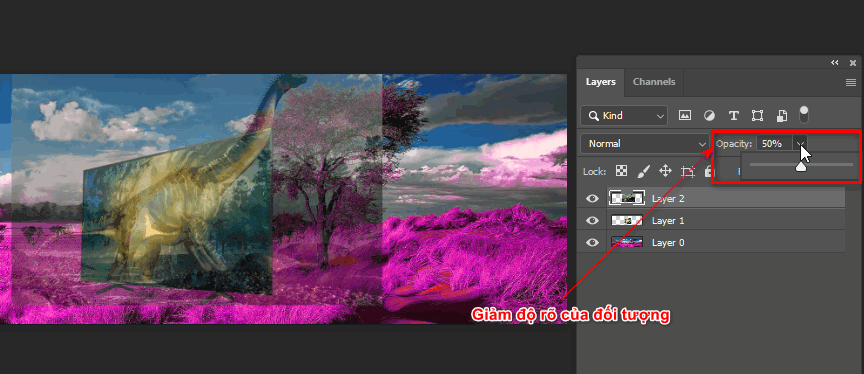
- After seeing the body of the dinosaur object in the TV screen
- Use tools Lasso tool to cut the TV screen later Ctrl + J selected area on the dinosaur layer
- Now we have the body layer inside the TV screen, then adjust the Opacity to 100% as before.
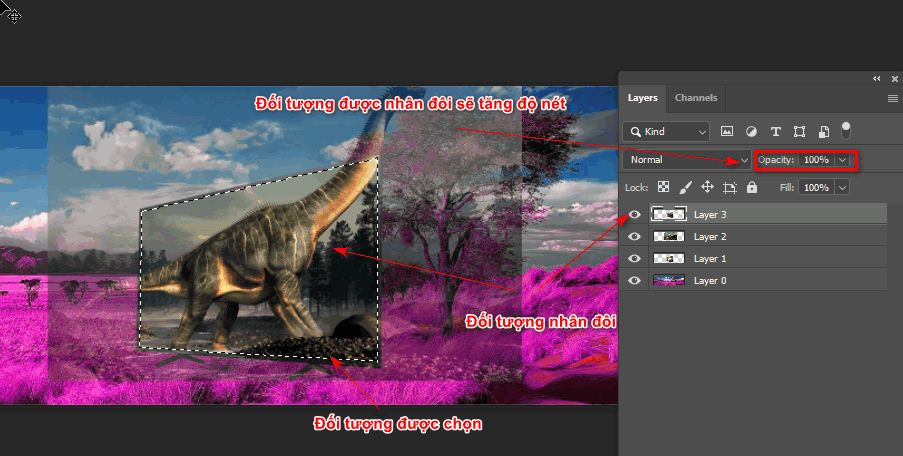
Step 6: Separate the head and tail of the dinosaur object
- Use command Lasso tool to delineate the head and tail area of the above dinosaur object original image layer
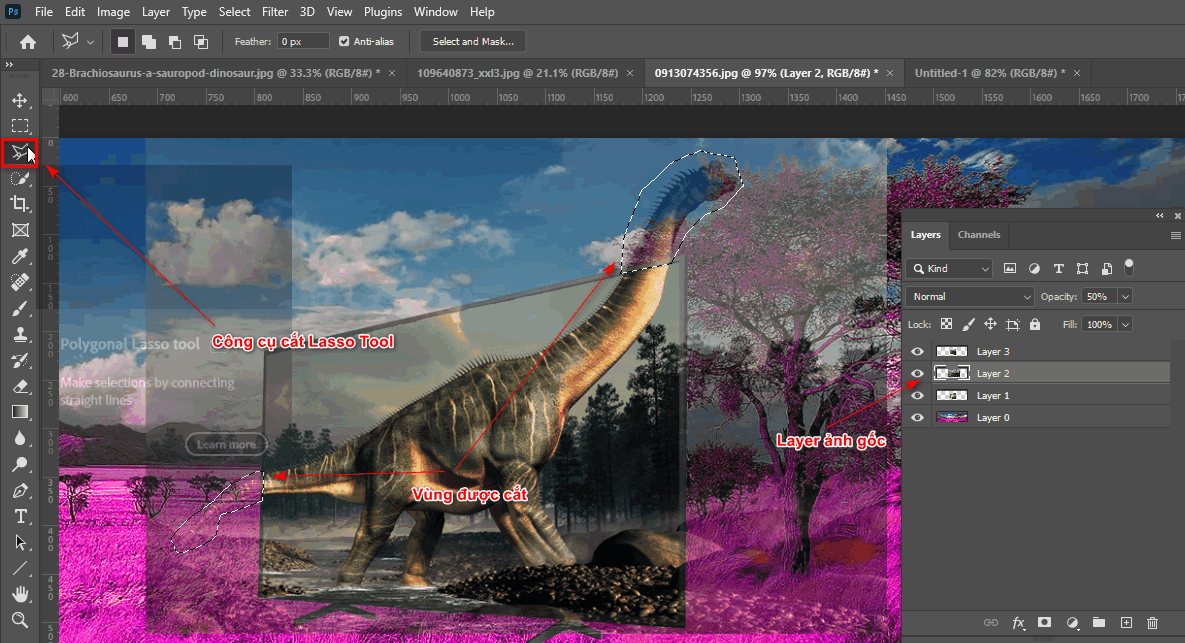
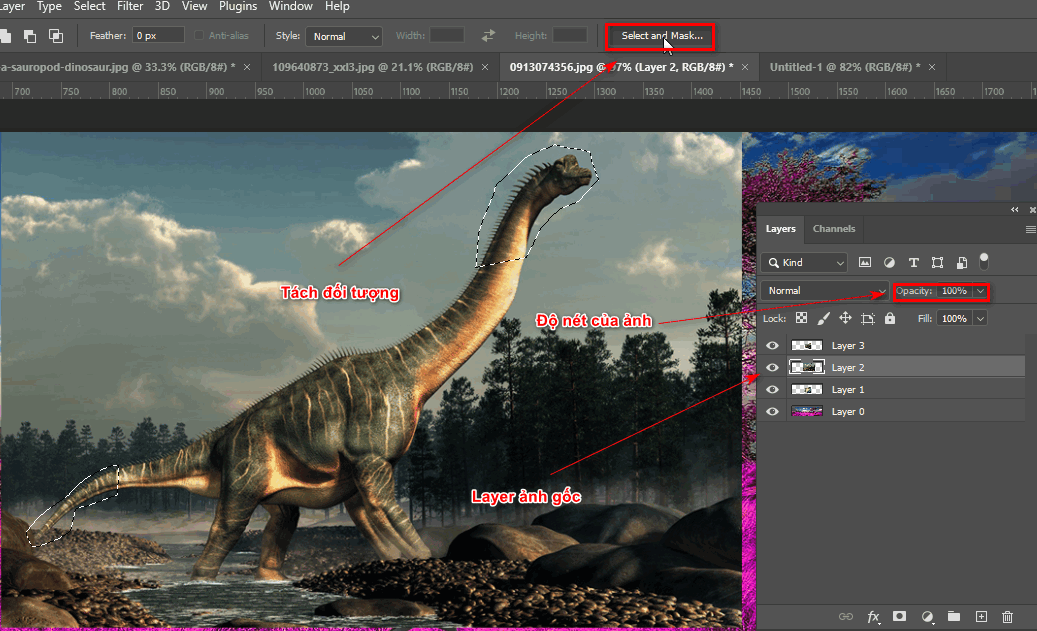
- Then pull Opacity of the original image back to 100% then click on the item Select and Mask on the tool's menu bar Lasso Tool
- The tool's parameter table will appear when using the tool Refine Edge Tool on the right to scan the areas that need to be separated from the head and tail of the dinosaur object > OK
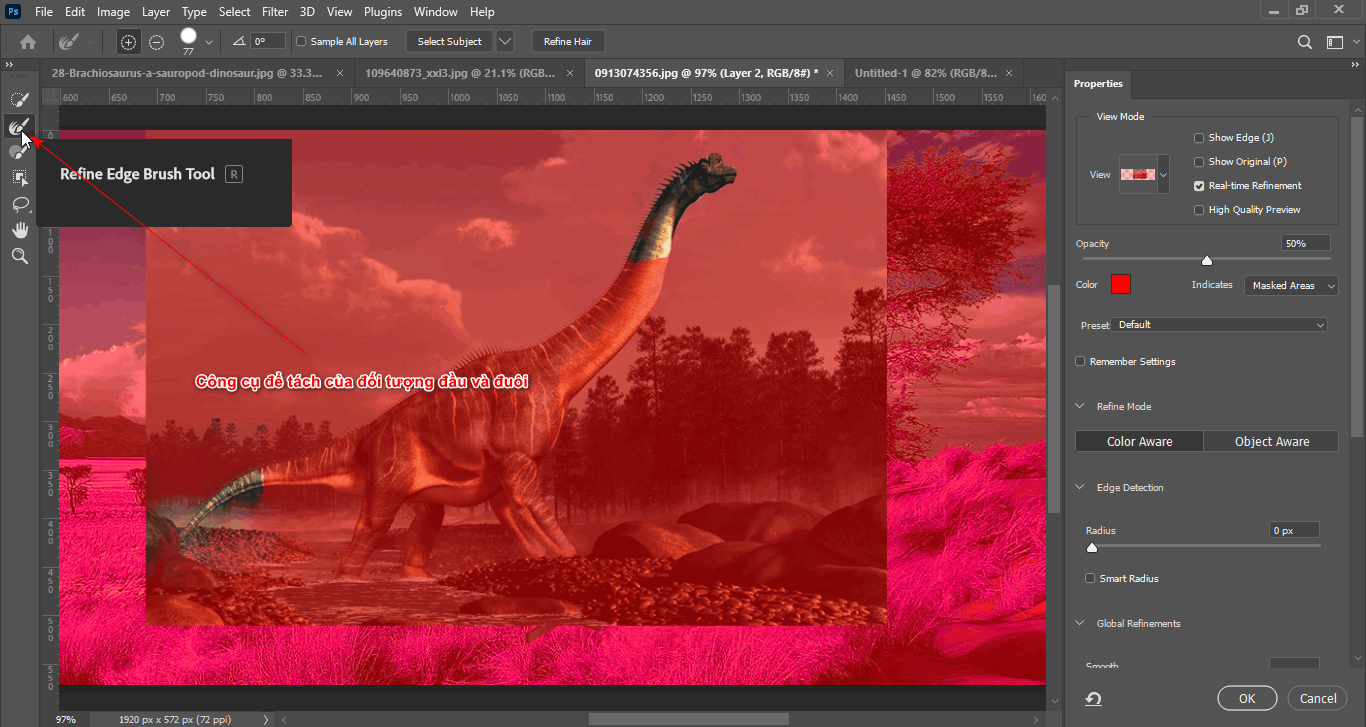
- At this time, we use the redundant areas Brush Tool give Layer Mask to delete redundant areas
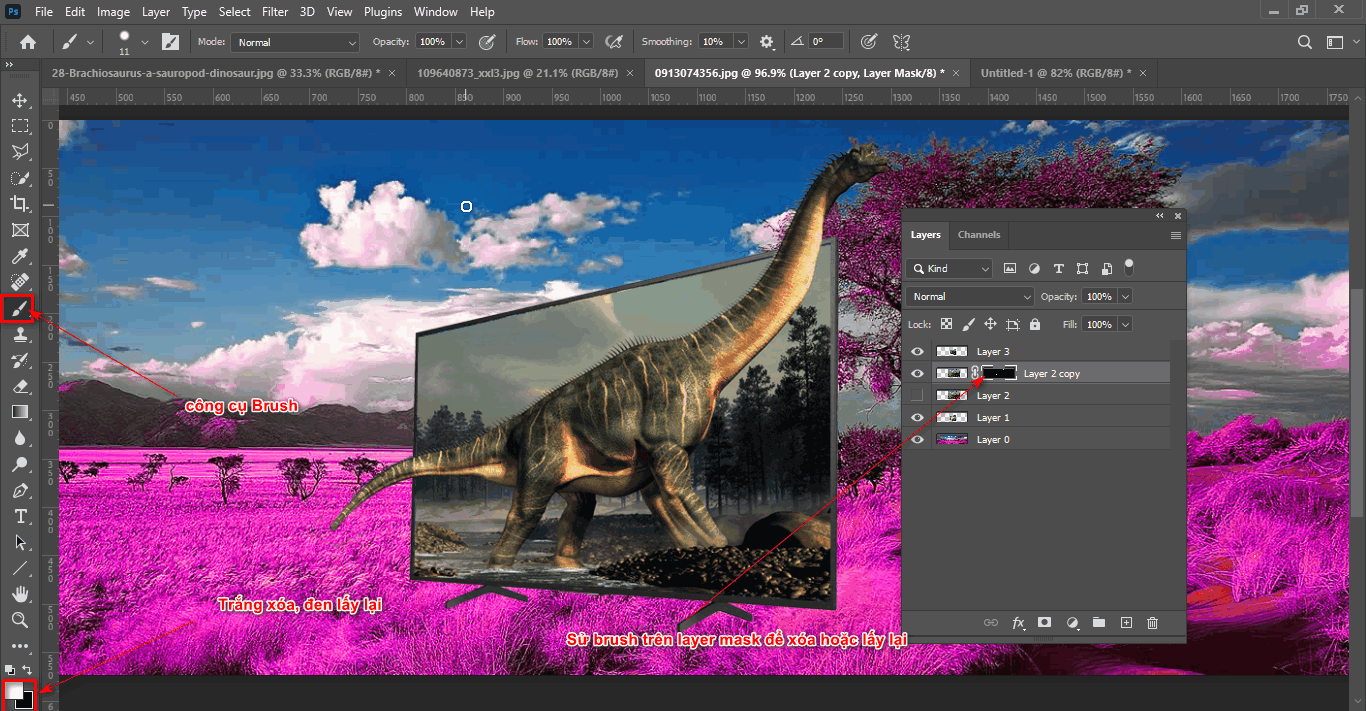
- Edit it to make it most appropriate and realistic
Epilogue
Posts How to create 3D background in Photoshop has helped you better understand how to create 3D banners and help your products stand out and attract more attention when delivered to customers. You can also apply this method to as many objects and products as you want.
If you are in need of learning Photoshop Basic to advanced. You can come to Graphic Express for advice and choosing the right course. The course is guided by 1:1 tutoring support throughout the study process. In just 15-20 sessions, you can master Photoshop software.
Good luck


