How to apply materials to subjects in Photoshop
If you want to become a professional graphic designer or a good photo editor, you cannot miss this article. Everyone knows that the Photoshop tool provides the power to help users create unique products and creative photos. But if you don't know how to use the tools effectively, you won't be able to unleash the full power of Photoshop.
That's why I will introduce you cApplying materials to subjects in Photoshop.
That's using tools Displacement Map. This tool will allow you to add images and materials to the subject. You can add flags, brand logos or images, etc. to an existing subject background to make them more unique. So let's get started.
Step 1: Choose an image.
You start with the bar Menu of Photoshop. Open the 2 files you need to use File > Open. You can Download practice documents here to follow the article.
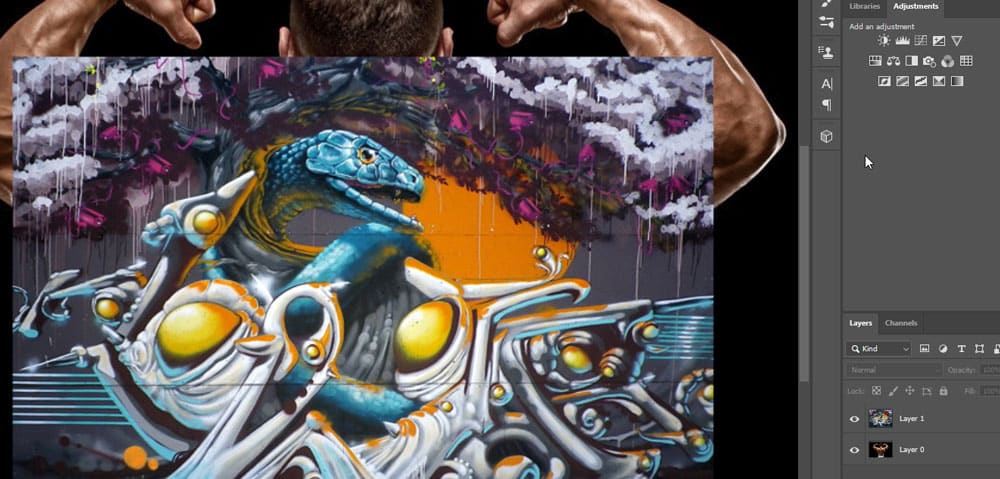
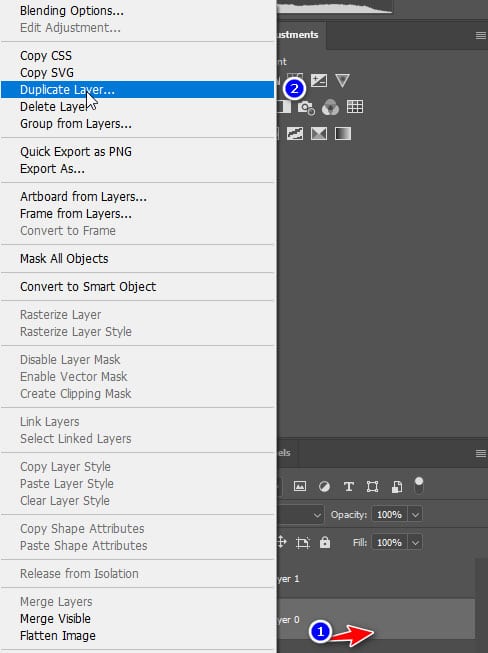
Choose an image as the subject, use as Background. Here, we will choose Layer 0 be the subject. Right click Layer 0, select Duplicate Layer…
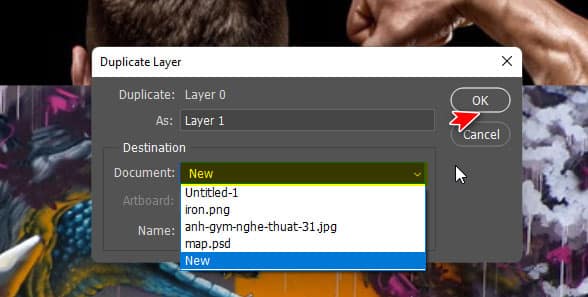
We'll do it on one Layer new, so we'll choose New > OK.
Step 2: Work with the Background image
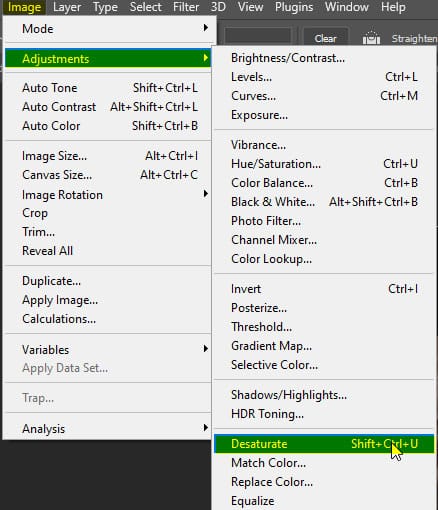
With the new background image, we need to restore it to a black and white image. We will follow these steps: select Image > Adjustments > Desaturate.
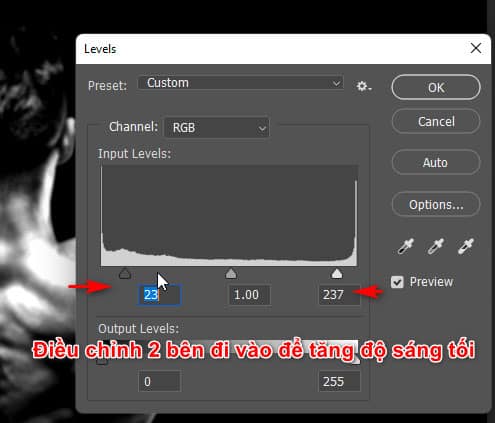
Next, you'll want to increase your contrast Layer by pressing Ctrl L. We will adjust the two keys on both sides a bit to increase the brightness and darkness.
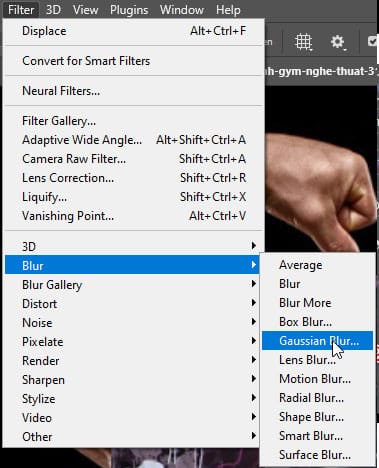
Again, you will need to Blur it goes by choice Filter > Blur > Gaussian Blur.
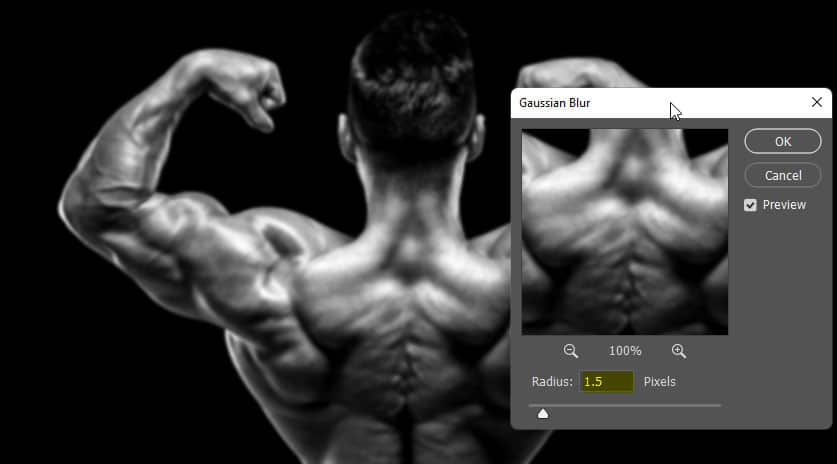
We just need it Blur from 1 to 2 pix, so we will adjust as follows:
Once you're done, you'll save it as a format .PSD. Name it whatever you want Save it again.
Step 3: Work with the 2nd Layer
If you're done, you need to go back to 2 Layer before to continue operation. Adjust it so that you want the front image to be immersed in the subject you want.
.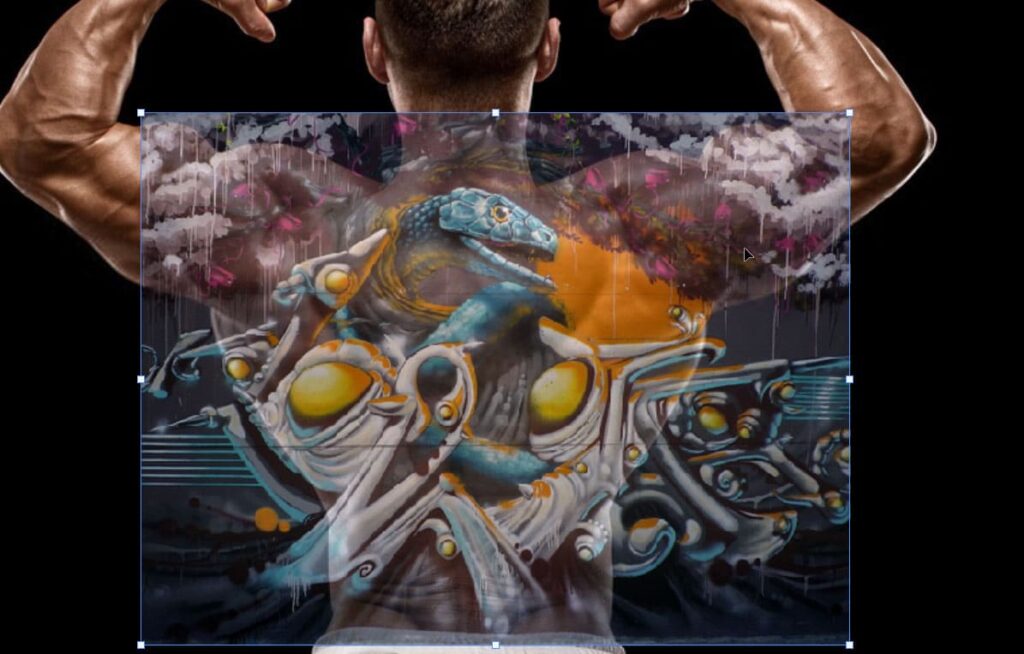
With Layer Second, here is a very beautiful Graffiti photo, you will right click on it Layer then choose Convert to Smart Objects.
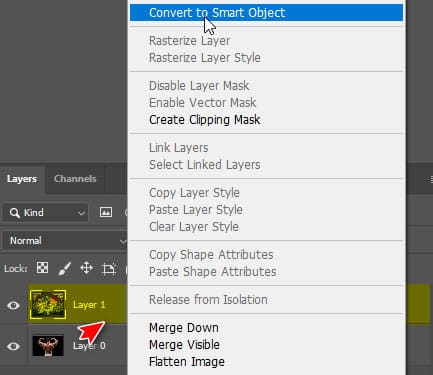
From here, you'll soon be able to tell way Apply materials to subjects in Photoshop and that.
- New features photoshop 2023
- Instructions on how to make product mockups in Photoshop.
- How to use Quick Selection Tool Photoshop
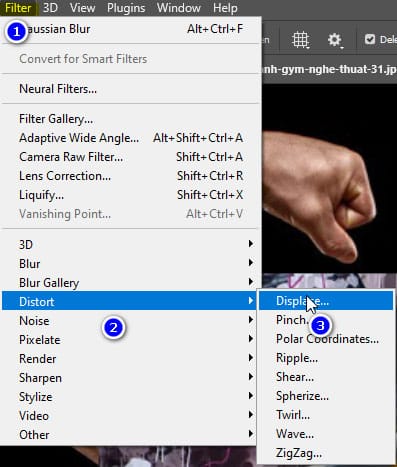
By itself Layer we just chose, we can choose Filter > Distort > Displace to select the saved file format and put it in
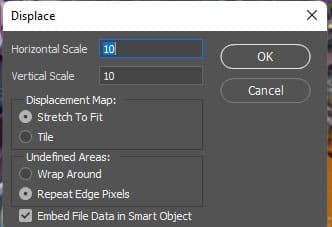
We will leave the default parameters as is or edit them to suit your image. They will then select the file .PSD we just saved.
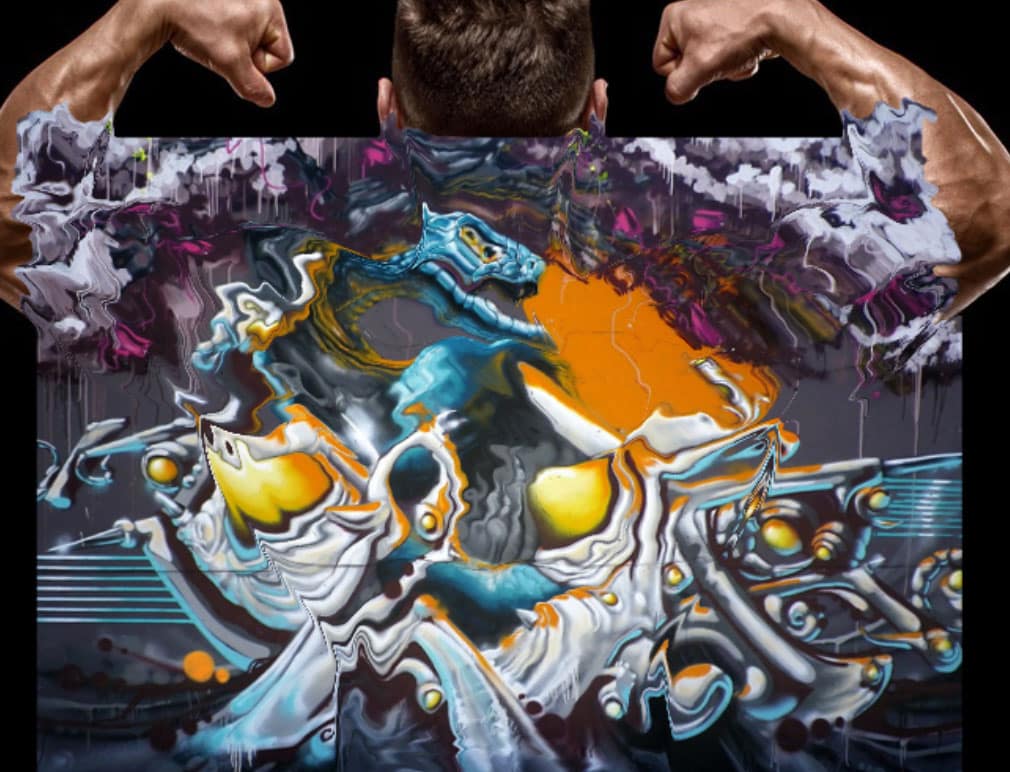
If done correctly we will get an image like the following sample
Step 4: Use the Layer Map tool
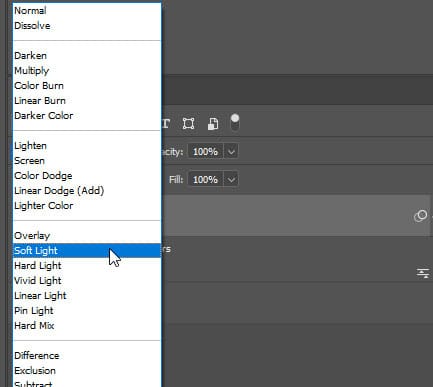
So that we can let the image sink into the body more realistically. I will give you light Layer graffiti city Soft Light.
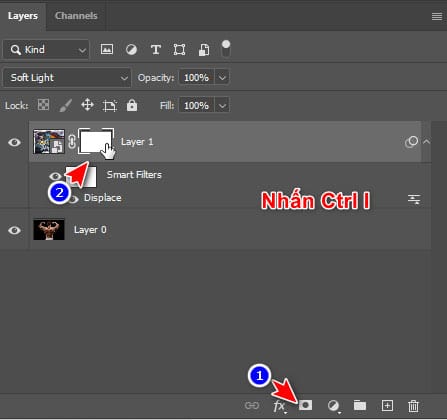
Then we will add a layer mask to it in the following way. Select the icon Layer Mask, left click. Select the accent white frame Ctrl I to turn it black.
Great, from now on you'll be using the tool Brush, the shortcut is B to start painting on the material that needs to be shown. Or you can get the exact subject by selecting the tool Quick Selection Tool, select the subject you want.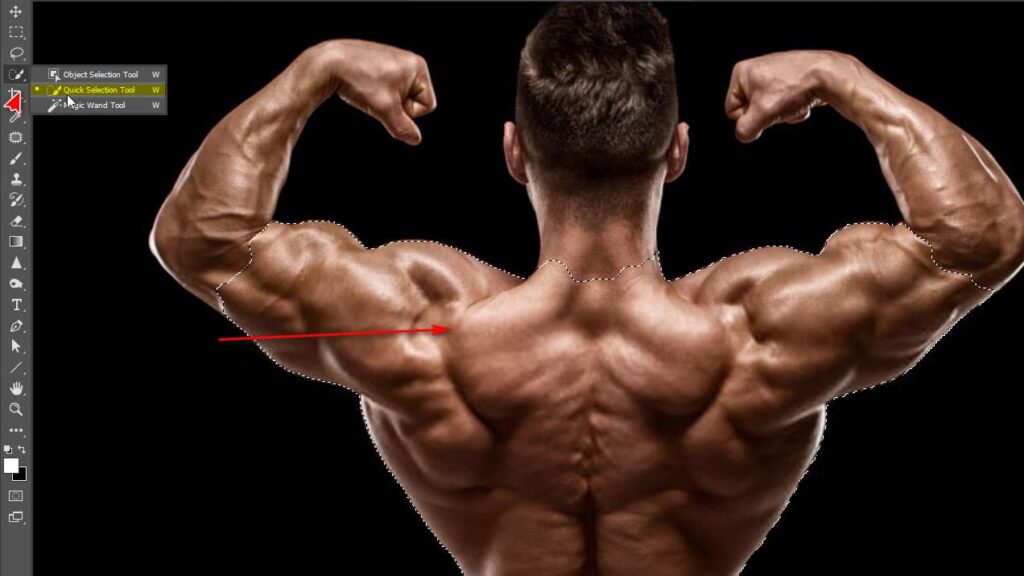
From here you can go back to using the tool Brush comfortably without fear of the image smudging on the outside. To be able to work better with the tool Brush Please read the article HOW TO Photoshop Brush Tool for more detailed usage.
If you have followed the above steps correctly, you should already know cApplying materials to subjects in Photoshop and know.

Epilogue:
So I just gave you instructions How to apply materials to subjects in Photoshop. With just a few basic steps but requiring high precision, you can make a perfect photo yourself. There are also many other specific applications such as incorporating brand logos into products or designs Texture for myself. Please try it.
Hope it will help you a lot in your studying process. If you need to improve your knowledge of photo editing, don't forget to contact us Graphic express Please. Photoshop course Tutoring is suitable for everyone who is studying and working. You can also rate 5* or click on the ad to express your thanks.


