Are you a photography lover or do you like to travel? No matter what, you will definitely want to have beautiful photos to show off to your friends and relatives, right?
Delete the common editing apps on your phone, below I will help you how to highlight a perfect beautiful photo from easy to difficult.
To learn about Photoshop, Adobe Photoshop or abbreviated Ps, is an image editing software, used by many designers and photographers to enhance colors or design unique products. You too can do that. Let us guide you How to adjust color in Photoshop cEnjoy this article
3 beautiful ways to adjust color in Photoshop
Original file as in the article for practice.
[note]
- How to combine funny pictures with Photoshop
- The best way to remove acne in photoshop in 2022
- Top 1 Image sharpening app not to be missed
- How to create rain in photoshop
[/note]
#1 Color correction in Photoshop using Vibrance
The Vibrance tool indicates color saturation, also known as color brightness. Accordingly, when increasing the Vibrance level, the color will be fresher, brighter and more dazzling, but if the user reduces the Vibrance level, Vibrance Down also means the color level will decrease, the color will be less bright and more faded.
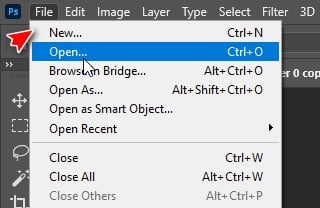
Accordingly, we will choose the following. First, open an image with File > Open > open the image to edit.
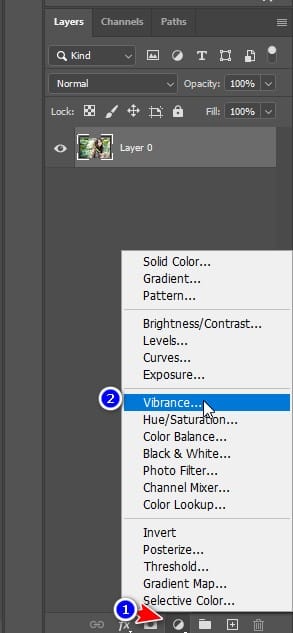
Continuing, we choose the tool Vibrance by selecting icon like number 1, right click, select Vibrance…
We will have a selection table as follows.
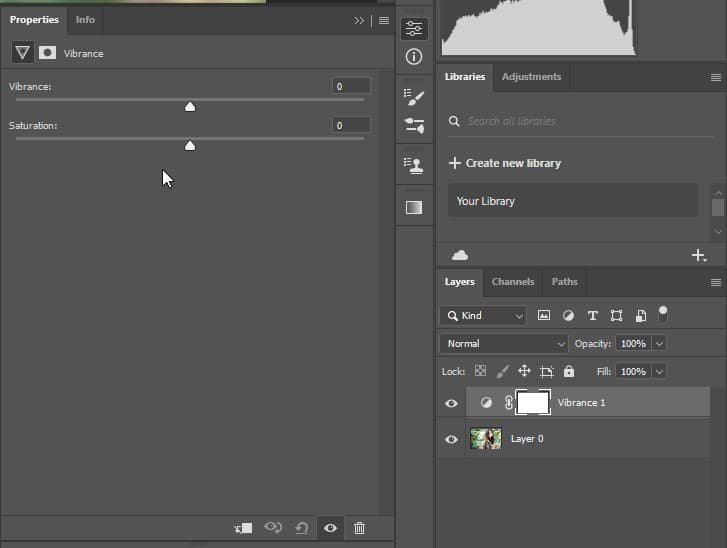
By pulling Vibrance and Saturation To the right you will highlight your photo. If you drag to the left, the image will become grayer.
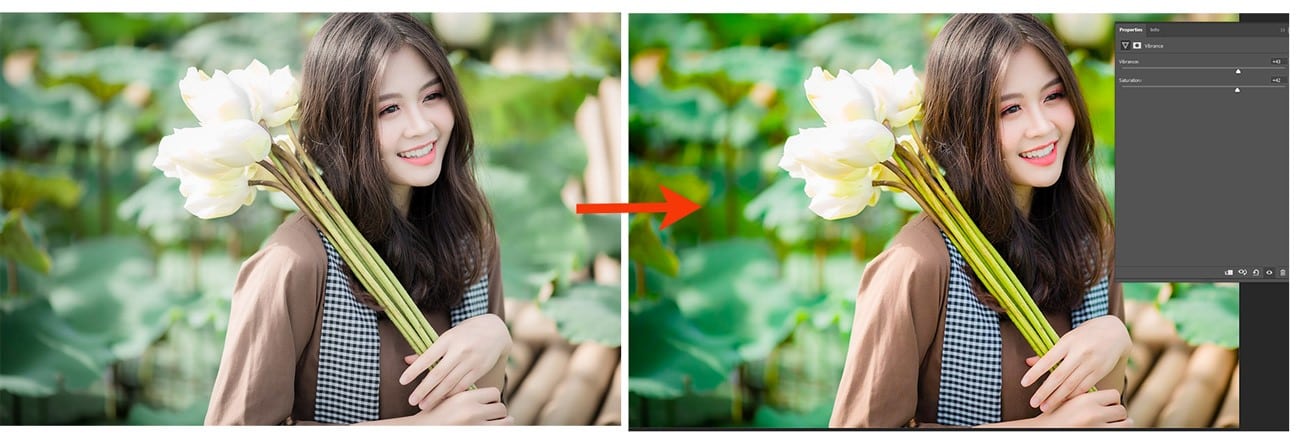
By pulling Vibrance and Saturation To the right you will highlight your photo. If you drag to the left, the image will become grayer. With a little simple adjustment, you can bring life to your photo.
So with just a few simple steps, we can adjust colors in Photoshop using the tool Vibrance Extremely simple, right?
But! Wait, there's more. We have more tools below for better editing
#2 Color correction in Photoshop using Hue/Saturation.
If you felt the color change earlier, then the tool Hue/Saturation may surprise you more. What if, as I said, you could make that girl, maybe make your crush more beautiful?
Similar to before, we will right-click on icon number 1, select Hue/Saturation.

The software will appear giving you the following options:
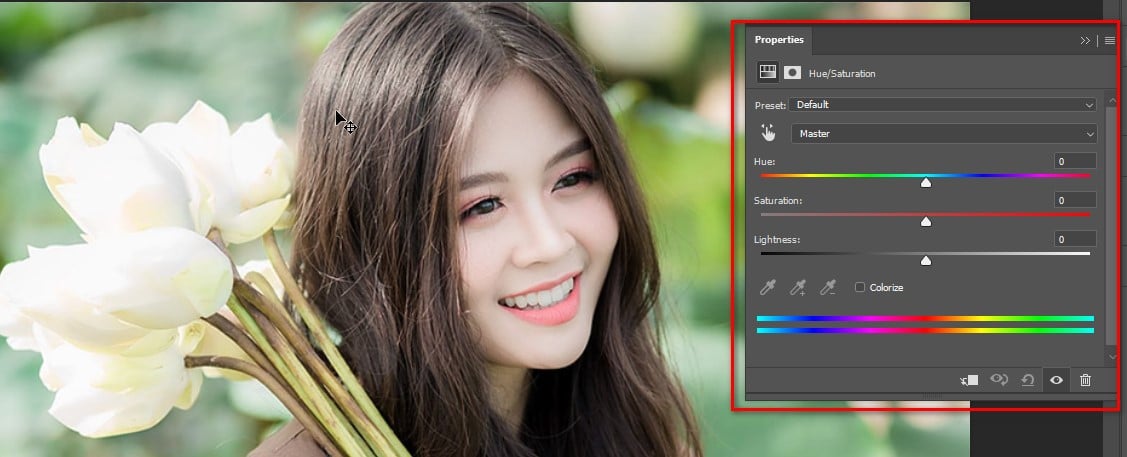
Please pay a little attention. We will have three tables which are Hue, Saturation and Lightness.
Hue is to change the color of an object, Saturation is the increase or decrease in color and Lightness is to adjust the lighting of the photo.
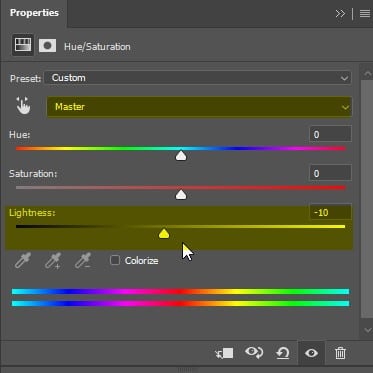
We will only work with the two tools below. Start with Lightness, we will adjust the light down a bit to just 1 to 10 to reduce the background. One thing to note is that you should adjust the lighting when you are sure of the text Master is selected.
Great, click on the hand tool, we can choose the color of any object we want to highlight.
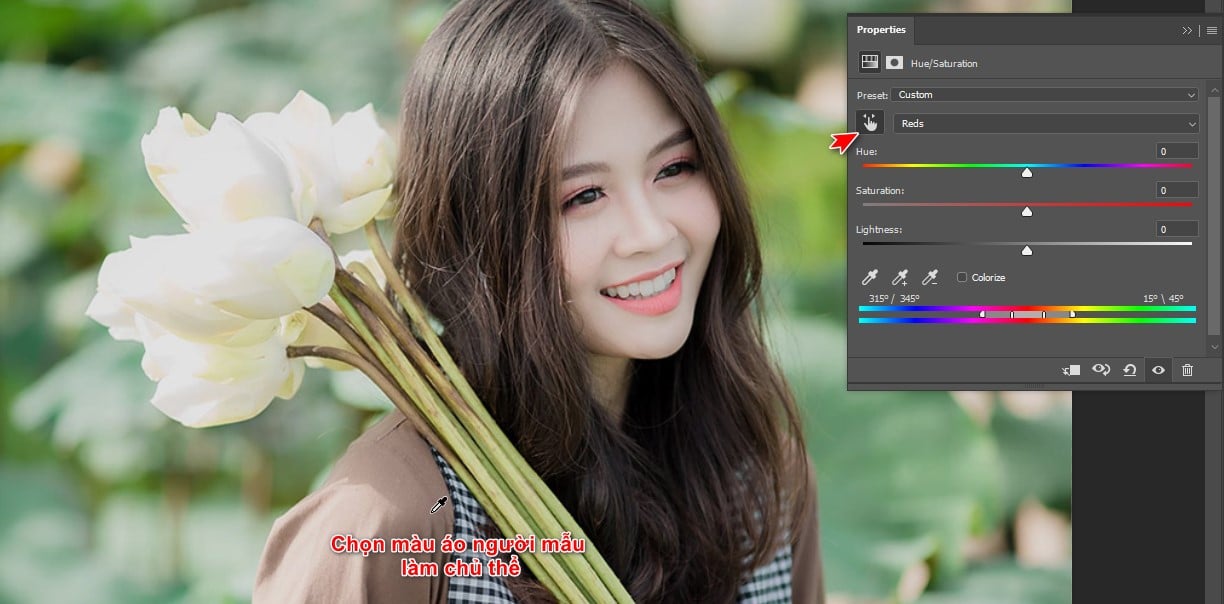
We will increase Saturation appears when the colors are separated, it can be Red, Yellow or Blue, depending on the object you choose.
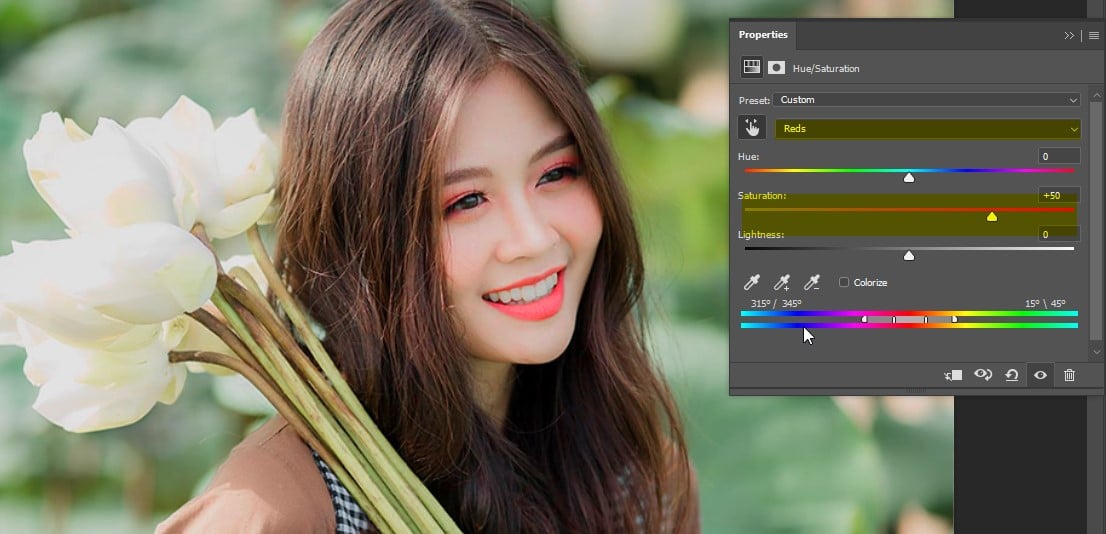
By increasing Saturation, you have highlighted the model a lot. Here are the products you can make.
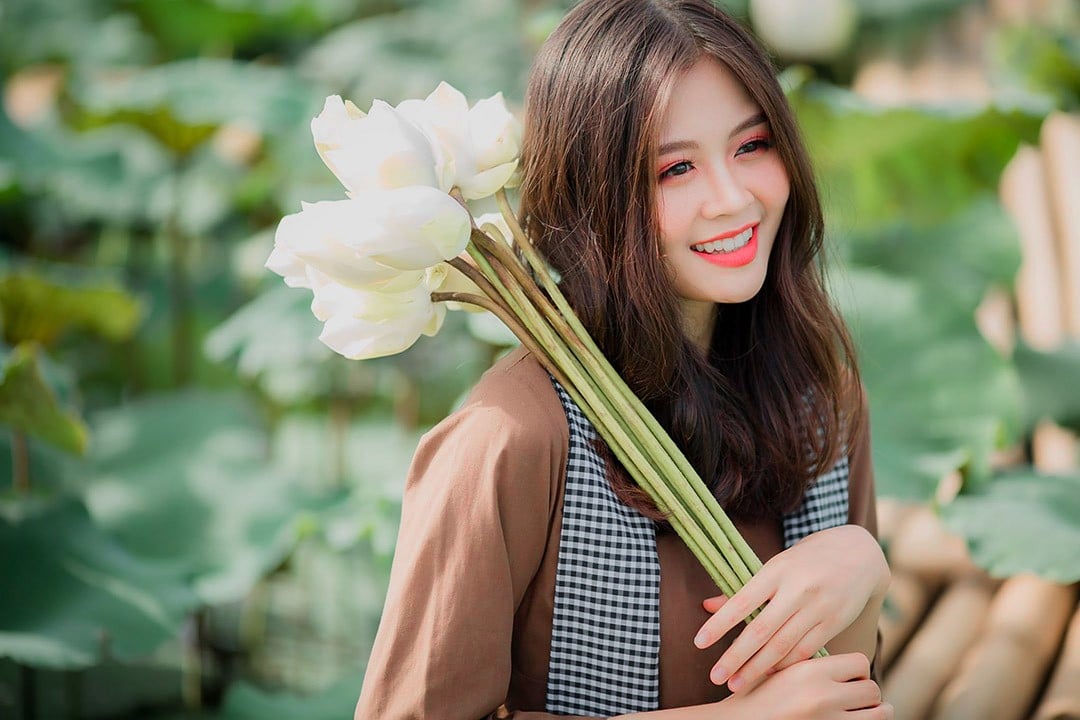
It's very easy, isn't it? Shall we try a more difficult way? Don't worry, the more effort you put in, the better the results will be.
#3 Color correction in Photoshop using cMr. Solid Color.
There will always be a way to make your photos more vivid, with Solid Color Not only can you highlight the subject, but you can also highlight any point you want.
Again we select the icon, then Solid Color
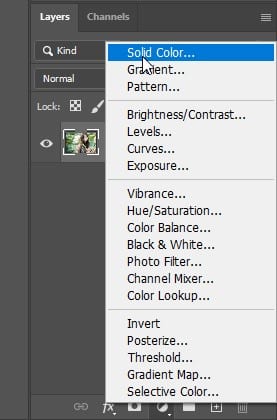
Your photo will be 1 Layer black overlap. Don't worry, just left click on Layer Mask right press Ctrl I
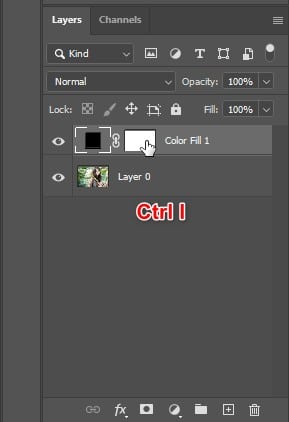
Good, you will choose again Layer black, now that your photo is back, double tap Layer That black color.
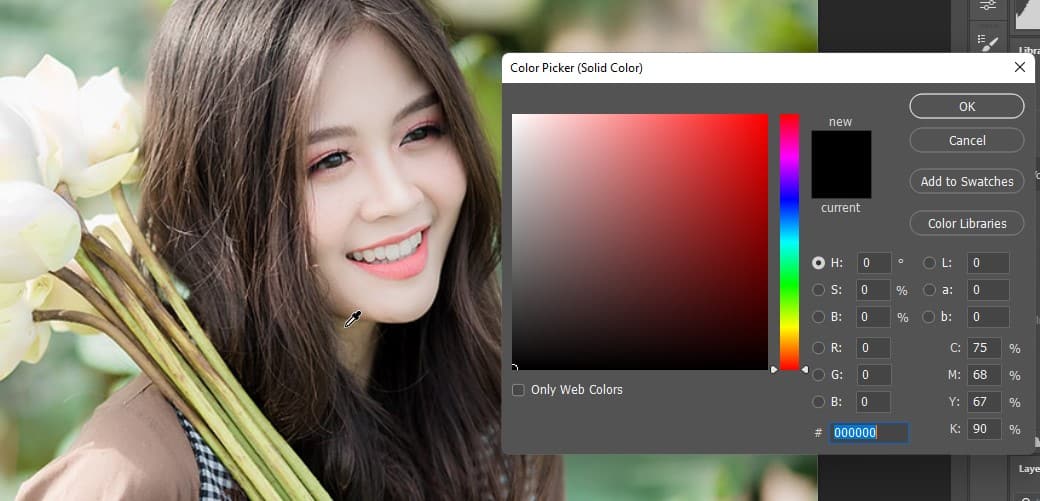
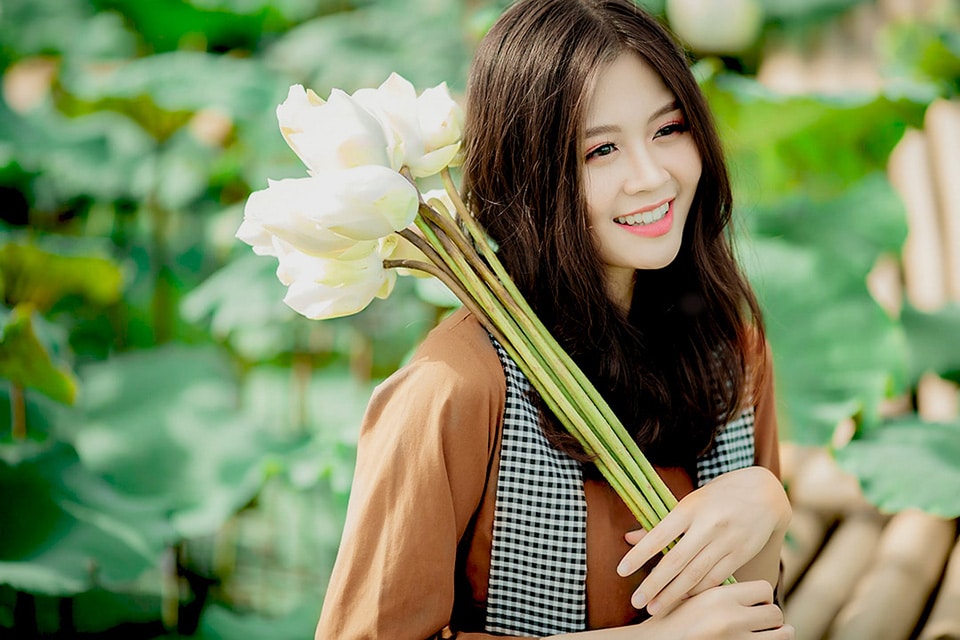
We will have a color picker. Hover over the color you want to use. Here, we will continue to choose the color of that girl's shirt.
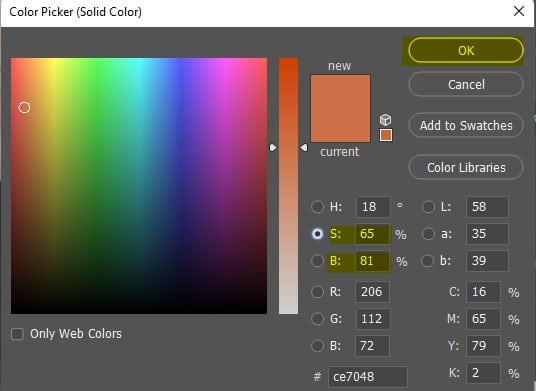
Once we have the brown color, we will adjust 2 lines Saturation and Brightness. We're going to increase the brightness and color a little bit. Done, click Layer Mask once again. Remember to switch color mode Soft Light Please.
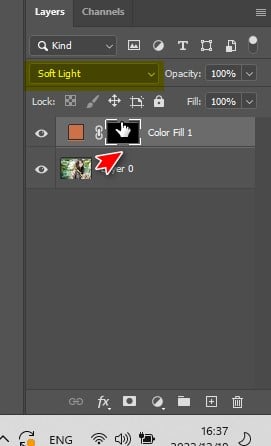
This time we will use the tool Brush, shortcut is B. Slowly fill in the image. To use the tool Brush effective, try reading through the article Instructions for using the Brush tool
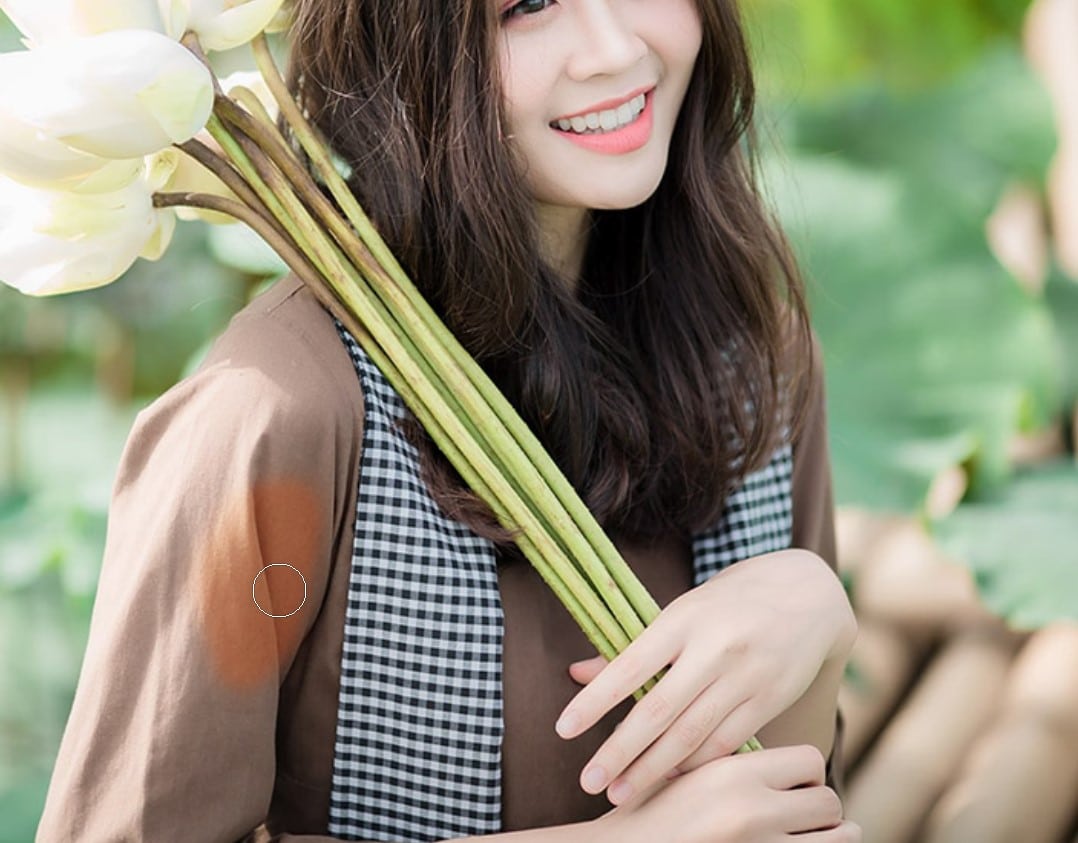
For simplicity, the keyboard shortcut increases or decreases the volume Brush To be [ and ]. Use wisely Brush you will be able to make the colors brighter.
You can repeat these steps to adjust each specific color.
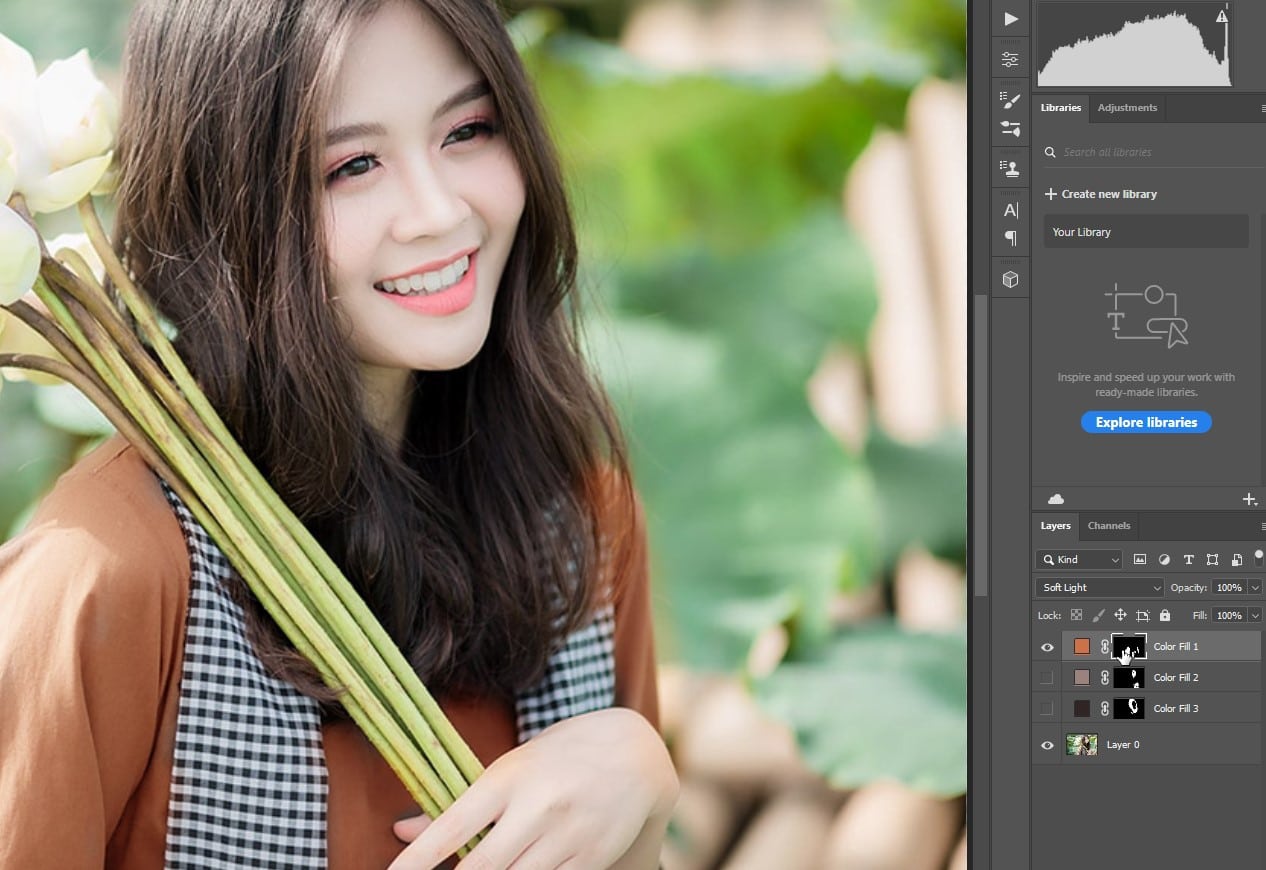
With a little skillful manipulation and aesthetic thinking, you will get the wonderful products you desire.
Epilogue.
With 3 color editing tools in Photoshop ( Vibrance, Hue, Saturation, Solid Color ) You can easily get a beautiful photo for yourself right away. Through the article cColor correction in Photoshop is extremely beautiful This…Hope it will help you a lot in your photo editing process.
If you need to improve your knowledge of photo editing, don't forget to contact us Graphic express Please. Photoshop course Tutoring is suitable for everyone who is studying and working.
You can also rate 5* or click on the ad to express your thanks. Please stop by and follow Facebook fanpage to be updated with the latest information from us.


