Camera raw in photoshop is an extremely powerful image editing tool. This tool can edit your image from an ugly image to a magical image with the available tools in photoshop. You just need to grasp some operations. camera raw in photoshop You can absolutely edit a beautiful image without having to edit too much.
Now I will guide you how to use the camera raw tool in photoshop.
HOW TO camera raw in photoshop version 14.3
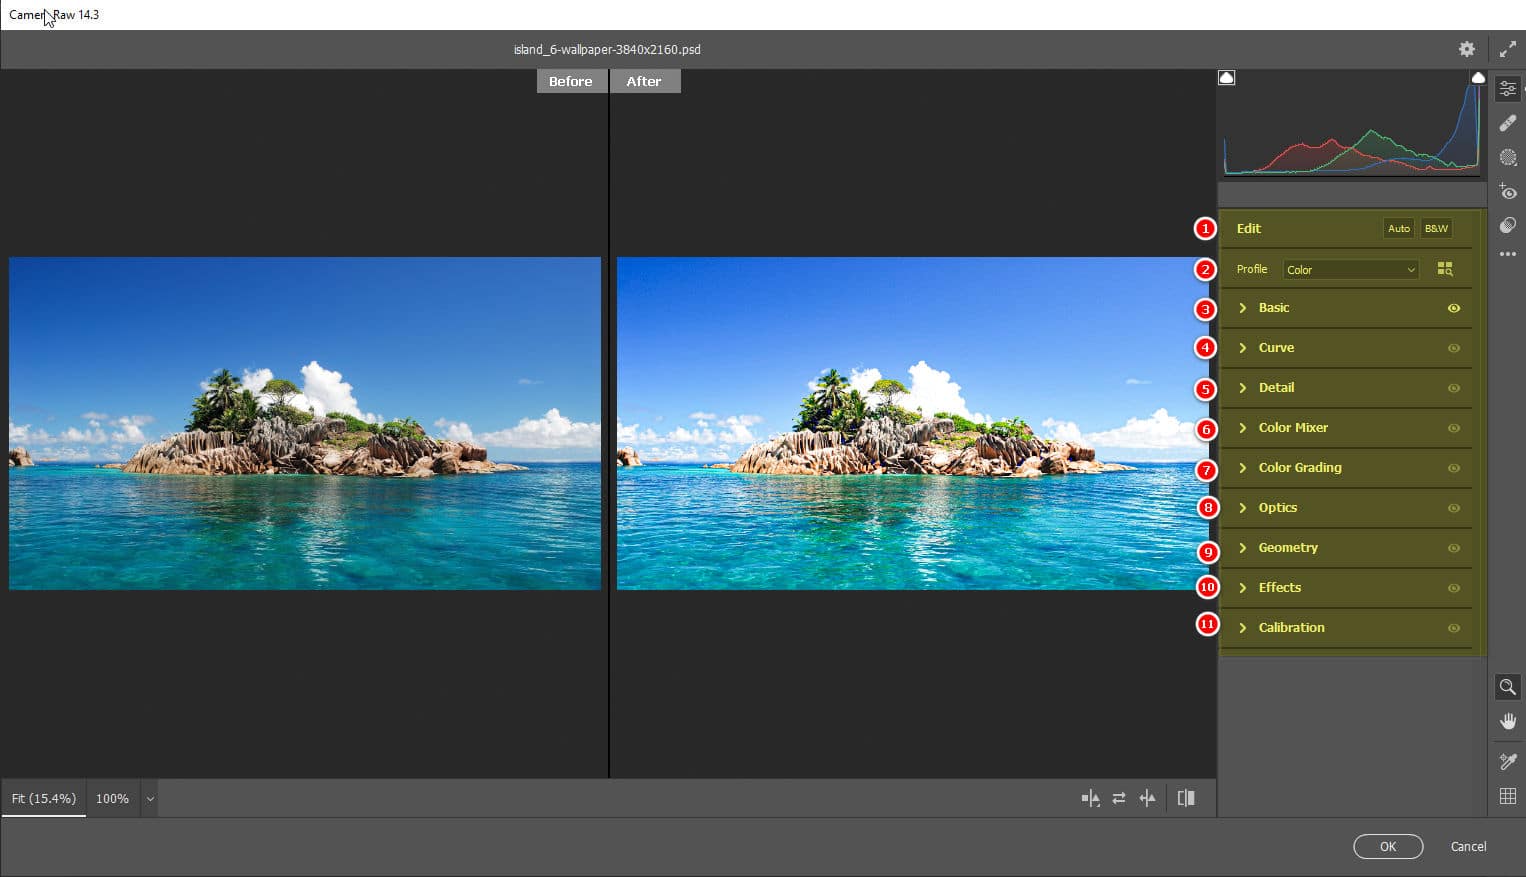
I. Tool menu in camera raw
- Edit: Quick color selection in auto mode and black and white mode
- Profile: When selecting item number 1, number 2 will automatically change accordingly. In this item, we can also import external Presets to apply to our photos.
- Basic: This is the image editing area for brightness, color, but there are many options. Details will be below.
- Curve: This is the area to adjust the brightness and color of the image. It is similar to the tool Curve outside we adjust
- Detail: Image sharpening tool
- Color Mixer: Color mixer tool for images. Colors will be mixed together to make your image more colorful.
- Color Granding: Separate color correction tools for each shade
- Optics: It is a type of optical lens that allows the lens to be in a concave shape, allowing for a wider viewing angle.
- Geometry: Stretch tool bends shape in many different modes
- Effects: Lens Ambient Effect
- Calibration: The tool allows to select different color image modes using sliders and pre-set options.
[note]
- HOW TO camera raw older version 2018 and earlier
- How to use the Brush Tool Photoshop
- How to use Clone Stamp Tool Photoshop
- How to use Spot Healing Brush Tool Photoshop
- How to use Rectangular Tool photoshop
[/note]
I. Functions of tools in camera raw
1. Item Edit camera raw photoshop: Skip
2. Item Profile camera raw photoshop: You can put the preset zip file in to apply it immediately.
3. Section Basic camera raw photoshop:
This is the position where we will do the most editing in the camera raw section. However, depending on different needs, we will use different tools.
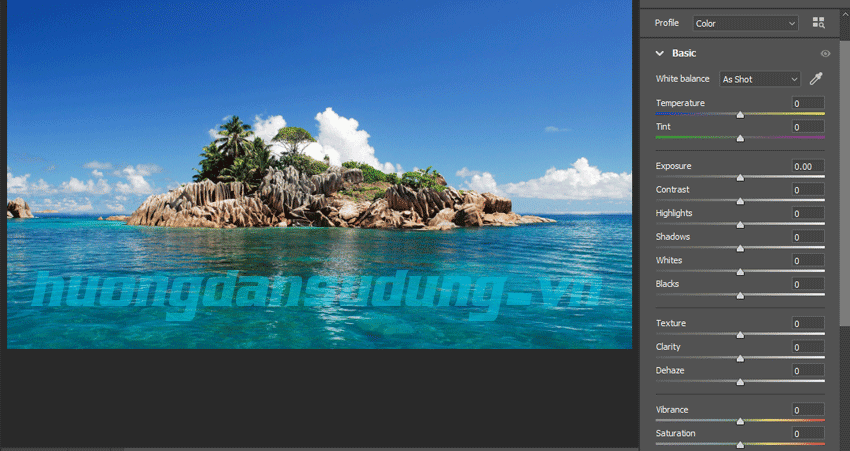
- White balance: Light balance.
- Exposure: Adjust the exposure for the entire photo. You can increase or decrease it to adjust the light to suit your photo.
- Contrast: Adjust the contrast of the image.
- Highlights: Adjusts only the bright areas of the photo. Bright areas have high intensity.
- Shadows: Adjusts the shadow locations that will be affected by this tool
- Whites: Corrects white areas of light
- Blacks: Tool to edit dark areas of an image.
- Texture: Blur and Sharpness Toolkit
- Clarity: Tool to add detail and depth to the photo.
- Dehaze: It is a form of color enhancement that helps the image have more detailed light and dark shades.
- Vibrance: The tool enhances more vivid colors, especially light green and pink.
- Saturation: You can increase or decrease the color saturation slightly to see the change in the photo.
=> These are all tools used a lot in photoshop when we edit images with camera raw. If you want to learn more, you can refer to photoshop course of Graphic Express center. This place has fast training so you can register and learn right away. The learning time is very fast while still ensuring knowledge when working.
4. Item Curve camera raw photoshop
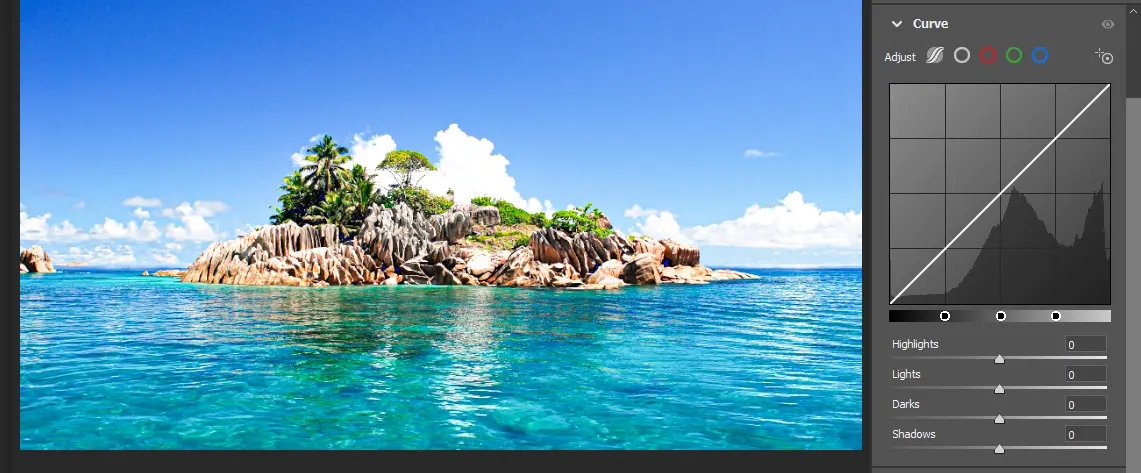
This is a tool to adjust brightness and color in Photoshop. This tool is divided into 5 main parts.
The Adjust section is the color selection tool for adjustment. If left as white, the software will increase the brightness. If left as the remaining colors, each color will be adjusted to its own color. If we adjust many colors continuously, the colors will be mixed together according to the color mixing formula.
Highlights: Is the part that adjusts the brightness area
Lights: This item adjusts the overall white light for the entire image.
Darks: This item refers to the overall darkness of the image.
Shadows: Adjust only the shadow part of the shape
5. Section Detail camera raw photoshop
This section is for enhancing the details of your photo. If your photo is blurry or out of focus, this section will help make your photo sharper and more detailed.
6. Section Color mixer camera raw photoshop
This is a color blending tool. It allows you to adjust multiple colors at once in an image without affecting other colors. Photoshop also says Color mixer helps you have better control over the color of your photos.

In this toolkit, it will be divided into many tabs so that you can easily choose colors in many different situations. Hue, Saturation, Luminance, All. Each tab will have a separate function. To learn more, you can switch to each tab and drag the slider or join photoshop course for the best experience.
7. Section Color Grading camera raw in photoshop
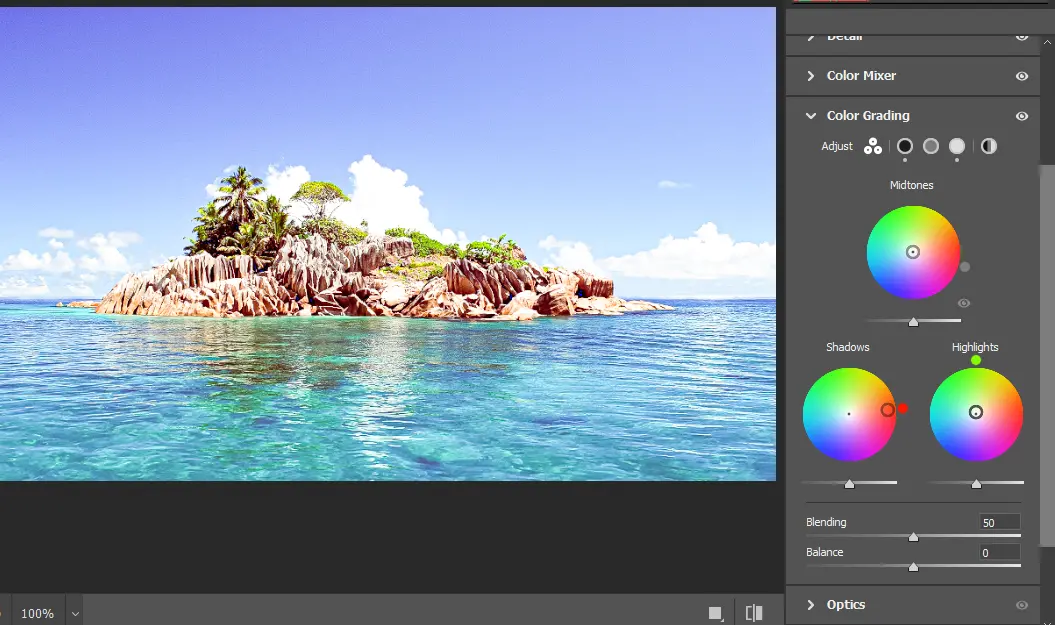
This is also a color correction tool and can adjust 3 main channels, Midtones, Shadows, Highlights. They are adjusted with gradient color strips in a circle. This tool is rarely used.
8. Section Optics camera raw in photoshop
This is a tool to adjust the aperture in the photo. When adjusting the Optics function in camera raw you will see your image convex or concave depending on the drag option you choose.
9. Section Geometry camera raw in photoshop
Multi-mode direction adjustment tool. Geometry allows you to adjust image positions in specific geometric directions as follows:

Upright: It is a preset and is an option available for you to choose from.
Manual Transformations: It is the part that adjusts the force you drag.
Vertical: Adjust image vertically
Horizontal: Adjust the image horizontally
Rotate: Rotate image.
Aspect: Change the appearance, which can be understood as it can stretch horizontally and vertically
Scale: Zoom in and out of the image size.
Offset x: Move image horizontally
Offset y: Move image vertically
10. Section Effects camera raw in photoshop
Create effects for images. There are 2 main items: creating Grain effects for images and rounding in an elliptical shape like binoculars.
11. Section Calibration camera raw in photoshop
It is a tool with several color options so you can quickly choose for your photo with 5 versions.
Note: When you use these tools in camera raw, all have a reset function for the items you have edited. To reset any item, just hold down the Alt key on the keyboard and it will show the reset items for you to choose.
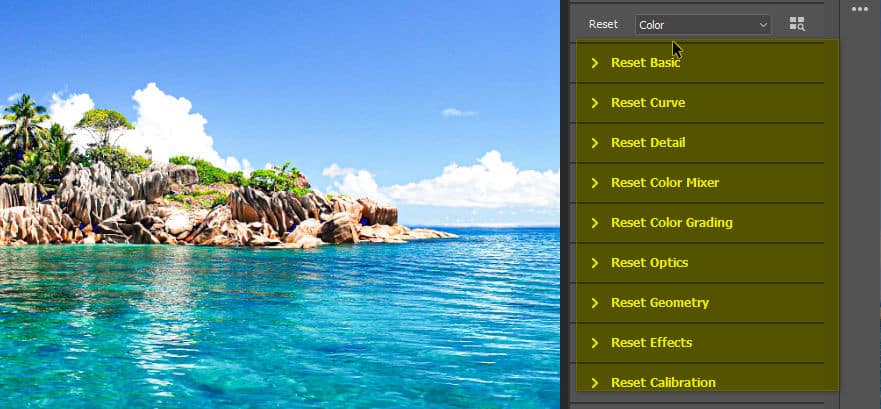
In each item, you just need to click on the reset item.
Conclude.
So I just showed you how to use the tools. camera raw photoshop Hope this article will help you a lot. In the section camera tool in photoshop There are some more tools. If you have any questions or additional questions about the camera tool in Photoshop, please leave a comment below and we will answer them for you.
It is a pleasure to accompany you. Don't forget. follow facebook us to receive more new instructions.


